Working with add requests
DM
DS
The add requests![]() A request to add a new HCP or HCO profile to a customer instance. Add requests are matched against existing data before routing to customer data stewards for review. that display in your inbox are assigned to you or a group to which you belong. When you work with an add request, you can accept or reject the request, or make additional changes to the record the request applies to.
A request to add a new HCP or HCO profile to a customer instance. Add requests are matched against existing data before routing to customer data stewards for review. that display in your inbox are assigned to you or a group to which you belong. When you work with an add request, you can accept or reject the request, or make additional changes to the record the request applies to.

Note: When working with add requests that contain only non-US addresses, the corresponding record is routed to the inbox for local data stewards, and is not Veeva-managed.
Navigating DCRs
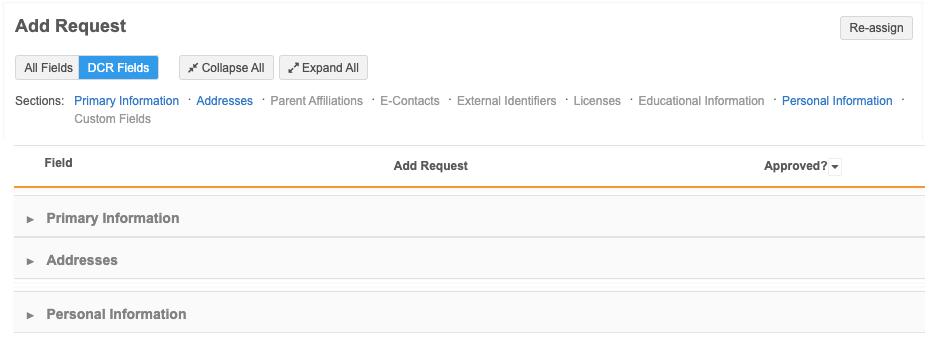
Data change requests include quick links to sections at the top of the page. This area remains fixed at the top of the page when you scroll through the page.
You can filter the DCR to view All Fields or DCR Fields.
All Fields view
In this view, all section names are highlighted in blue. Click the section name to automatically scroll to that area on the page.

DCR Fields
In this view, only the section names included in the DCR are highlighted in blue. The other sections are listed but they are not highlighted (display as gray) so you can easily identify the sections that apply to the request.
If you click a section name that is not included in the DCR, the page switches to the All Fields view and opens to the section that you selected.
If you add field values to a section that was not included in the original DCR, that section is added to the DCR Fields view and the link is highlighted in blue.
Collapse or Expand sections
Use the Collapse All and Expand All buttons to hide or display all details in each section. By default, all sections are expanded when DCRs open. If you choose Collapse All, Network MDM retains your preference if you reload or revisit the DCR.
For sub-objects and relationship objects, only the section is expanded; not each object within the section.
Using tab and hot keys
Use tabbing and hotkeys on data change request pages to process tasks more efficiently.
Tab
Use the Tab key on your keyboard to move through the fields on the DCR. The first row of the DCR is highlighted by default.
- Pressing the Tab key highlights the next row.
- Pressing Shift + Tab moves to the previous row.
Hot keys
When a row is highlighted, use specific keyboard letters to toggle to the appropriate action button:
- A - Accept

- R - Reject

-
E - Edit

If the field that is being edited is a text field or a drop-down list, the field is focused so that you can type or select a value.
Copy
You can highlight and copy values from the Change Request page.
Associated tasks
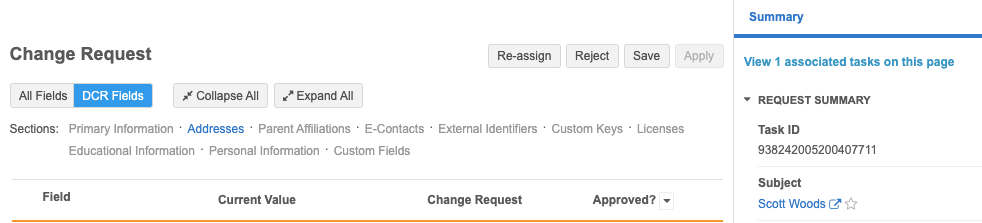
Associated tasks display on data change requests to advise you of additional tasks for that object and that they might be assigned to another data steward. Using this information, you can proactively assign those tasks to yourself or coordinate with the data stewards assigned to the other tasks to avoid making multiple calls to verify the data.
Assign related tasks
The highlighted box below the count of associated tasks provides assignment information about those tasks.
- If all of the related tasks are unassigned, click Assign all to me. All of the tasks will be assigned you with a single click.
- If any or all of the related tasks are assigned to different data stewards, a message displays to remind you to coordinate with those stewards.
- If any of the tasks remain unassigned, click Assign the unassigned tasks to me.
When you are assigning related tasks to yourself, if another task is added to the queue in the process, a message displays to alert you that some tasks are still not assigned. Click Assign all to me. If another data steward claims the task before you click the link, a message displays so you are aware of the change. You can proceed to assign the task to yourself.
View associated tasks
Associated change requests are grouped in the Associated Tasks section at the bottom of the Add Request page. Requests are processed in chronological order (Network MDM create time).
To open an associated task in a new browser window, right-click the Task ID link choose the option to open the link in a new tab.

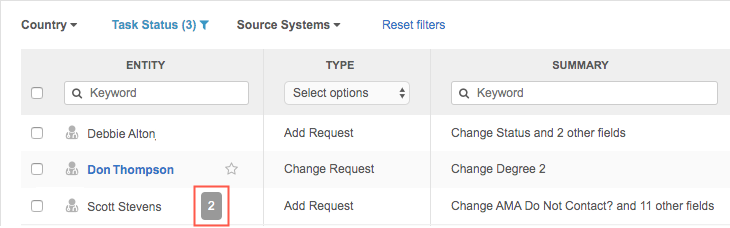
Queued tasks
Change requests on unverified records have an In Queue status and are not listed in the Inbox because they cannot be processed until the parent task is processed. A number beside the entity name indicates that there are In Queue tasks for that parent task.
For more information about associated change requests and the order in which In Queue tasks are processed, see About queued DCR tasks.
Attachments
Attachments can be submitted on add requests. If attachments are included in the request, the request opens to the Attachments tab.
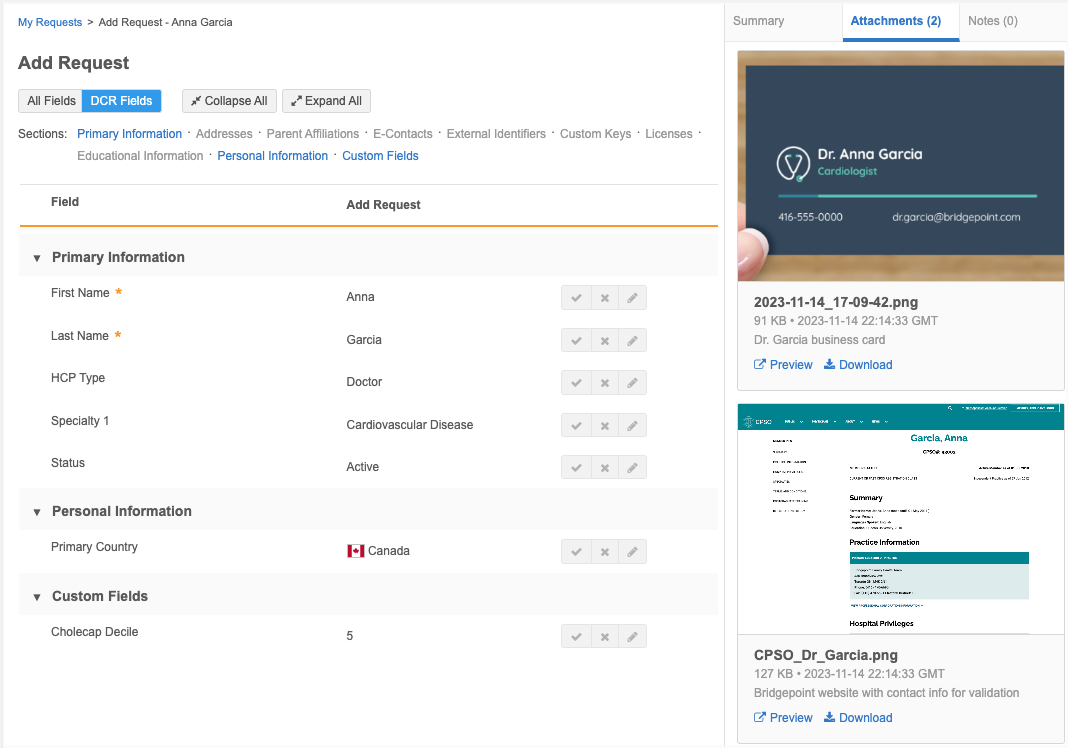
Details
The following details display for each attachment:
-
thumbnail
-
file name
-
image size
-
date and time that the attachment was added
-
description that the requester added before submitting the DCR
Actions
-
Preview - Click to expand the image on the page. Click the Arrow icon to move to the next attachment.
You can also download the image in preview mode.
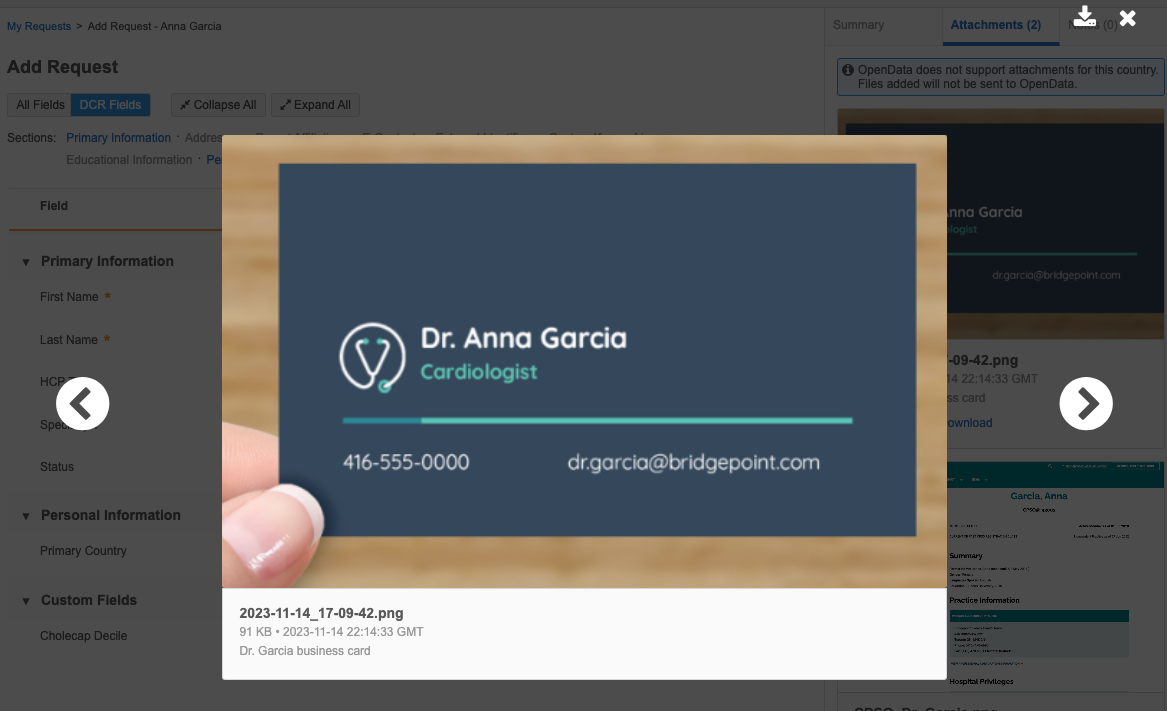
If the file cannot be previewed, this link does not display.
-
Download - Save the image locally on your computer.
For details, see Attachments on DCRs.
DCR notes
Data Stewards can add relevant details to data change requests using the Notes tab. The Summary tab displays by default. Click Notes to open the tab.
If notes have been added to a task, a count of the notes displays beside the label.
For more details, see DCR notes.
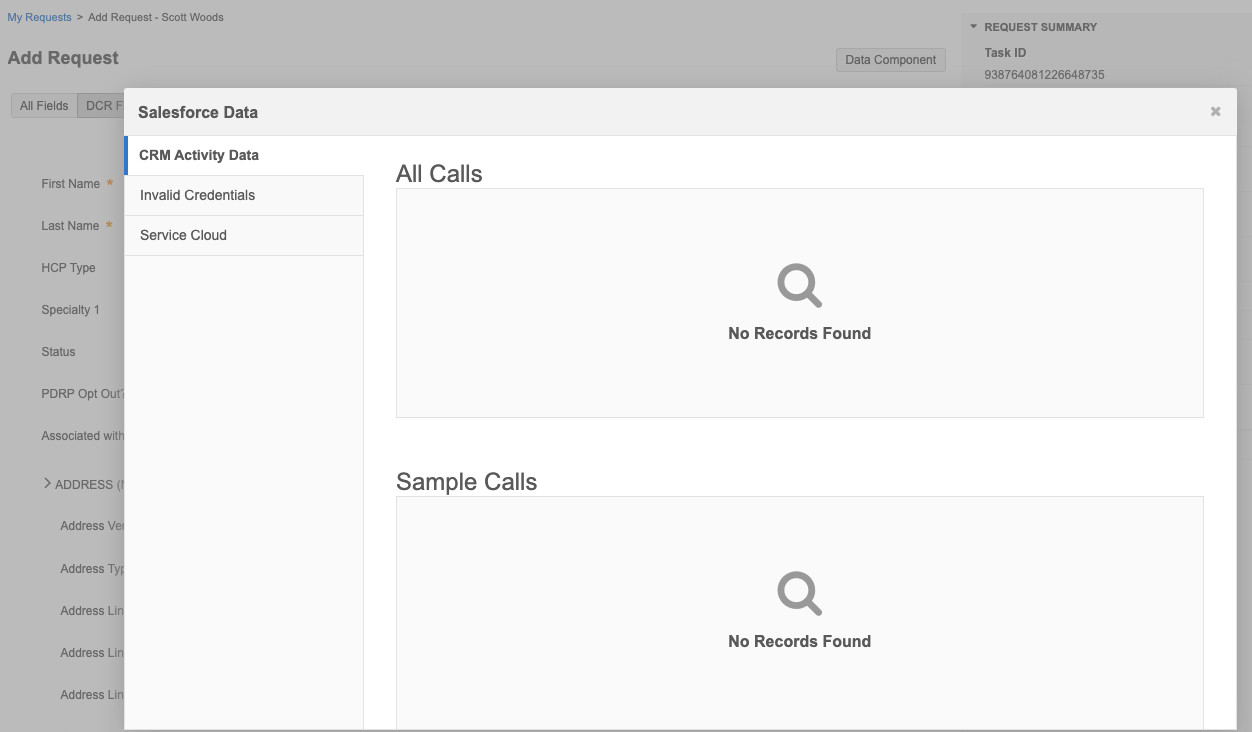
Data components
A button called Data Component might display beside the Re-assign button. You can click this button to view record data from Salesforce orgs to help you to validate the information in the DCR. When you click the Data Component button from an add request, it opens to the first component that is listed alphabetically.
On add requests, most of the data components will not yet have any data, so a No Records Found message displays in each component section.
The Data Component button name is configurable, so the button might have a different name.
The button does not display for the following reasons:
-
The record does not yet have a Network ID.
The button displays only on approved add requests and on unverified add requests.
-
Data components have not been created in your Network MDM instance.
-
You do not have permission to view them through your assigned user groups.
For more details, see Data components.
Linking parent addresses
If Network Address Inheritance is enabled in your Network MDM instance, you can establish links between addresses and affiliations in data change requests (DCRs). This helps to improves the quality of addresses by ensuring that child affiliations are linked to parent addresses.
If there are address changes in a DCR, you can manage the changes using address inheritance in the Address (New) section. For more information, see Managing address inheritance in DCRs.
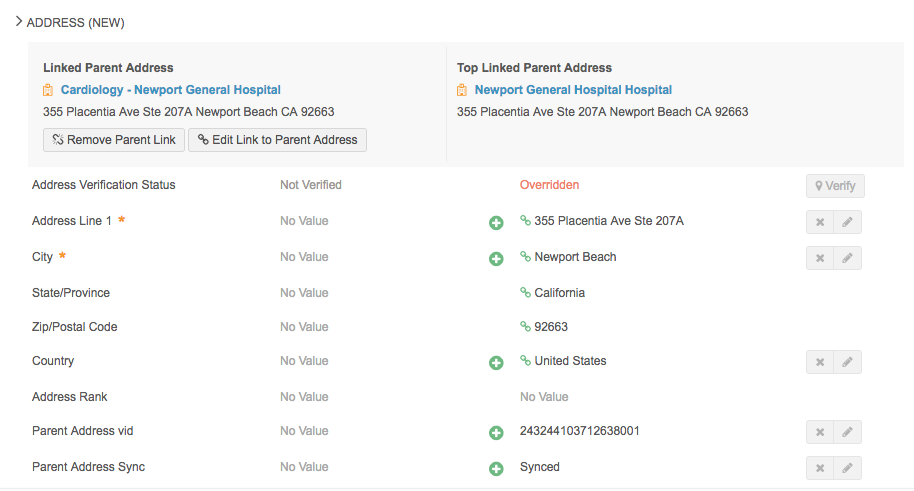
Parent affiliation
The primary address of the parent HCO displays in the Parent Affiliations section on a DCR. The address cannot be edited.

Link to HCO
An icon displays beside the Parent HCO address so you can go directly to the HCO's profile. When the icon is clicked, the HCO profile opens in a new tab.
The icon is active on tasks for the following situations:
- Change requests that contain new parent HCOs
- Change requests that contain changes to existing HCOs
- Add requests containing a parent HCO.
Profile link
You can link to the profile of an record directly from a DCR instead of searching for the record. The link displays in the Subject section in the Summary pane. The link is only available if the record state is Pending Review or Valid.
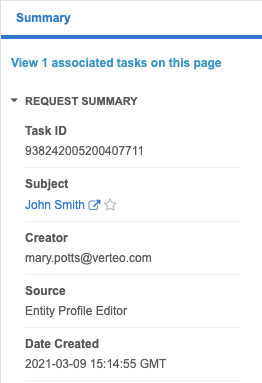
For add requests, the link displays only if Administrators have enabled the Create Unverified![]() Immediately create records (in an unverified state) when new HCPs or HCOs are submitted as requests in your Network instance. This enables users to immediately make changes to unverified records. option in your Network MDM instance (Settings > Workflow Settings). When this option is enabled, an unverified record is created when an add request is submitted so the submitter can action the record almost immediately. If this option is not enabled in your instance, a profile is not created and a link does not display in add requests.
Immediately create records (in an unverified state) when new HCPs or HCOs are submitted as requests in your Network instance. This enables users to immediately make changes to unverified records. option in your Network MDM instance (Settings > Workflow Settings). When this option is enabled, an unverified record is created when an add request is submitted so the submitter can action the record almost immediately. If this option is not enabled in your instance, a profile is not created and a link does not display in add requests.
For more information about unverified records, see Queued DCR tasks.
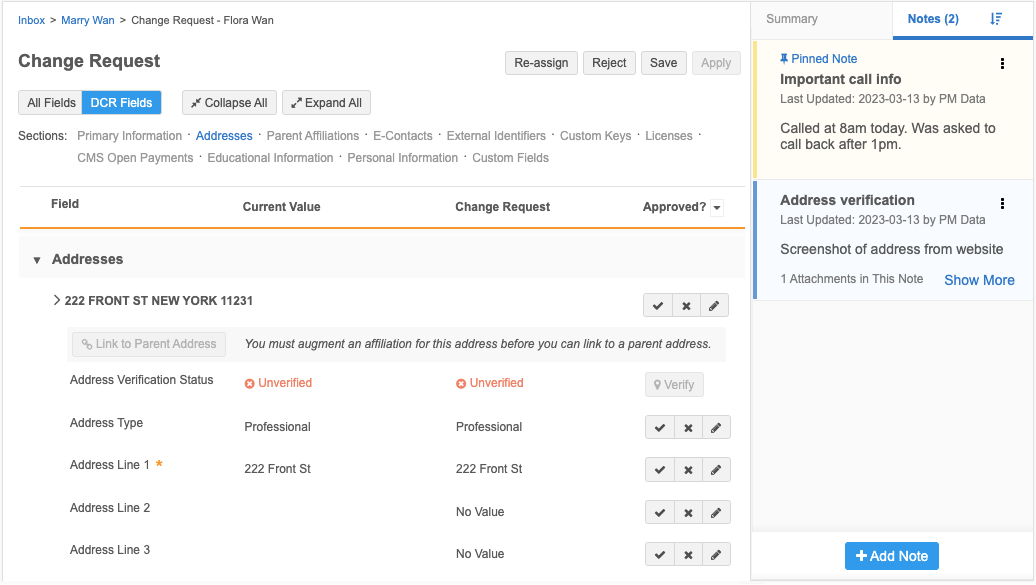
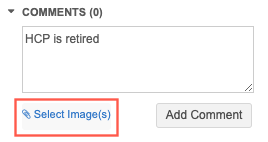
Add images to comments
Data Stewards can add images to comments in data change requests.
This is helpful for several reasons:
- Data Stewards can provide evidence for how the DCR was validated; for example, a screenshot of the website where they verified the data.
- Users that submit DCRs can understand the Data Steward's decision through the attached evidence, especially when DCRs are rejected.
- Data Stewards can easily find the validation source again using an attached image when further research is required.
If the Select Images link does not display in the Comments section, this feature has not been enabled for your instance. Administrators must enable it for their Network MDM instance by selecting the DCR Comment Attachments option in the General Settings.
Note: Attachments added in DCR comments are only visible within the same Network MDM instance.
About images
- Supported format- Images in .jpg or .png format can be added.
- File size - There is no limit to the size of the image that can be uploaded, but larger files are automatically resized to 1MB.
- Number of images - Three images can be added to a comment. There is no limit to the number of comments that can be added to a DCR.
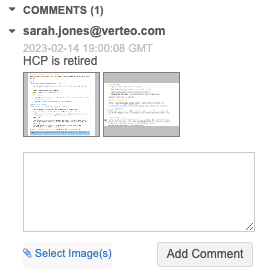
Viewing images
When images are added to DCR comments, they display as thumbnails below the comment. Data Stewards can click a thumbnail to view the enlarged image. If there are multiple images, click the arrows to browse through the images.
Report on comments
Users with access to the SQL Query Editor can report on DCR comments to see what DCRs included images. For more information, see Report on DCR comments.
Audit image use
Administrators can view DCRs that include images in the Task audit history.
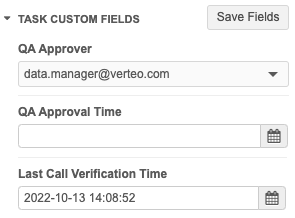
Update task custom fields
A section called Task Custom Fields might display at the bottom of the Request Summary pane on the data change request. These fields are for internal use only and are used for data stewardship purposes; for example, fields can be created for supervisors to track data quality or for Data Stewards to provide additional information when they process a request.
The fields can be updated and saved without impacting the DCR.
Task custom fields display only if users have been given access to the fields in the task custom field configuration.
For more information, see Task custom fields.
Suspect matches
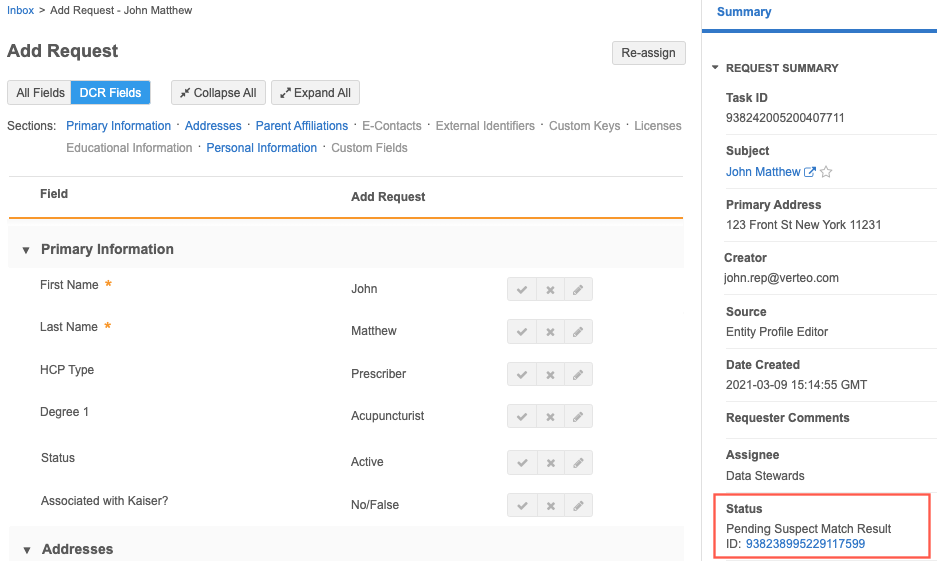
When a suspect match is created from an add request, details about the related task are available in the Summary pane.
Add requests
Add requests that have created a suspect match task contain a link to that suspect match task. Data Stewards can click the task ID link in the Status section to open the suspect match's task.
Suspect match tasks
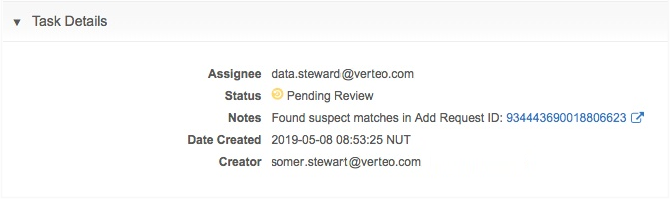
Suspect matches that are created through an Add Request include Creator and Requester Comments information in the Task Details section. This information gives data stewards more information to help them determine the outcome of the match. For example, a data steward can see that a sales rep created the suspect match and the rep added more information in the comments.
DCR detailed view
The DCR Detailed View button displays on processed data change requests. Click the button to display the detailed changes of processed data change requests (DCRs).

For more information, see DCR Detailed View.
Custom objects
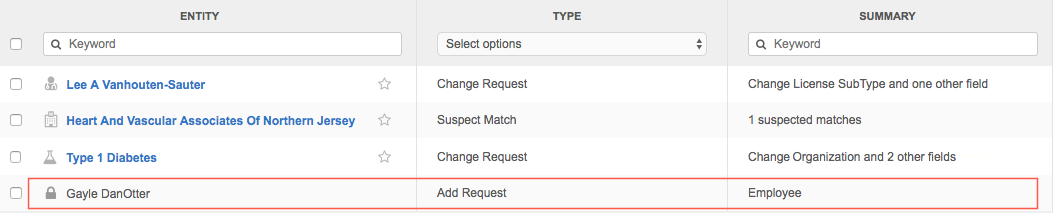
Add and change requests for custom objects are either automatically approved or routed to local data stewards. Data stewards that have access to custom objects can find the DCRs by filtering the inbox or by searching by task ID. Data stewards that do not have access to the custom object through their data visibility profile will see a Lock icon in the inbox and will be unable to open the task.
Tasks with many objects
When tasks have a large number of sub-objects (more than 100 sub-objects for each sub-object type) or a large number of pending associated tasks (more than 100 tasks), Network MDM handles the DCR process differently to avoid issues in your Network MDM instance.
Many sub-objects
When data change requests are submitted, Network MDM reindexes the DCR task and the entity. Network MDM will not index the sub-object or relationship object records if there are more than 100 records for each object type.
Example
A DCR is submitted to update the name for an HCO. The existing HCO record has 101 addresses, 5 ParentHCOs, and 3 Licenses. Network MDM will only index the ParentHCO and License objects for that task; the address object will not be indexed because there are more than 100 addresses on the record. This means that addresses will not display for that record on the Inbox page. The addresses will be available on the record profile, in Network MDM search, in reporting, and on the original DCR as usual.
Many associated tasks
After an update to a record, Network MDM indexes the entity for each associated pending task so the update is available on those tasks. To avoid issues in your Network MDM instance, the entity will not be reindexed if the record has more than 100 associated tasks. This means that the change will not be updated on each associated task in the inbox.
Example
An HCP record has 101 pending associated tasks. An update is made to the HCP’s Medical Degree through a source subscription. Network MDM will not reindex the 101 associated tasks to apply the update to HCP's Medical Degree. The update to the Medical Degree will be available on the record profile, in Network MDM search, in reporting, and on the original DCR as usual.