OpenData subscriptions
Filtering downloaded Parent HCOs
Administrators have more flexibility to limit the number of HCOs that are downloaded to your Network instance during Veeva OpenData downloads.
When you download an HCP, all of its parent HCOs are downloaded but some of the HCOs might not be relevant to your therapeutic areas. Now, you can use Network Expressions to define the parent HCOs that you want to download or ignore. Using Network Expressions can provide more flexibility for defining filters. You can filter using more fields and you can use lookup tables containing combinations of fields. Previously, filtering was limited to a list of specialties and HCOs types.
This enhancement is enabled by default in your Network instance.
Supported downloads
The parent HCOs filters will be applied when HCPs and HCOs are downloaded using the following methods:
-
Ad hoc downloads (includes Sync with OpenData, Download from OpenData, and Ad Hoc Download jobs)
-
Network Account Search in Veeva CRM
-
Data change requests (add and change requests that are approved by OpenData)
-
Search and download (Network UI, Network API, Network widgets)
Filters are applied to active relationships only.
How filters work
The filters traverse HCOs level by level to see which HCOs to update or download.
For each level of HCO, Network does the following when filters are defined:
-
If the HCO is already in your Network instance, it syncs the record and moves to the next level.
-
If the HCO meets the basic filter or NEX rule, it downloads the record and goes to the next level.
-
If the HCO does not meet the basic filter or NEX rule, the record is not downloaded and Network does not look at the next level beyond that HCO.
When filters are not defined, all parent HCOs up to the maximum level that you defined are downloaded.
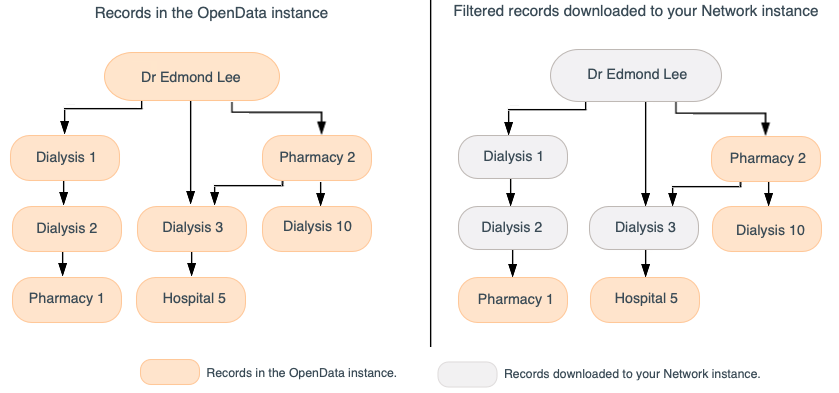
Example
In this example, the parent HCOs are filtered so only Dialysis Centers are downloaded.
hco_type__v == '29:1,29:2,29:98,29:99'
Filter Parent HCOs
On the OpenData country subscription configuration, use the Filter Parent HCOs during Ad Hoc Download and Data Change Requests option to specify the records that are allowed to be downloaded.
This option is in the Parent HCO section; it was previously in the Health Care Organization section.
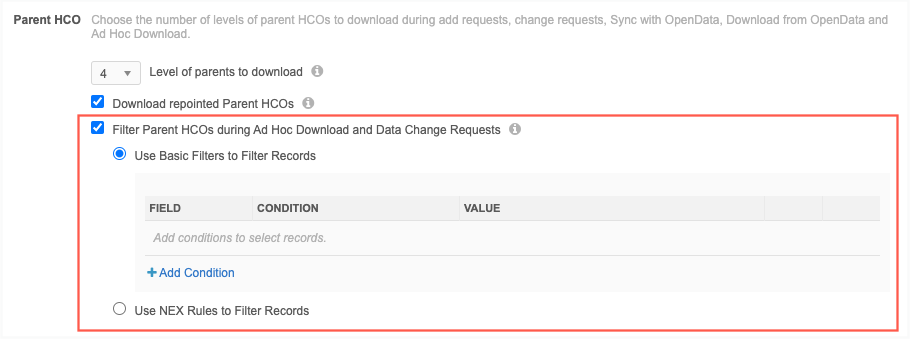
When this setting is selected, two options display:
-
Use Basic Filters to Filter Records - Use the Specialty or HCO Type fields to filter the parent HCO records that are downloaded. This was the existing option; no changes have been made to this behavior.
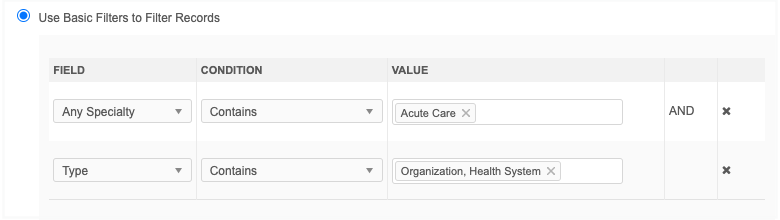
If you had HCO Type or Specialty filters applied to your existing country subscription, those filters will be preserved in this option.
-
Use NEX Rules to Filter Records - Use Network Expression rules to filter the parent HCO records that are downloaded.

Create a NEX rule to specify the parent HCOs to include or ignore during OpenData downloads. Lookup tables can be used in the NEX rule.
Click Verify to validate the NEX rule syntax.
NEX rule help
For help with writing Network Expressions, see the following:
-
Examples - Click the tooltip to view NEX rule examples. Click the copy icon beside the rule to copy it to your clipboard so you can paste it into the NEX rule field.

-
Documentation - Click the NEX Rule Functions and NEX Rule Operators links to open the Veeva Network Online Help.
Key points for NEX rules
-
The rule must evaluate to either true or false.
-
One NEX rule is allowed.
-
Square brackets are not required.
-
Lookup tables can be used.
-
Sets of fields are not supported (for example, addresses__v, licenses__v, parent_hcos__v, custom_keys__v).
Example NEX rules
Example 1
Download parent HCO if the HCO type is Organization, Health System (4:37).
hco_type__v == '4:37'
Example 2
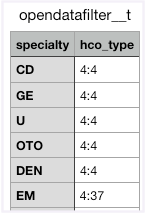
Do not download parent HCOs that meet the HCO type and specialty criteria in the lookup table.
not(lookupvalidate('opendatafilter__t', hco_type: hco_type__v, specialty:[specialty_1__v, specialty_2__v]))This example uses a lookup table. The lookup table includes a column for Specialty and HCO Type. Parent HCOs that meet the specialty and type combination will not be downloaded. For example, you might want to download parent HCOs that have the HCO type Organization, Health System (4:37), but not HCOs that specialize in Emergency Medicine (EM).
Using lookup tables can give you more flexibility and be easier to maintain.
For information about creating lookup tables and using the lookup functions in Network Expressions, see Lookup tables.
-
Veeva CRM considerations
These filters can be applied in Veeva CRM when sales reps download accounts.
In CRM, the ADD_PARENTS_TO_TERRITORY_vod Network setting must be set to 1.
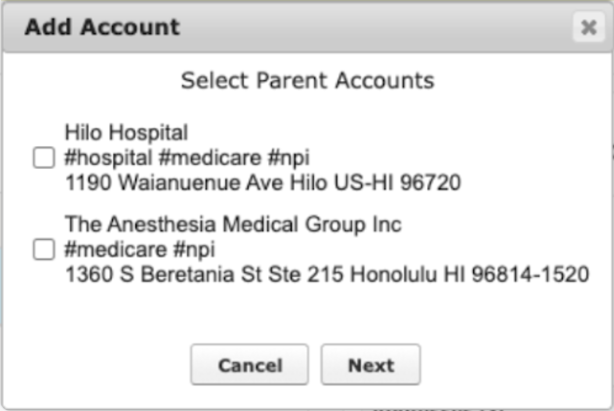
When a user is adding an account in CRM, the filters are applied when a user does not select parent accounts in the Add Account pop-up.
If a parent account is selected, that record will be downloaded regardless of the filters that are applied in Network.
For details, see Adding Parent HCOs to Territory when Importing an HCP or HCO in the Veeva CRM Online Help.
Managing configurations
The filters that you define can be included in export packages so they can be imported to a target environment.
Logs
Administrators can track the changes that are made to the NEX rule parent HCO filters in the System Audit Log.
OpenData Communications enhancements
The OpenData Communications feature was introduced in Network version 22R3.1. These enhancements have been introduced in 23R1.0.
Smart table support
Files sent in OpenData Communications can be opened in a smart table so you can understand the content of the files and how it might affect the data in your Network instance. Previously, files could only be downloaded.
Note: Smart tables are supported for .csv files only.
This enhancement is enabled by default in your Network instance
Opening files
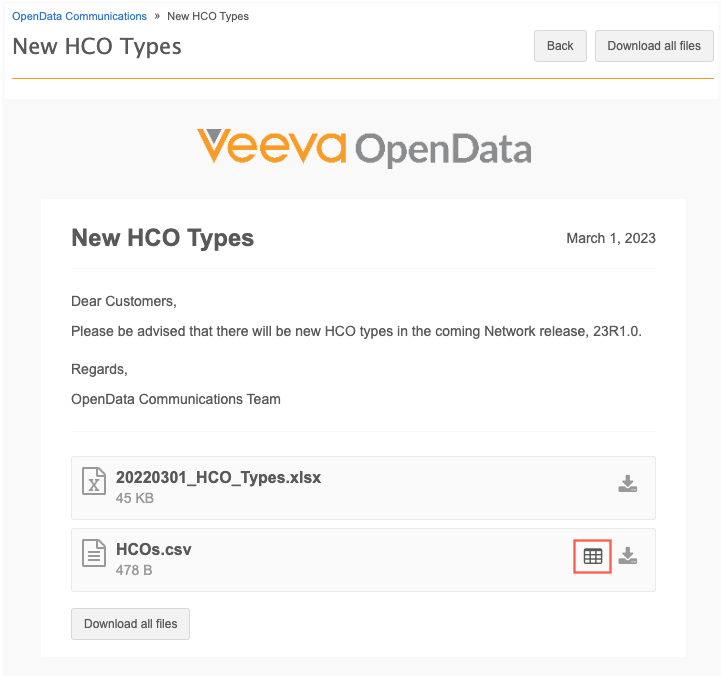
The Smart Table ![]() icon displays beside .csv files that are sent by OpenData teams (System Interfaces > OpenData Communications). Click the icon to open the file in a new browser tab. Use the smart table to view, filter, and even augment the data.
icon displays beside .csv files that are sent by OpenData teams (System Interfaces > OpenData Communications). Click the icon to open the file in a new browser tab. Use the smart table to view, filter, and even augment the data.
Displayed records
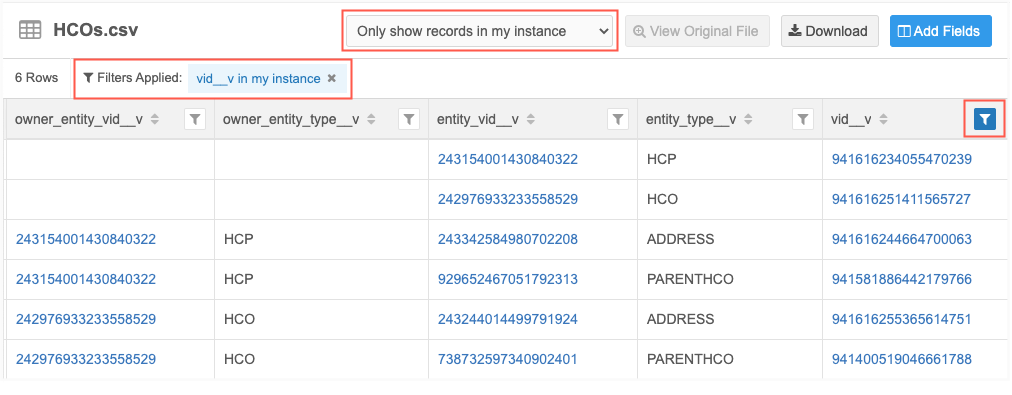
If the .csv file contains a column called vid__v, the smart table opens with the Only show records in my instance filter applied. This enables you to immediately view the records that are relevant to your Network instance.
When the file is filtered, the filter is indicated at the top of the file and on the relevant column. If you download the smart table, only the filtered data is downloaded.
Available filter options:
-
Show all records - All records in the smart table display.
-
Only show records in my instance - Display only the rows in the file where vid__v values are in your Network instance.
Includes opted out records that have been downloaded to your Network instance.
-
Only show records not in my instance- Display only the rows in the file where vid__v values are in the OpenData instance; not in your Network instance.
This includes OpenData records that you have unsubscribed from (record state = DELETED).
Tip: If no records display when the file opens, it means that none of the records are in your Network instance. Change the option to Show all records to view the records.
If the file does not contain a vid__v column, all records in the file display by default. The options to filter the records do not display.
Supported files
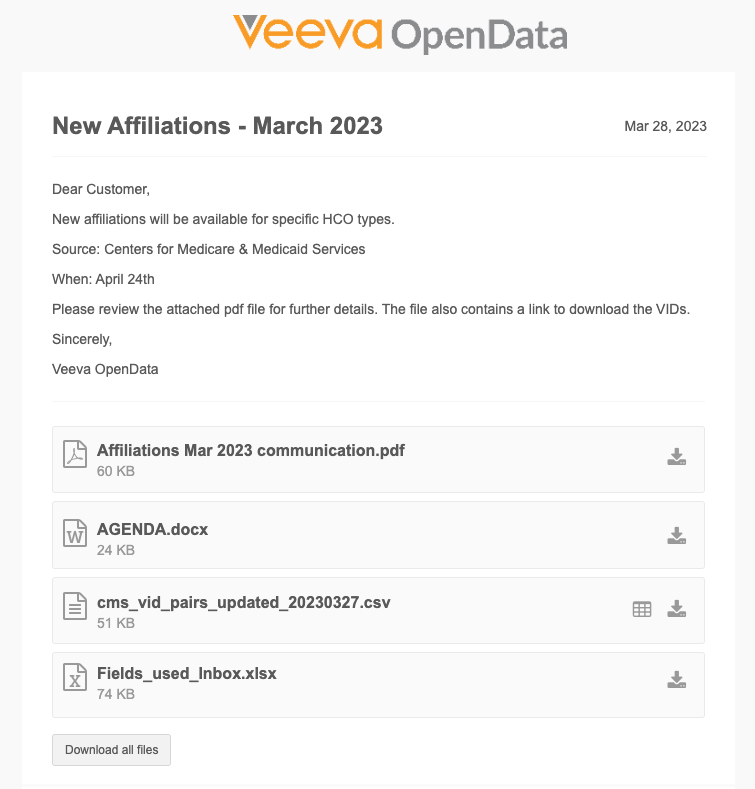
OpenData teams can now include Microsoft® Word® and Adobe® PDF files in OpenData Communications. Previously, only .csv files and Microsoft Excel (.xlsx) files were supported.
Additionally, attachments are now sorted alphabetically in communications.
Unread communications
The OpenData Communications page now tracks the read communications by individual users. Previously, after a user in your Network instance opened an OpenData Communication, the link to the communication was no longer highlighted in blue, indicating that it had already been read. Now, communications that you have not personally read remain highlighted to ensure that you do not accidentally miss important information from OpenData teams.
OpenData Communications
You can now view and manage communications from Veeva OpenData in your Network instance. This feature centralizes all notifications from the OpenData team so you can track information and activities and take any required actions.
This feature is enabled by default in your Network instance.
Highlights
-
Notifications are sent to you only about the countries that you subscribe to and that are enabled in your Network instance.
-
A predefined user group, OpenData Communication Subscribers, is added to help Administrators manage the users that should receive OpenData communications.
-
Emails are sent to subscribed users with links to view the full communication in Network.
-
Attachments are not included in Veeva OpenData communication emails so they cannot be misplaced.
Receiving notifications
Users that are subscribed to receive OpenData communications will receive emails from OpenData from the following address: opendata-emails@opendata.veeva.com.
The email notifies you about OpenData activities that you should be aware of or that you should action. The email contains the text of the communication and a link to view the full message in Network. Attachments are not included in the email.
Example email
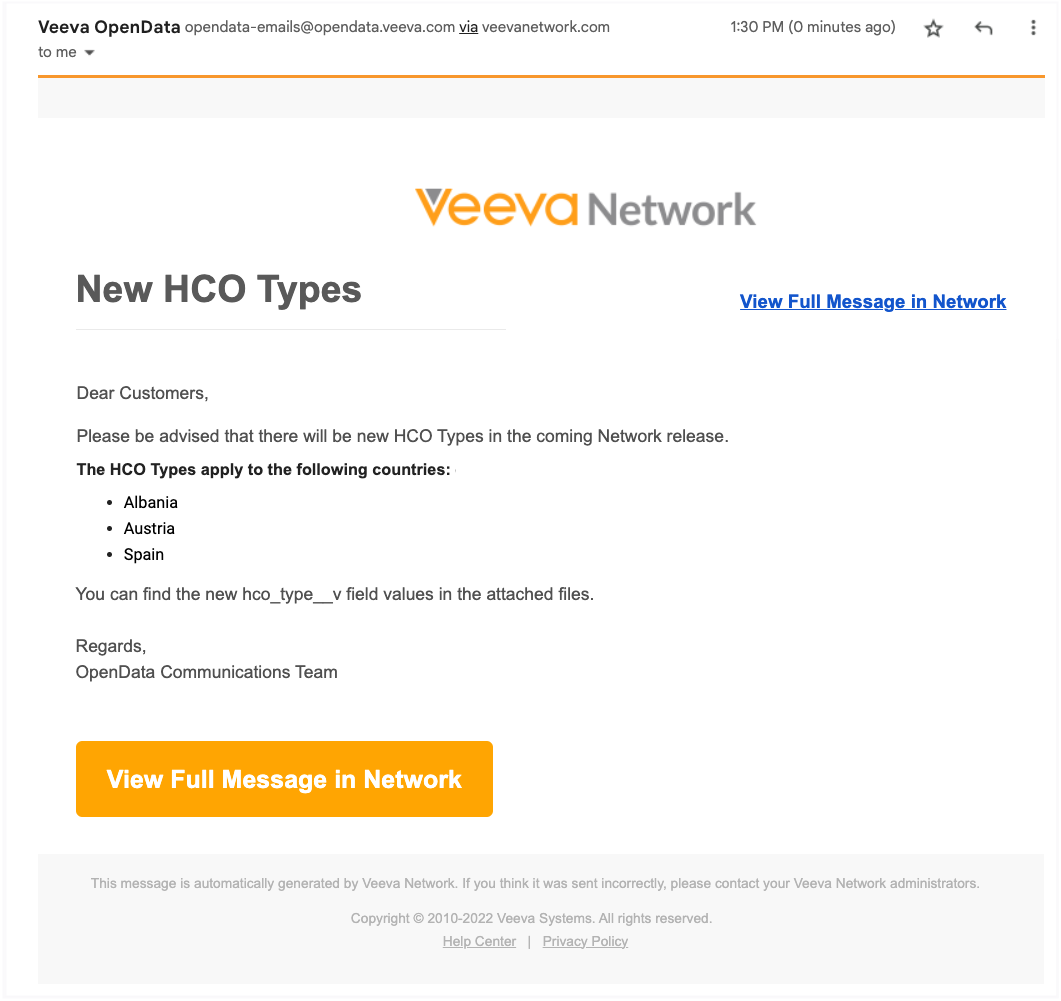
When you click View Full Message in Network, the communication opens in the Network application. Log in with your credentials if you are not already logged in.
View communications
The full message and all attachments are available in the communication.
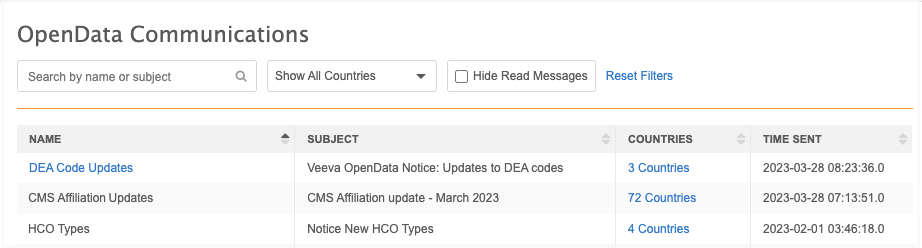
For each communication, the following details display:
-
Name - The name that OpenData defined for the communication.
-
Subject - The email subject.
-
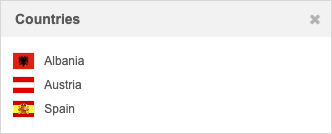
Countries - The countries that the communication applies to.
If there is one country, the country name displays. If multiple countries are selected, a count of countries displays. Click the count to display a pop-up of the countries.
-
Time Sent - The date and time (in your local timezone) that the communication was sent by the OpenData team.
Example
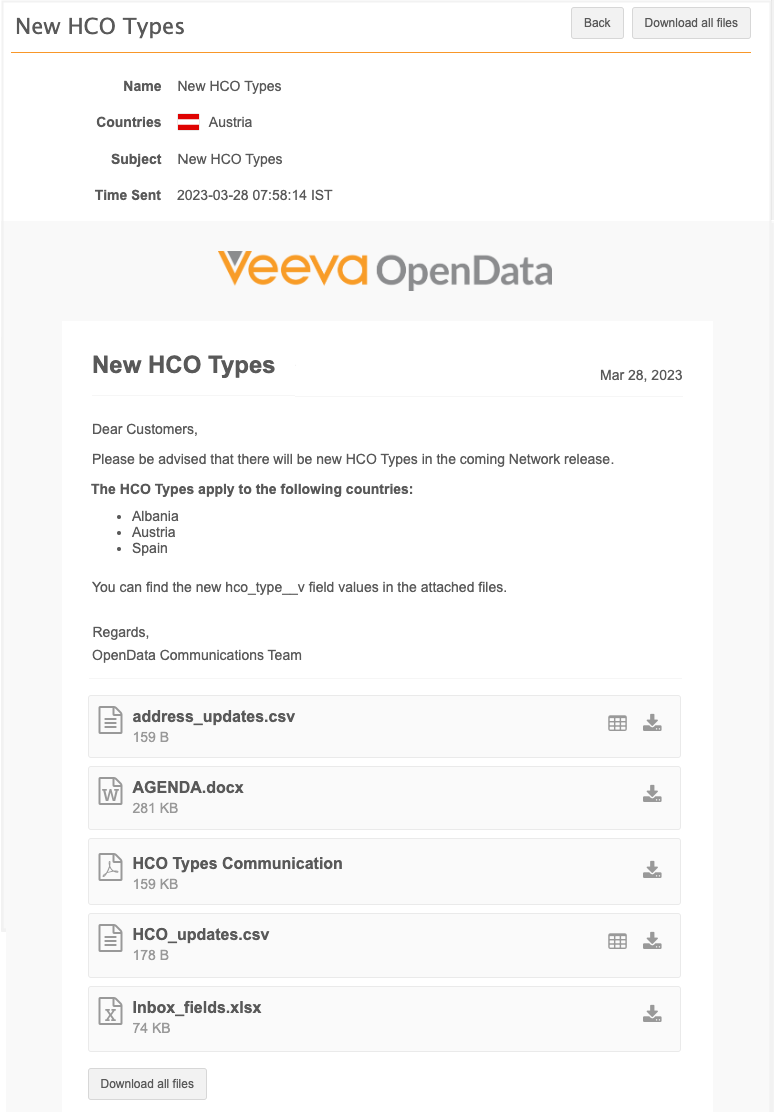
Downloading files
You can download files in an OpenData communication even if you do not have FTP access.
-
Click Download all files or use the Download button on a file to download it individually.
Click Back to navigate to the OpenData Communications page.
OpenData Communications page
A new page is added so you can view and manage all of the communications that you receive from OpenData in your Network instance.
To open the page:
-
In the Admin console, click System Interfaces > OpenData Communications.
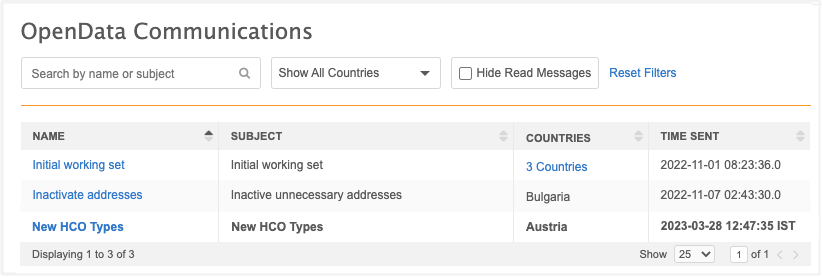
All of the messages that you receive from OpenData display on the page in alphabetical order. Messages that have not been read yet display as bolded text.
For each communication, the following details display:
-
Name - The name that OpenData defined for the communication.
-
Subject - The email subject.
-
Countries - The countries that the communication applies to.
If there is one country, the country name displays. If multiple countries are selected, a count of countries displays. Click the count to display a pop-up of the countries.
-
Time Sent - The date and time (in your local timezone) that the communication was sent by the OpenData team.
Finding communications
To find a specific message, use one of the following methods:
-
Search - Use the search bar to find a communication by name, subject, or the time it was sent.
-
Show All Countries - Expand the list to filter the page by country. By default, all countries display.
-
Hide Read Messages - Click to quickly find new messages.
-
Sort - Sort the table using any of the columns.
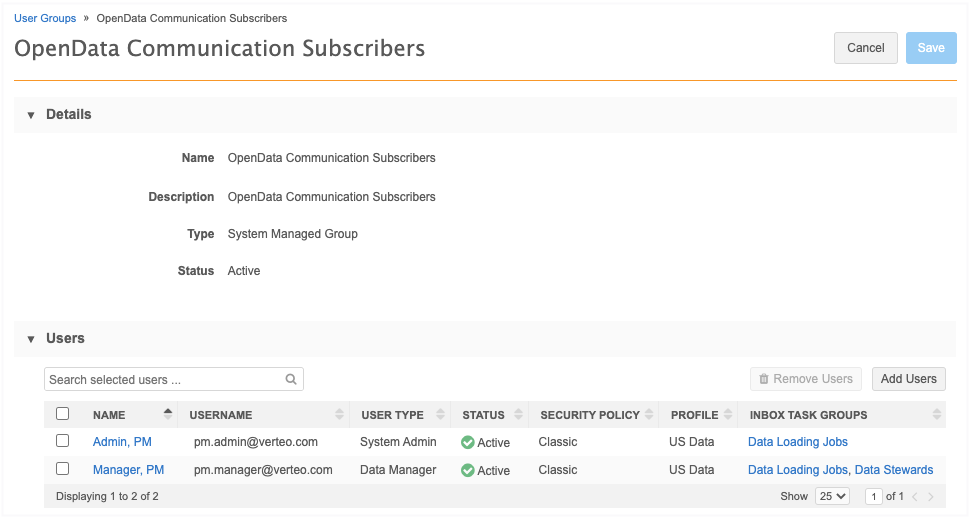
OpenData Communications subscribers
To manage subscribers, Administrators can add users to a predefined user group called OpenData Communication Subscribers. The users that Administrators add to this user group will receive the emails sent by the OpenData team.
Note: Administrators, Data Managers, and System and Data Admin users can be added to the user group. These are the only users that have access to the OpenData Communications page in the Admin console.
To add subscribers:
-
In the Admin console, click Users & Permissions > User Groups.
-
On the User Groups page, click the OpenData Communication Subscribers group.
No users are added to the group by default.
-
Click Add Users and select the users that should receive OpenData emails.
OpenData exports to process
OpenData subscriptions now include a count of the files that are pending and that will be processed the next time the subscription job runs. These updates are available on the OpenData Subscriptions page and for each country subscription.
This enhancement is available by default in your Network instance.
OpenData subscription page
The OpenData Exports to Process columns identifies the files that are pending for subscribed and enabled countries.
These are the files in the delta export; the records that have been added or changed in the Veeva OpenData instance for this country since the last time your subscription ran.
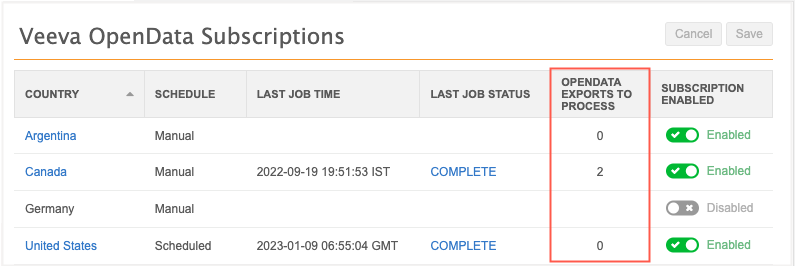
Note: When there are a large number of files to export, it can take some time to display the count. When the count is still processing, you can click a country subscription link to view the details on the country page.
Country subscription page
The OpenData exports to process count displays in the Job Schedule section.
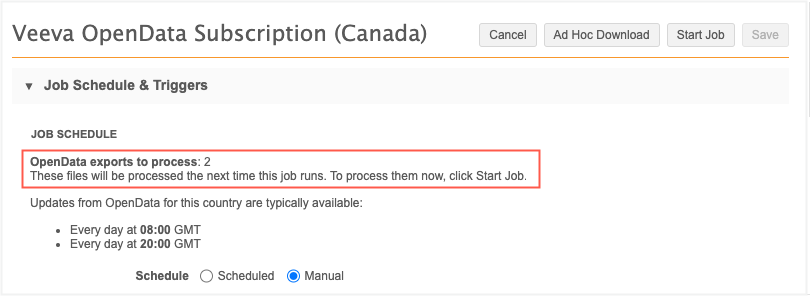
Additionally, enhancements have been made to the format of the update schedule so it is easier to read.