File Explorer
The following enhancements have been made to File Explorer in this release.
Open compressed files
You can now view the contents of compressed files within File Explorer. Previously, compressed files had to be downloaded to view the contents. Now, double-clicking on a compressed file opens a temporary folder containing the contents of the file. This is helpful when you want to view the .csv files that are contained in .zip files as smart tables within File Explorer.
This enhancement is enabled by default in your Network instance.
Supported compressed file formats
The following file types can be opened in File Explorer:
-
.zip files
-
.tgz
-
.tar.gz
Note: Encrypted archives are not supported.
Unzipping files
To open a compressed file:
-
Double-click the file
-
Hover over the file and click the Folder icon.

or
When you open a compressed file in File Explorer, a temporary folder is created. The folder is not saved to the FTP directory.
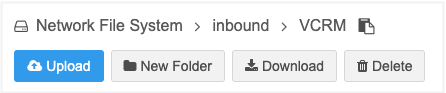
Because the folder is temporary, the actions (Upload, New Folder, Download, Delete) that usually display under the folder breadcrumb in File Explorer are not available for these folders. Also, the Copy Path icon does not display beside the breadcrumb.
Typical Folder
Uncompressed file folder
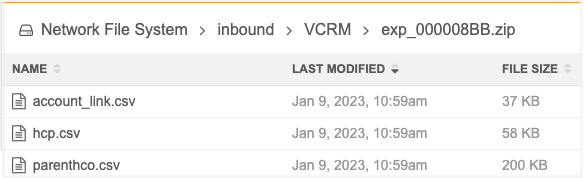
The folder can be sorted by the Name, Last Modified, and File Size columns. A limit of 1000 items display in the folder.
Note: For files, the Last Modified time identifies the time the file was uncompressed.
Options for files
The following actions are available for folders and files within the unzipped folder:
Folders
-
Open to view contents
CSV files
-
Open as smart table
-
Download
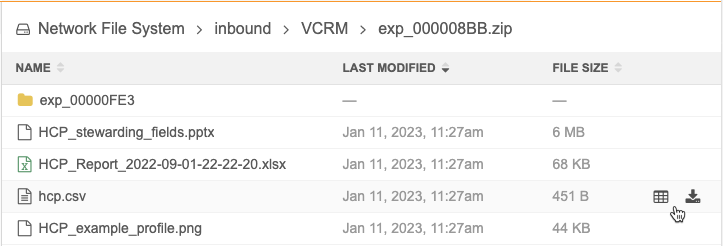
Other file types
-
Download
Note: Other compressed files are not supported. If there is a nested compressed file in the unzipped folder, it cannot be opened.
Audit
Administrators can use the System Audit Log to view the files that have been unzipped by users.
Filtering smart tables
Filtering options have been added to smart tables to help you quickly understand the data.
Previously, a column could be filtered by searching for a specific value. Now, you can filter columns using the following tabs:
-
Filter by condition - Define the text to include or exclude in the filtered smart table.
-
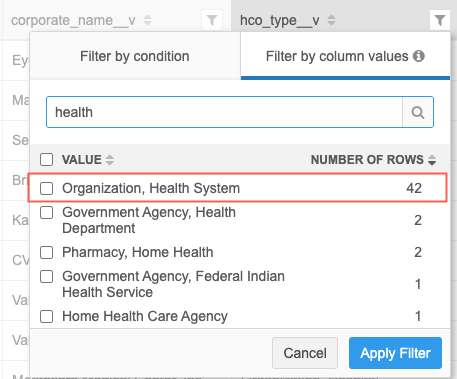
Filter by column values - Displays all of the values in the column and a count for the number of rows that the value.
Example
Use this option to easily see how many rows in the HCO Type column are health systems.
This enhancement is enabled by default in your Network instance.
Note: Backslash (\) characters are not supported in defined filters.
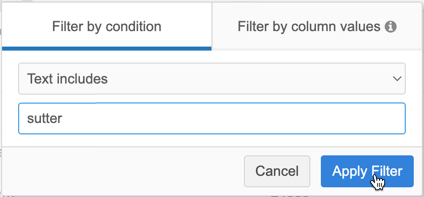
Filter by condition
The Filter by condition tab displays by default.
Use the dropdown list to choose the Text includes or Text excludes option and then type the text that you want to filter on. Click Apply Filter to view the updated smart table.
Example
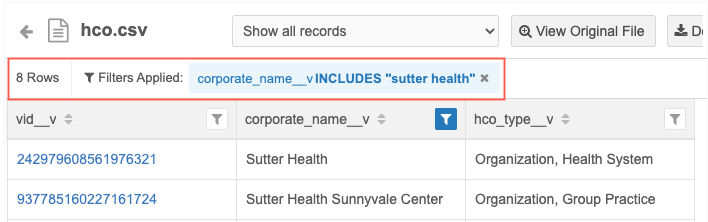
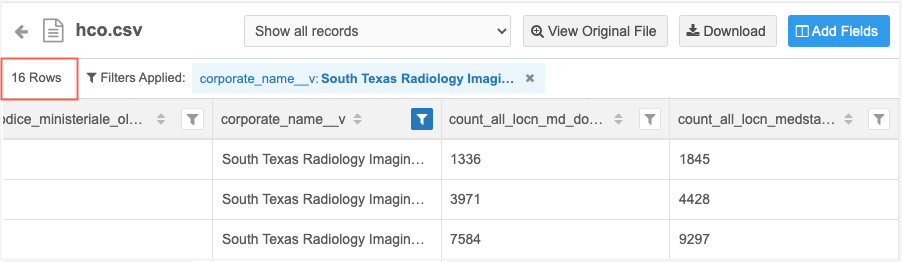
Filter the smart table to see only the rows that include sutter in a corporate_name__v column.
The smart table is filtered and displays an updated row count. The Filters Applied label highlights the column name and the filter criteria. Hover over the filter information to view a tooltip with all of the values.
Tip: Click the highlighted filter information to open the column filter pop-up.
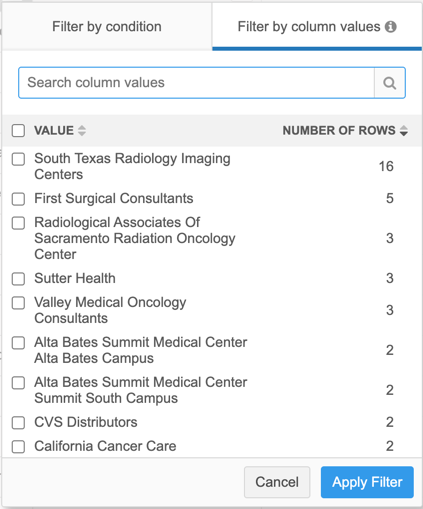
Filter by column values
When the Filter by column values tab is selected, all of the values in the column are listed. A count displays beside the value to identify the number of rows that the value applies to. Select one or more values to filter the smart table.
By default, the values are sorted in descending order by row count. Use the Sort ![]() icon beside Value and Number of Rows to reorder the list in ascending or descending order.
icon beside Value and Number of Rows to reorder the list in ascending or descending order.
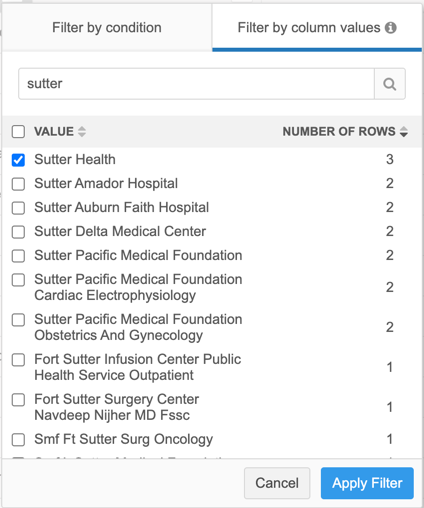
Use the search bar to find a specific value. For example, type sutter to find values containing that name in the column.
Blank values
If the column contains blank values, they display in a (Blanks) category at the top of the list. This includes field values that are Null and No Value.
![]()
Filter local records
If the smart table contains a vid__v column, you can filter the file to show only records in your instance. If there is no vid__v column, all records will always be displayed.
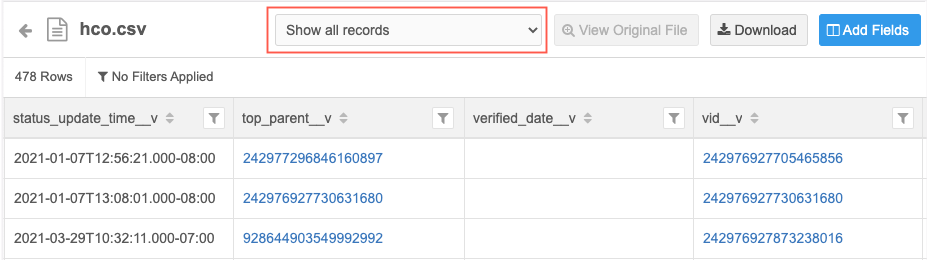
Note: If there are multiple columns called vid__v exactly, only the first vid__v column is used.
There are three filter options:
-
Show all records - All records in the smart table display. This is the default option.
-
Show records in my instance - Display only the records where vid__v values are in your Network instance.
-
Show records not in my instance- Display only the records where vid__v values are in the OpenData instance; not in your Network instance.
These options support Veeva standard objects (HCPs, HCOs, addresses, licenses, and parent HCOs); custom objects are not supported.
Records that display for each option
Unless noted, records with all record states and statuses display.
| Filter options | Local Records | OpenData Records | Third Party Records |
|---|---|---|---|
| Show all records |
|
|
|
| Only show records in my instance |
|
Includes opted out records that have been downloaded. |
|
| Only show records not in my instance |
|
Includes records that you have unsubscribed from OpenData (record state = DELETED). |
|
Smart table rows
Row count
When you open a smart table in File Explorer, it can be difficult to understand how many rows it contains and what the data looks like. Now, you can see a count of rows in the file.
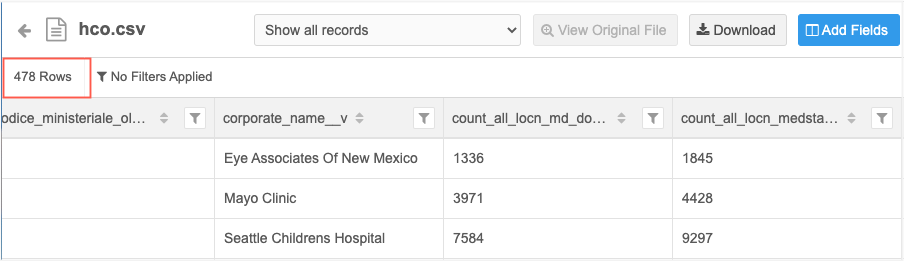
Smart tables display only the first 1000 rows in the file; the count identifies all rows. When filters are applied, all of the rows are filtered, not just the first 1000 rows that display. Additionally, if you download the smart table, the filter is applied to all rows in the downloaded file.
Filtered count
When you filter a smart table, the count updates to display only the filtered rows.
Smart table logs
Administrators can now use the System Audit Log to track when users open and download smart tables.
