Users
Data visibility profiles
Read only access permission
The Read-only access permission on data visibility profiles is renamed to Data Read-only access because it restricts edit access to data only. If users have read-only access to data, they can view records, but they cannot add or edit records. Previously, the Read-only access permission also prevented users from adding and editing reports as well as data if they only had one data visibility profile. The restrictions for reports have been removed so users with Data Read-only access can edit and create reports based on their user type.
This enhancement is enabled by default in your Network instance.
New user type user
A new user type called System and Data Admin is now available. This user type combines the System Admin and Data Steward capabilities so you no longer need alternate user IDs to completely manage your Network instance.
This new user type is available by default in your Network instance.
User capabilities
As a System and Data Admin user, you have complete access to Network; all the capabilities of the system administrator user plus the data steward user.
Highlights of capabilities
- Admin console - All menu items and feature capabilities are available; for example, you can configure and run subscriptions and data maintenance jobs; view and edit the data model; create users; configure Network widgets, and view audit logs.
- Home dashboard - Network displays the administrator's home dashboard when you log into Network. All dashboard widgets are available to you.
- Ad Hoc Match - Jobs created by all users are listed.
- Inbox - All jobs and data change requests display and are ordered by newest tasks. You have full data steward capabilities for data change requests. If you open a task that is not assigned to another user, the task is automatically assigned to you.
- Data change requests - Any type of task can be processed (add or change requests and suspect matches). Also, if the workflow settings are configured to review rejections by Veeva OpenData, record changes that you make will be automatically accepted. The resolution note for these requests will display: System approved - created by data steward.
- Reports - All reporting capabilities are available.
- Network Explorer - You can view and edit hierarchies.
- Data Updater - Jobs for updating or merging records can be created.
-
Record profiles - All of the data steward capabilities are available to you.
This includes the following capabilities:
- Find Suspect Match (for local records)
- Viewing and processing associated tasks
- Access to the Validate button to run data validation rules.
- Access to the Send to OpenData button to send a record to OpenData for ownership change.
- Promoting or rejecting candidate records
- Managing multi-country HCPs
- Data validation rules - This user type is automatically added to existing rules and new rules and cannot be removed.
- Reporting - Access to all Network reporting capabilities, including viewing and editing reports saved by other users.
Create a new user
To create a user with this new type:
- In the Admin console, click Users & Permissions > Users.
- On the Users page, click Add User.
- On the Add New User page, define the Username and Email.
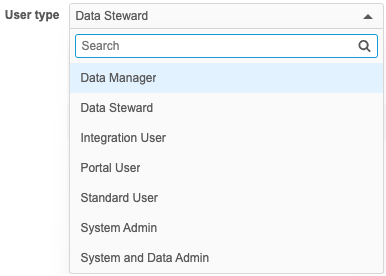
- In the User type list, select System and Data Admin.
- The Inbox Task Groups field is automatically populated with the Data Loading Jobs and Data Stewards groups. This ensures the user has data change requests and job warnings in their inbox.
- Configure the remainder of the user profile as usual.
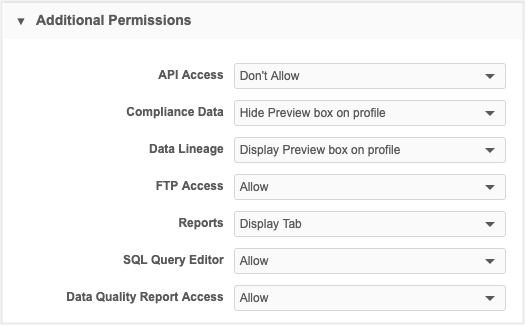
The new System and Data Admin user has the same default settings as a Data Manager. Also, the SQL Query Editor and Data Quality Report Access permissions that display when you create a Data Steward user also display but default to Allow; Data Stewards do not have access to these features by default.
Switching existing users
Administrators can switch user types for an existing user. For example, if you have IDs for a data steward and a system administrator, you can switch one of these IDs to the System and Data Admin user type.
When you switch a user type in the user's profile, the user type changes but data permissions and settings are not updated automatically. You must adjust permissions for the System and Data Admin user to they have access to the data and settings they need.
Consider switching the most active Network user with access to as many groups and features as possible. The newly updated user should belong to the superset of groups from each of the previous users.
After you've updated one of the user types, remember to inactivate users you no longer need.
Switching from a data steward user type
When switching from a data steward to System and Data Admin type, you might want to manually adjust the following settings so the user has all of the intended capabilities:
- Inbox Task Group - Add the Data Loading Jobs group.
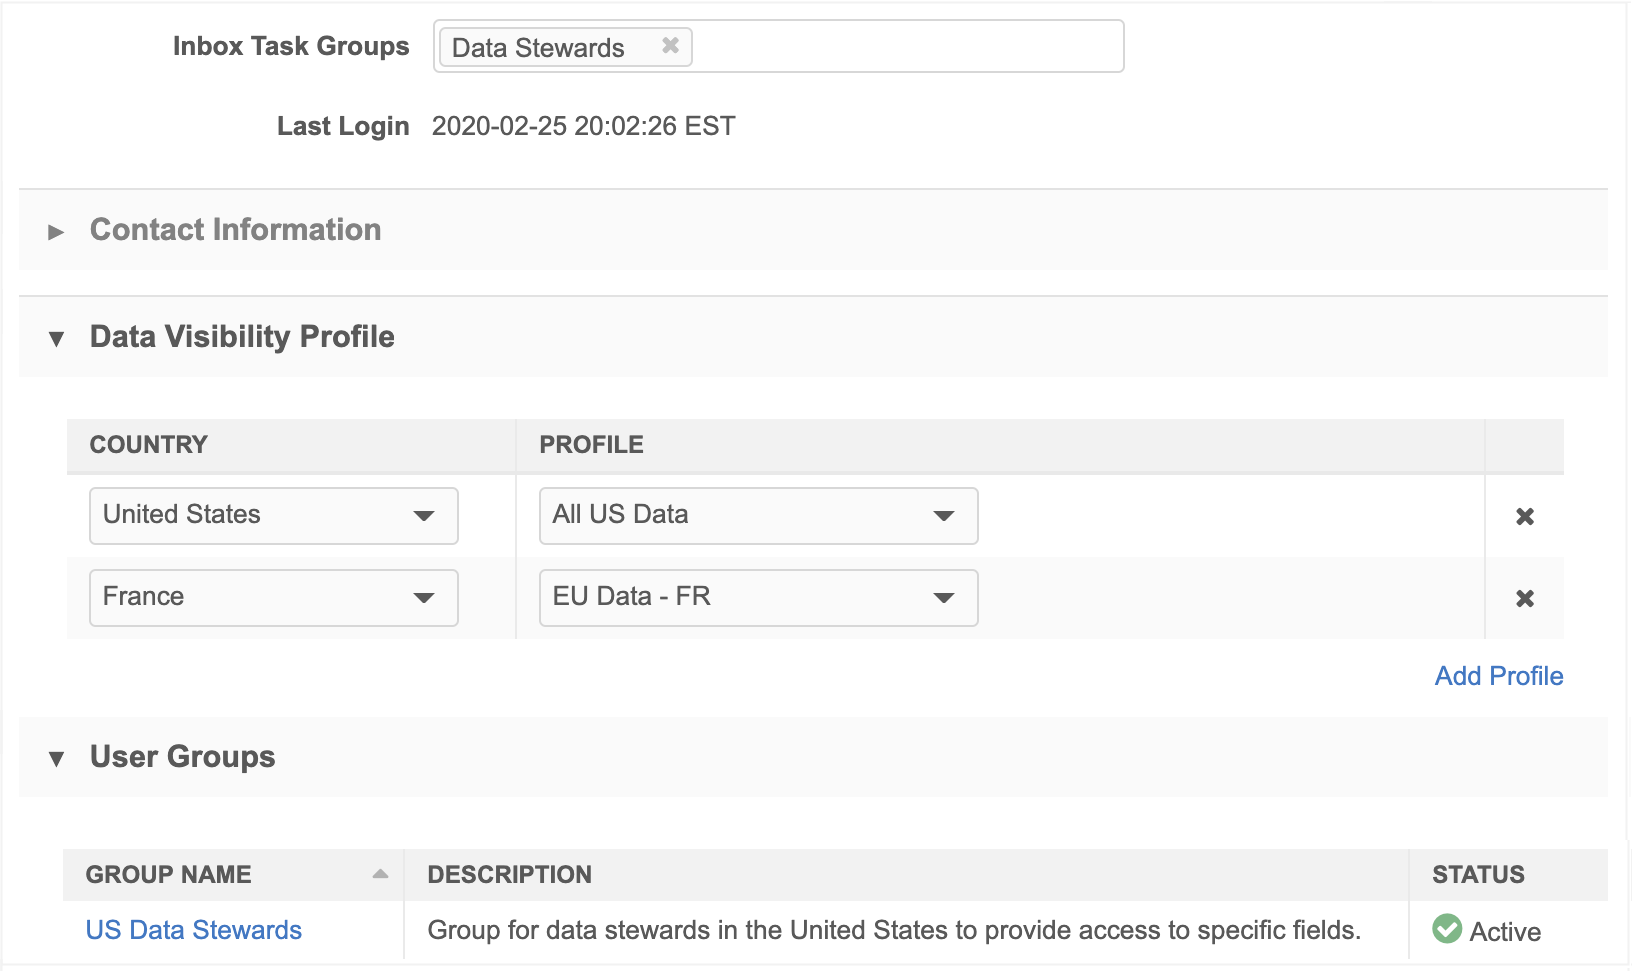
- Data Visibility Profiles - Add data visibility profiles for relevant countries and data sets.
- Data Updater - Merge Records permission - Change to Allow.
- FTP Access permission - Change to Allow or Allow Directory.
- SQL Query Editor permission - Change to Allow.
- Data Quality Report Access permission - Change to Allow.
Switching from an admin user type
When switching from an admin user to System and Data Admin type, you will likely have a number of groups and profiles to assign to the new user type.
Update the user profile to include all new groups and data visibility profiles:
- Inbox Task Group - Add relevant inbox task groups.
- User Groups - Add relevant user groups.
- Data Visibility Profiles - Add data visibility profiles for relevant countries and data sets.
Provisioning new instances
When a new Network instance is created, the user type that is created will now be a System and Data Admin. Previously, the provisioned user was a System Admin.
Welcome email
The new user welcome email now includes the user type and Network instance URL details. Previously, only the user name and temporary password were included in the email details.
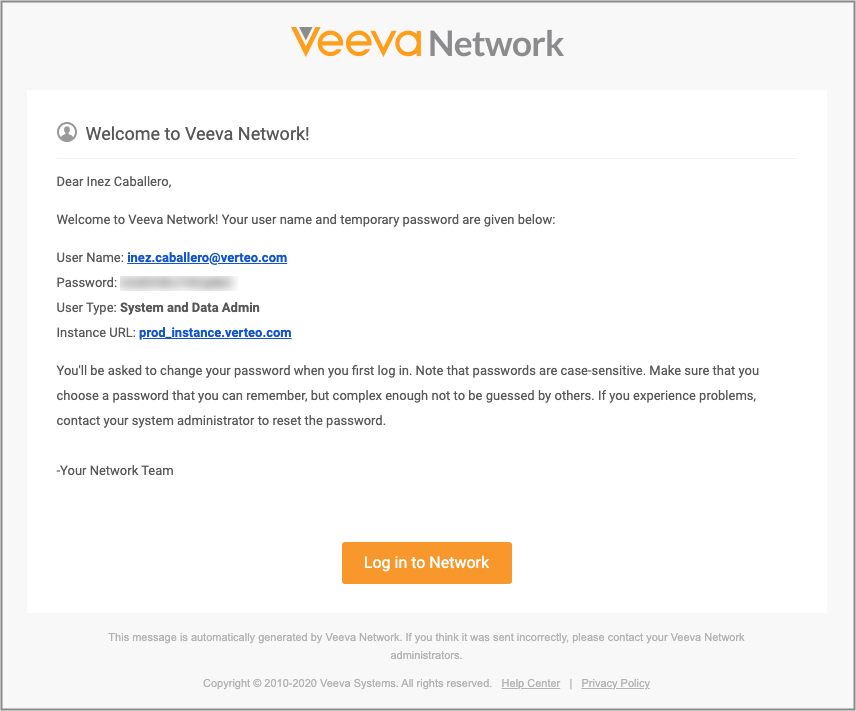
When administrators create new users, a welcome email is sent to the user if the Generate temporary password and notify user option is selected. Users can click Log In to Network to navigate to the instance's login page to change their temporary password.
This enhancement is enabled by default.