Updating and validating addresses manually
DS
New addresses are automatically validated in Network MDM when data stewards add and validate addresses on record profiles or override addresses directly in change requests.
Update an address in an add or change request
In change requests that include address changes, you can update and validate address information.
-
From the inbox, select a change request. The Change Request page opens.
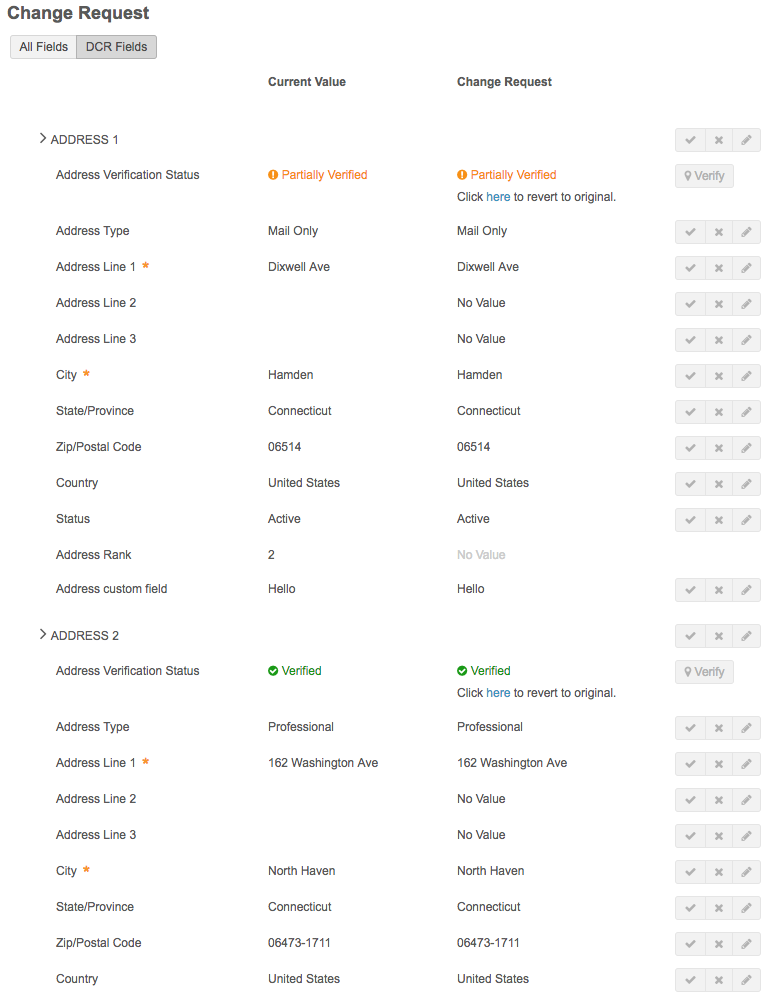
If the change request includes updates to one or more addresses, they appear in the request as editable. The status of the verification for each address appears in the Address Verification Status row.

Depending on your workflow settings (automatic address verification can be turned off by your administrator in the Workflow Settings), validation status will appear as one of the following:
Verified – A complete match was made from the available data.
Not Verified (address verification turned off or verification failed) - The address has not been automatically verified, or the verification process yielded no results. You can click the link under the status to verify the address manually.

Partially Verified - Parts of the address are valid. Some values (such as City or Zip/Postal Code) may be missing and are making full verification difficult. The address requires further details for full verification.
Ambiguous (Incomplete) – Multiple addresses might match the input. More detail may be required.
Unverified – Not enough information is available to verify the address, or the information provided is invalid.
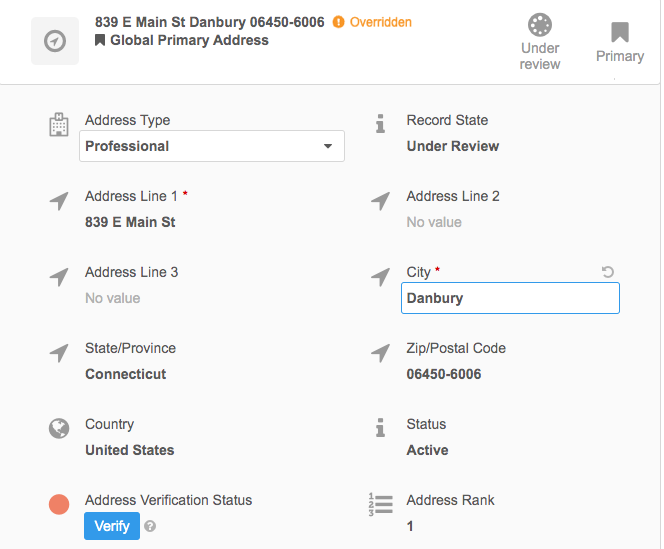
Data Steward Override – The address has been overridden by a data steward.
-
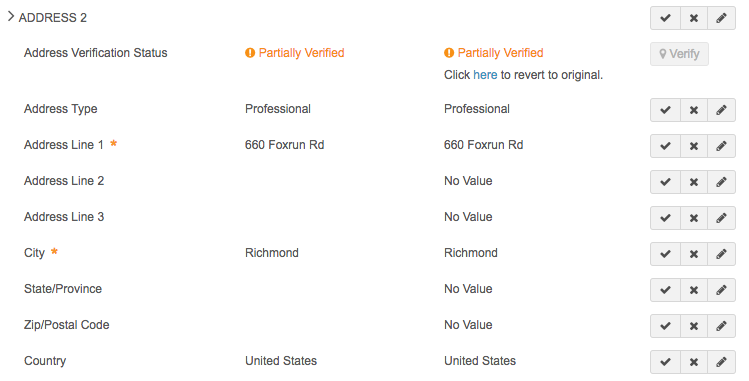
Click the Edit icon
 to the right of the address item you want to change.
 -
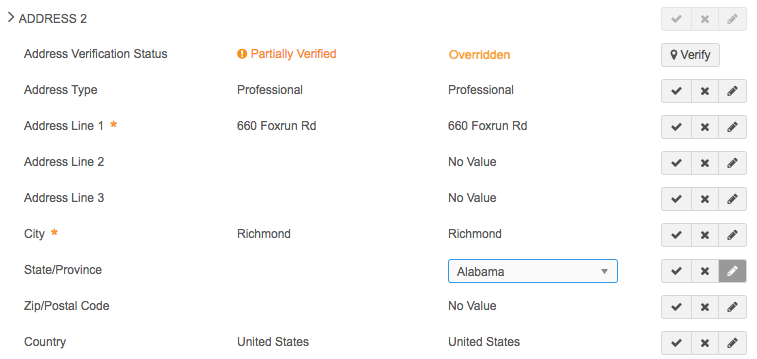
Type a new value for the item you selected. The verification status changes to Overridden.
- To verify the address, click Verify.
- An Address Verification dialog displays the value provided and the verified address.
Differences between the address provided and the verified address are highlighted in the dialog, and verification statuses are displayed at the bottom of each column. Fields that are sent to the address verification service as input are marked in bold. Click Show more fields to display additional fields. You can select the address you want to use at the top of each column. The Cleansed Address is selected by default.
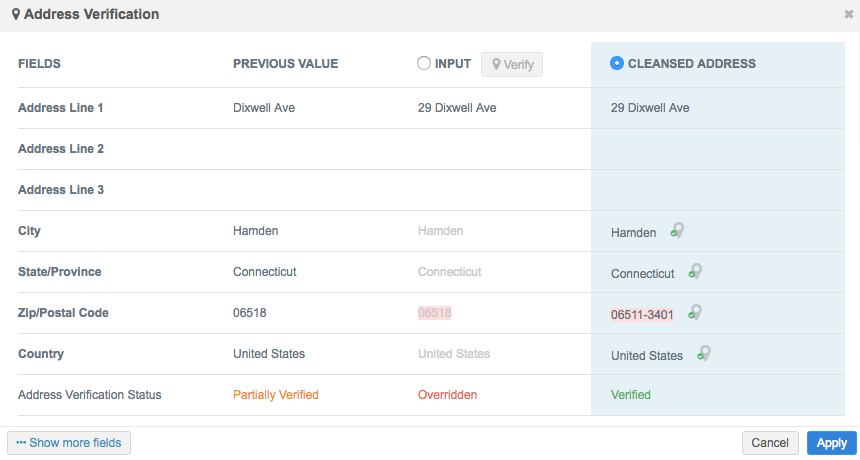
- Click Apply to select the address to update the DCR.
- To revert your changes to the original values in the change request, select Click here to revert to original.
- Approve the DCR.
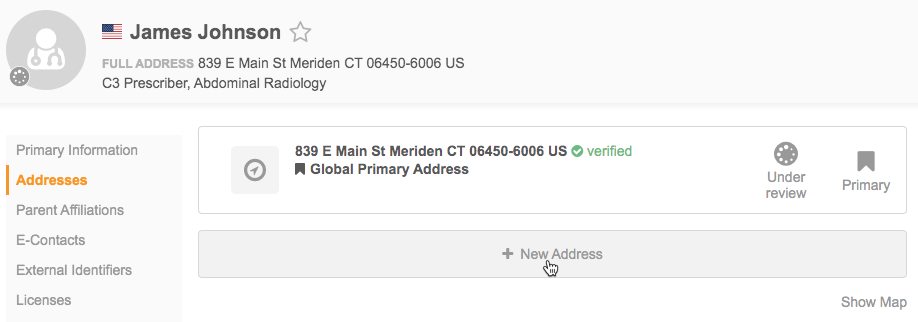
Add or update an address in an HCP or HCO profile
To add or edit an address on a record profile:
-
In a profile, add or edit an address:
- Add - In the Addresses section, click New Address to create a new address for the profile.
- Edit - Expand the Addresses section and begin updating address values.
Note: You can click the show inactive link to display inactive addresses and update them as you would an active address.
-
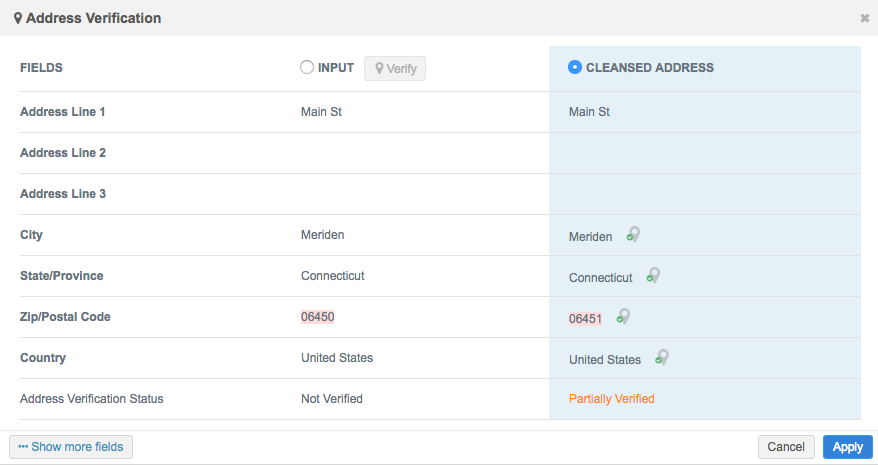
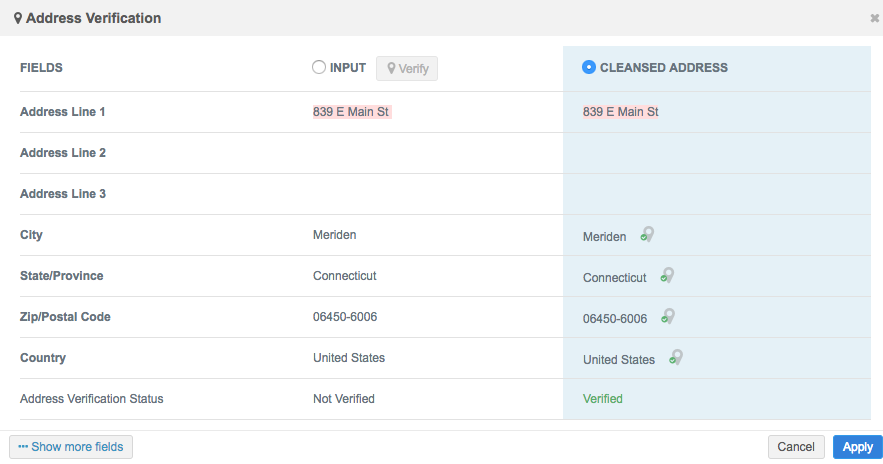
After you have updated the address values, click Verify at the bottom of the Addresses section.
- An Address Verification dialog displays the provided values and the verified address. Differences between the address provided (Input) and the verified (Cleansed) address are highlighted in the dialog. Verification statuses are displayed at the bottom of each column. Fields that are sent to the address verification service as input are marked in bold. Click Show more fields to display additional fields.
You can select the address you want to use at the top of each column. The Cleansed Address is selected by default.
-
If the address is unverified, partially verified, or incomplete, add more information to the address and click Apply.
Each time you update address information, the address verification changes to Overridden.
-
If at any time you want to revert the value of a field that you have updated, click the Undo icon
 to the right of the field to revert.
 - To save your changes, click Apply.
Note: Information under multiple address fields (for example, a suite number in the Address Line 2 field) may be appended to the first address field during address cleansing. As a result, the full address including suite number, would appear completely, in the first field.
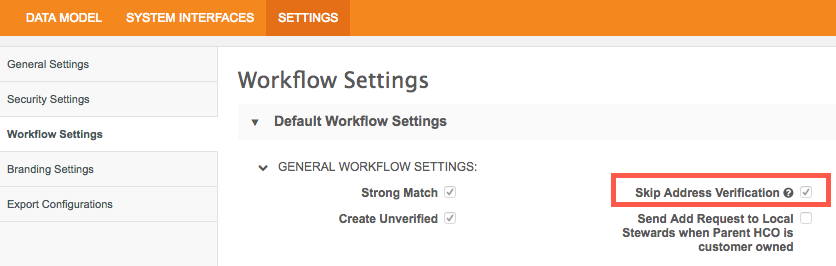
Skipping address verification
Address verification is enabled by default in Network MDM, but can be turned off completely, or for individual countries. An administrator must set these exceptions in the Workflow Settings, in the Admin console.
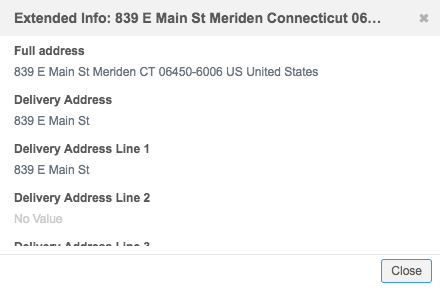
Viewing additional information
For existing addresses in a profile, the Extended Info button at the bottom right of the Addresses section displays values for additional address fields from the record source data.