Creating custom objects
DM
Custom objects can be created and edited only in your Network Sandbox instance. After the objects are enabled and tested, you can export them to your Production instance.
Prerequisite
Custom objects must belong to a data domain. You can add an object to an existing domain; for example, the default Customer Master domain. If you are creating objects for a new activity or area, create a new domain for the object.
Create a custom object
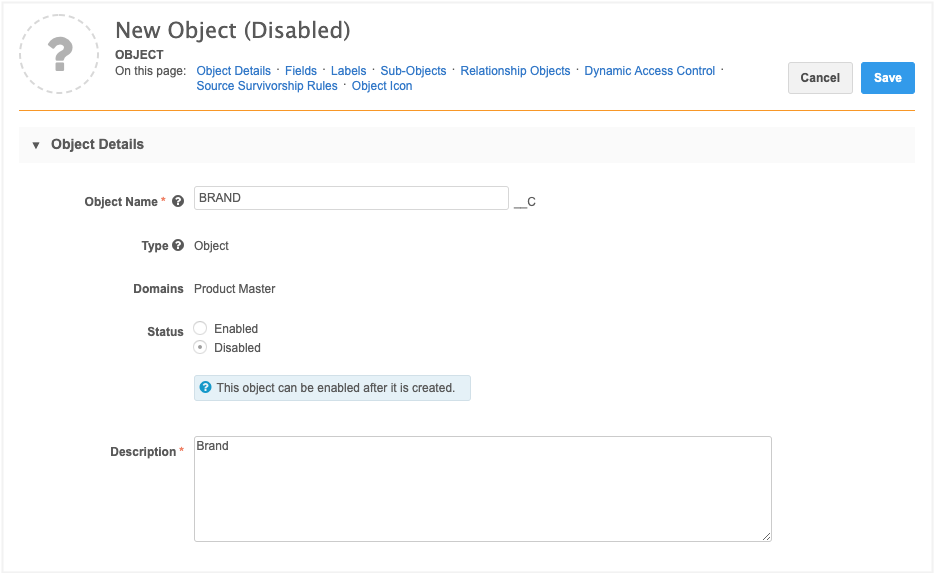
To create a custom main object:
- In your Sandbox instance, click Admin > Data Model.
-
Open a data domain and click Add Object.
If the button is dimmed, ensure that you are logged into your Sandbox instance.
-
In the Add Object to Domain dialog, choose Create a new object and select Object from the list.
If this is an empty domain, only the main Object type is available in the list.
The New Object page displays.
-
Object Details - Define the Object Name and Description.
Note: The Object Name cannot be edited after the object is saved.
The following details are read-only:
- Type - The object type that you chose in the Add Object to Domain dialog.
- Domains - The data domains that the object belongs to. New objects list the current domain. When you edit an existing object, any domains that it belongs to will display.
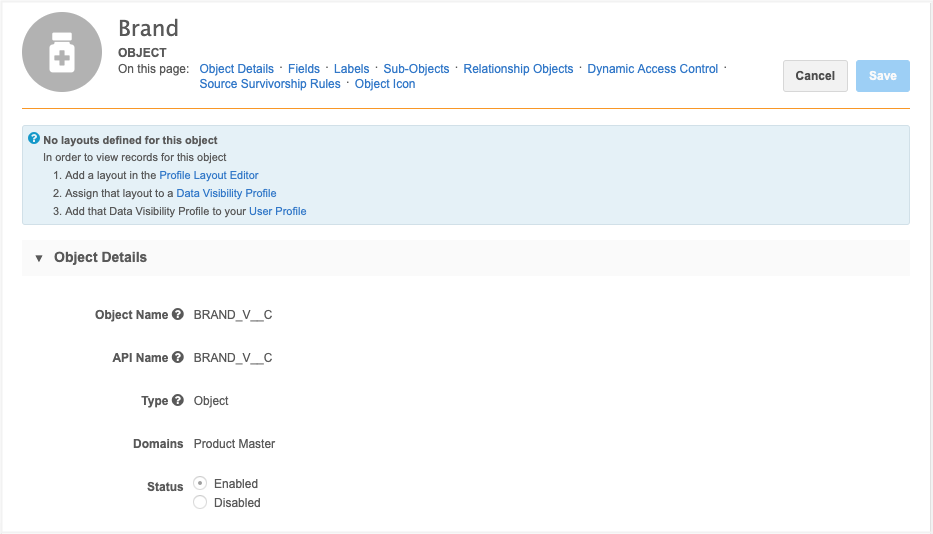
- Status - New custom objects are saved as Disabled. You can enable the object after it is saved.
- Fields - This section lists the default fields that are created for each custom object. After this object is saved, you can add custom fields.
-
Labels - Type the singular Label and Plural label that will be used for the custom object in the Network UI for all of the languages required.
The following special characters are not supported for labels: slash (/), asterisk (*), brackets ([]), backslash (\), colon (:), question mark (?).
-
Sub-Objects - Add existing sub-objects if required. Sub-objects from any domain can be selected.
After an object is created, a Custom Keys sub-object is automatically added to this section.
- Relationship Objects - This section is empty. When this object is added to a custom relationship object, the relationship object will display here.
- Dynamic Access Control - Click Enable Dynamic Access Control Rules if you want to restrict this custom object to specific users. When Dynamic Access Control is enabled on the object, users cannot access the object unless they are included in a rule. For more information, see Dynamic access control.
- Source Survivorship Rules - Define the priority of sources for the custom object.
- Object Icon - Choose the icon that will identify this object throughout the Network user interface.
-
Save the new custom object.
When the object is saved, it is automatically associated with the current domain. Custom objects are saved as disabled. You can enable the custom object when you are ready to use it.
In the following sections, configure the details for the object.
After you enable a custom object and save the changes, a reminder to create a profile layout displays.
For more information about the process of provisioning custom objects in your Network instance, see Getting started with custom objects.
Edit custom objects
After a custom object has been created, the following configuration details can be edited in your Sandbox instance or Production instance.
Changes can be made to the following details:
- Description
- Labels
- Source rankings
- Object icon
Updates can be made to fields and sub-objects:
- Add custom fields
-
Enable or disable editable fields
Fields that have a toggle
 in the Status column can be enabled or disabled. Fields that do not have a toggle are read-only.
 - Add sub-objects
Delete custom objects
If an object is created in error, or is no longer required, it can be deleted. For more information, see Removing custom objects.