Creating data domains
DM
Administrators and data managers can add a data domain to contain custom objects for a specific business purpose. Custom objects must be created in a domain, so when you add a new data model to your Network MDM instance, create the domain first and then create the custom objects.
Note: Data domains can be created in Network MDM Sandbox instances only.
Add a domain
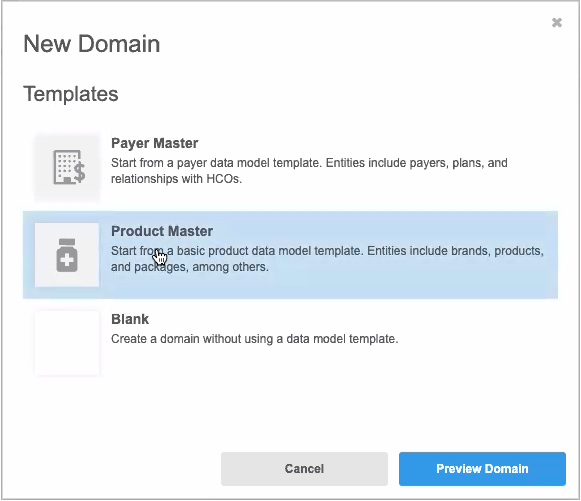
You can create a blank domain or use one of the following domain templates:
-
Payer Master
Use a domain template
To add a data domain using a template:
- In the Admin console, click Data Model.
- The Data Domains page opens by default. Click New Domain.
-
In the New Domain dialog, select an available template: Product Master or Payer Master. If the template is already used, it is dimmed and cannot be selected.
When you have selected an option, click Preview Domain.
-
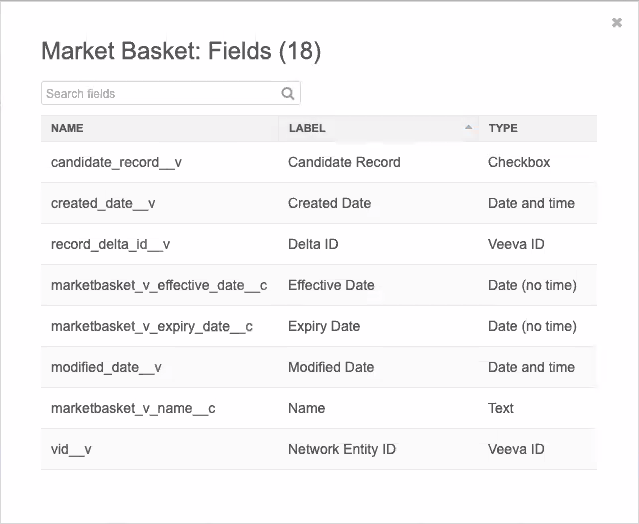
The Preview Template tab displays the ERD of the data model. Click any of the field links to preview the fields that will be added for each object.
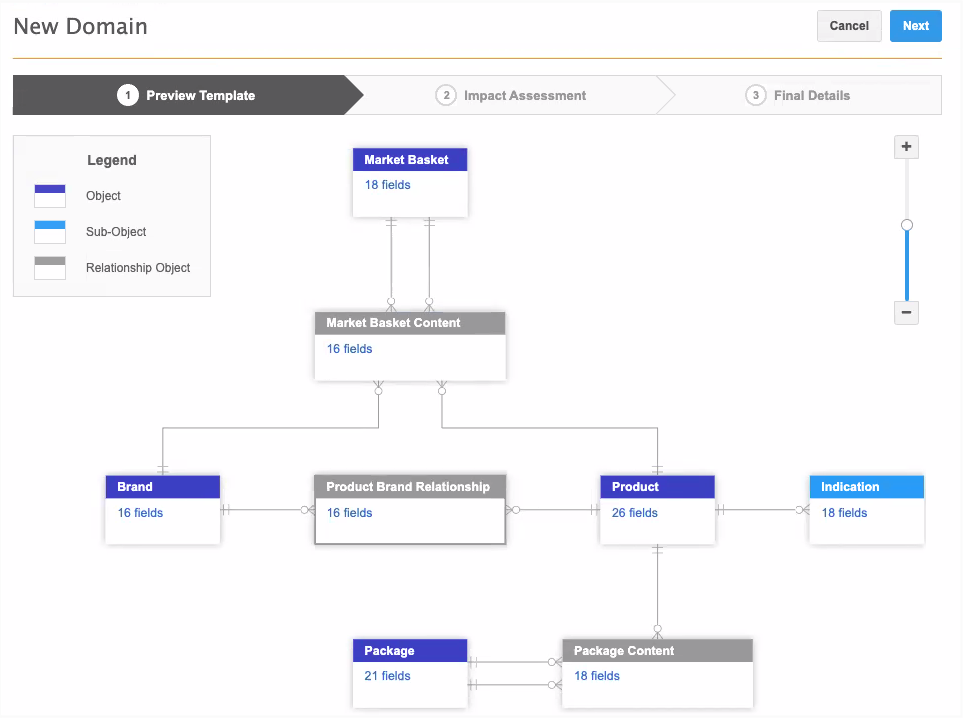
Note: The Payer Master template includes the HCO object and address object. These objects already exist in your Network MDM instance (in the Customer Master domain) so they will not be created, but they display in the ERD for completeness.
-
On the Impact Assessment tab, review the objects and reference types that will be added to your Network MDM instance when the template is applied.
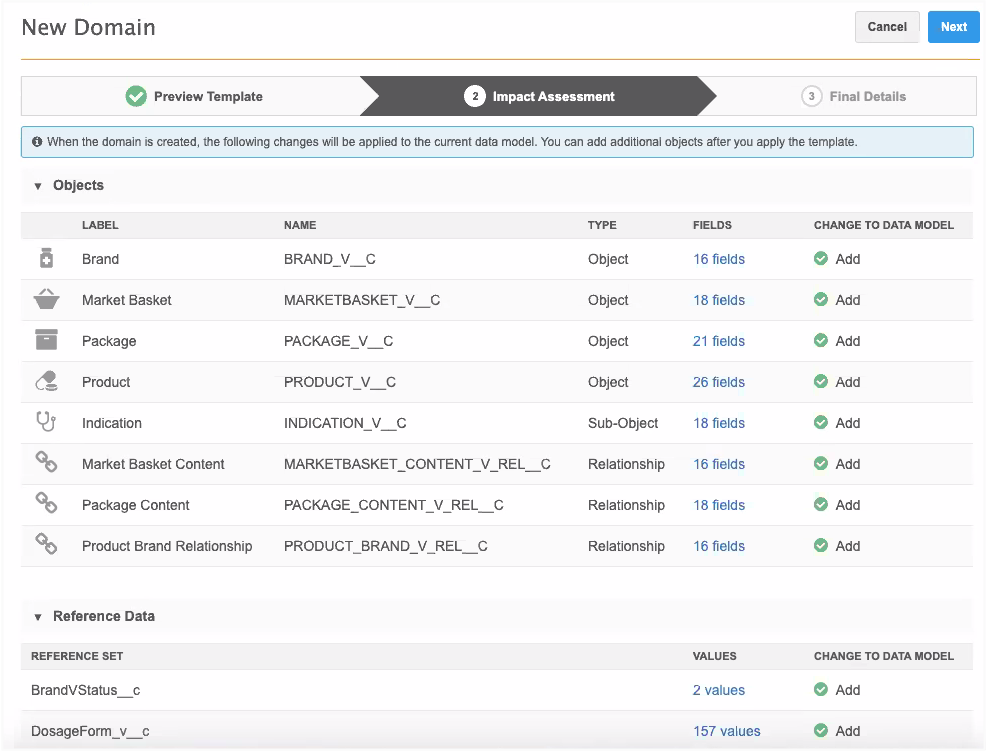
Object names are created under a Veeva namespace using the
_V__Csuffix to ensure that there are no name conflicts with existing objects. Avoid creating any custom object names under the namespace that is reserved for Veeva custom domain templates. If you previously created an object with the same name as an object in the template, a warning message displays in the Change to Data Model column. The template cannot be applied when there is a name conflict. Contact Veeva Support to resolve the issue.-
Click the links in the Fields columns to preview the fields that will be added for each object.
- In the Reference Data section, click the links in the Values columns to see the values created for the reference data. Some reference sets are created without any reference values so you can add the values that are relevant to your business.
-
- Click Next.
-
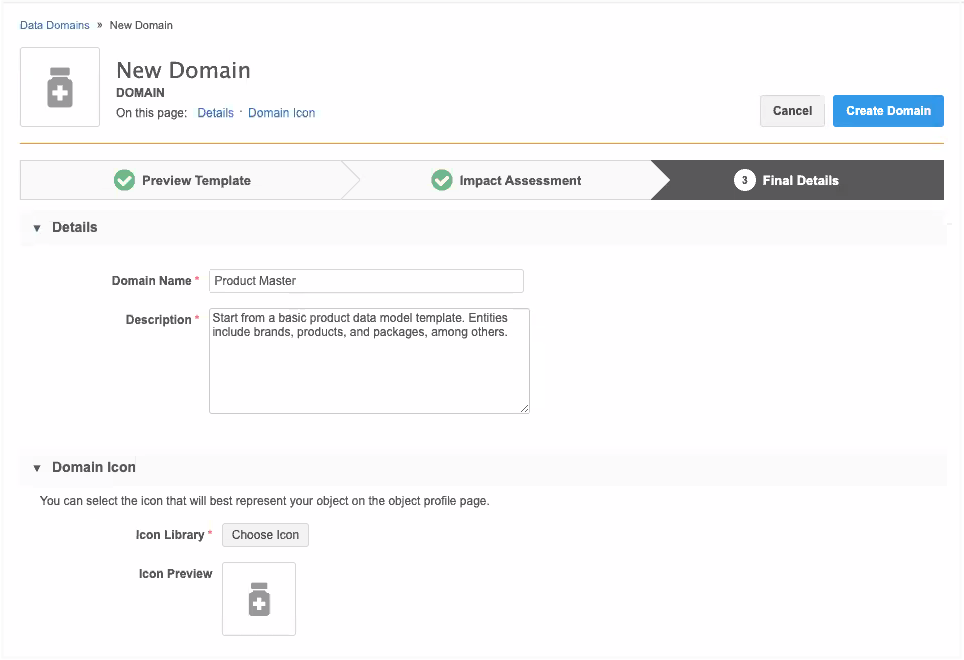
On the Final Details tab, you can customize the data domain by overriding the domain name and description. You can also choose a different icon.
The Name and Description use the defaults from the template in your defined language.
-
Click Create Domain. In the confirmation pop-up, confirm that you want to create the domain.
-
On the Data Domains page, you can view the progress of the data domain. The template is a configuration package that is imported into your Network MDM instance.
When the domain is created, data model entities (objects, fields, reference types) will be added to your Network MDM instance; these entities will be locally managed and maintained. All of the objects will be enabled by default. Administrators do not need to enable each object.
Create a domain without using a template
To add a domain and create your own data model:
- In the Admin console, click Data Model > Data Domains.
- Click New Domain.
-
In the New Domain dialog, choose Blank to create a domain without a template. Click Preview Domain.
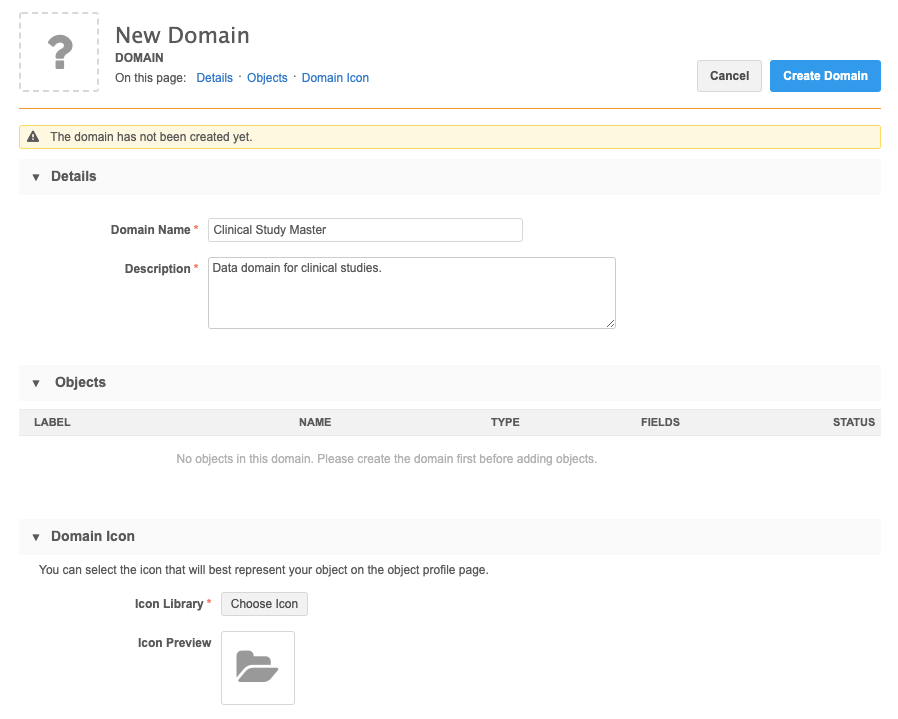
The New Domain page opens.
- Define a Domain Name and Description. For example, you might create a domain for clinical study objects.
- The Objects section for new domains is empty. You can add objects after the data domain is saved.
- In the Domain Icon section, click Choose Icon to select the icon that will be associated with the domain.
- Click Create Domain to save the domain to your Sandbox instance.
Updating data domains
Custom domain configurations can be changed in Sandbox and Production instances. You can rename the domain, update the description or change the icon.
The Customer Master domain cannot be changed; it is read-only.
Delete data domains
A data domain can be deleted if it does not contain objects.
-
On the domain configuration page, click Delete Domain. In the pop-up, confirm the deletion.
The Delete Domain button is dimmed if the domain contains objects. Remove the objects to delete the domain.
When the domain is deleted, the Data Domains page opens.
If you deleted a domain created with the Payer Master or Product Master template, you can create a domain with that template again.
Adding objects to domains
Administrators can add existing objects to domains or create a new custom object for the domain.
Note: Creating new custom objects is supported only in Sandbox instances.
To add objects to a data domain:
- In the Admin console, click Data Model.
- Open a data domain.
- In the Objects section, click + Add Object.
-
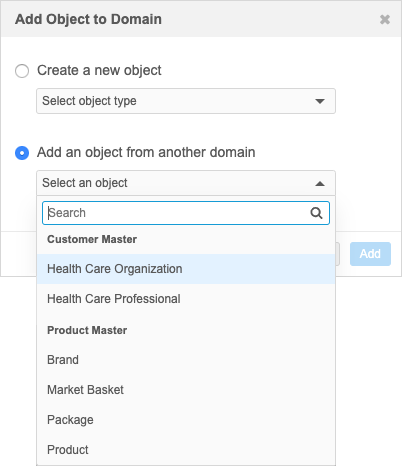
In the Add Object to Domain dialog, choose one of these options:
-
Create a new object - Create a new custom object to add to this domain. If this is a new domain, a main object must be added first, so the Sub-object and Relationship objects are dimmed.
Custom objects can be created by administrators in Sandbox instances. For detailed information, see Creating new objects.
-
Add an object from another domain - Select an existing object from another domain to add it to the current domain. If there is only one domain in your Network instance, this option is not available.
Only main objects can be added from another domain. Sub-objects and relationship objects are automatically included in the domain by their association with the main object. A relationship object becomes associated with a domain if the owning main object belongs to the domain.
-
- To save your changes, click Update Domain. When the domain is saved, the object is added to the domain.
Domain association for objects
Objects must belong to a data domain. When you create an object, update an object, or add an existing object to a domain, the domain association follows these rules:
- Main objects bring their related sub-objects to the domain.
- Sub-objects do not bring their related main objects to the domain.
- Relationships are associated with the domains of the owning object.
Export the data model
The data model can be exported locally as a Microsoft Excel® file.
To export, select a data domain and click Export Data Model. The data model downloads with the following naming convention "Data Domain as of <date>.xlsx".
Export data domains to Production instances
To move data domains and custom objects from your Sandbox instance to your Production environment, export the configurations using Network MDM's Configuration Management feature.
When a data domain or a custom object is created, it is assigned a unique and static code. If the domain is renamed, the code does not change. The code is used when you import the configuration to your production instance to match against existing domains or objects.
Creating an export package
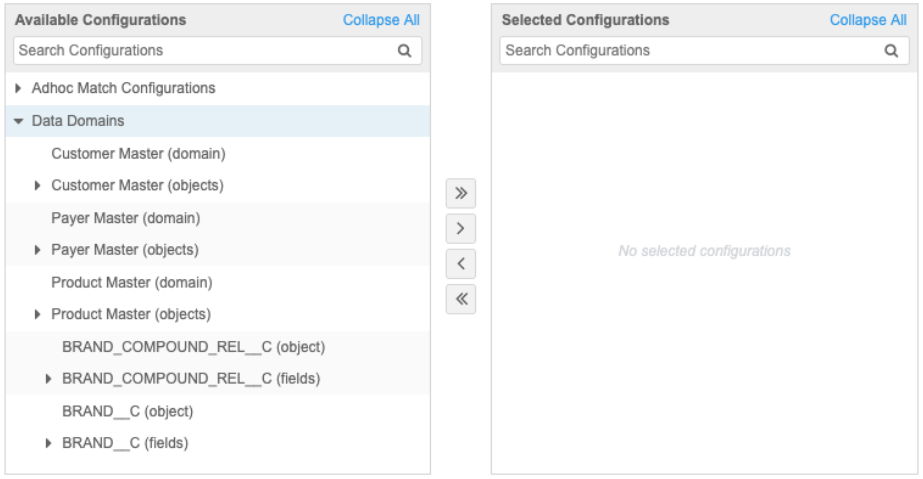
When you are creating an export package (Settings > Configuration Export), the data domains in your Network MDM instance are located in the Data Domains node.
The Available Configurations pane contains two main items for each domain:
- Domain configuration - The data domain itself; for example, Product Master (domain). Moving this item into the Selected Configurations pane moves the domain itself. A domain can exist without any data model objects.
-
Domain objects - All of the objects in a data domain; for example, Product Master (objects). Moving this item into the Selected Configurations pane moves the domain and all of the dependent objects.
You can also export individual objects in your package. When you add individual objects to your export package, the following dependencies are added:
- Main object - The data domain is added; an object cannot exist without a data domain.
- Sub-object - Main objects are added.
- Relationship object - Main objects are added.
Other dependencies for custom objects might need to be manually added. For more information, see Custom object dependencies.
After you have created the package on your Sandbox instance, you can import it to your Production instance.