Step 2: Create an Affiliation widget
Create the widget in your Network instance. This includes creating a Search widget so users can add accounts to the Influence Map.
Create the Search widget
To populate the Affiliation widget and allow users to add accounts, a Search widget is required. The Search widget is used to check for existing accounts and provide the option to create a new account.
For more information, see the Configure a search widget.
Create the widget
Now that the fields and data are prepared and available, create and customize the Affiliation widget for your internal application. When you save the configuration, Network generates the code that web developers will use to embed the widget in your application.
-
In the Admin console, click Widgets & Portal.
The Network Widgets page displays a list of widgets that are configured in your Network instance.
- Click Add Network Widget.
- In the New Network Widget dialog, select Affiliation Widget. Click Create Widget.
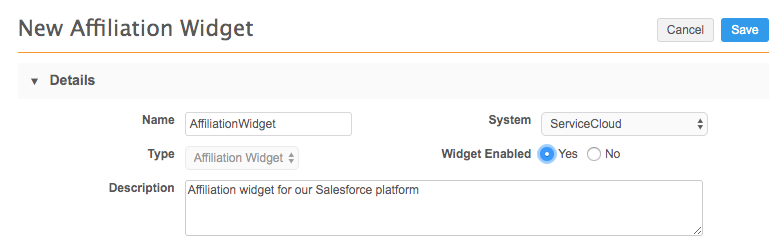
Details section
Define the following information in the Details section:
- Name and Description.
-
System - Select a source system.
- Type - This list is read-only. It specifies Affiliation Widget by default.
- Widget Enabled- Choose Yes.
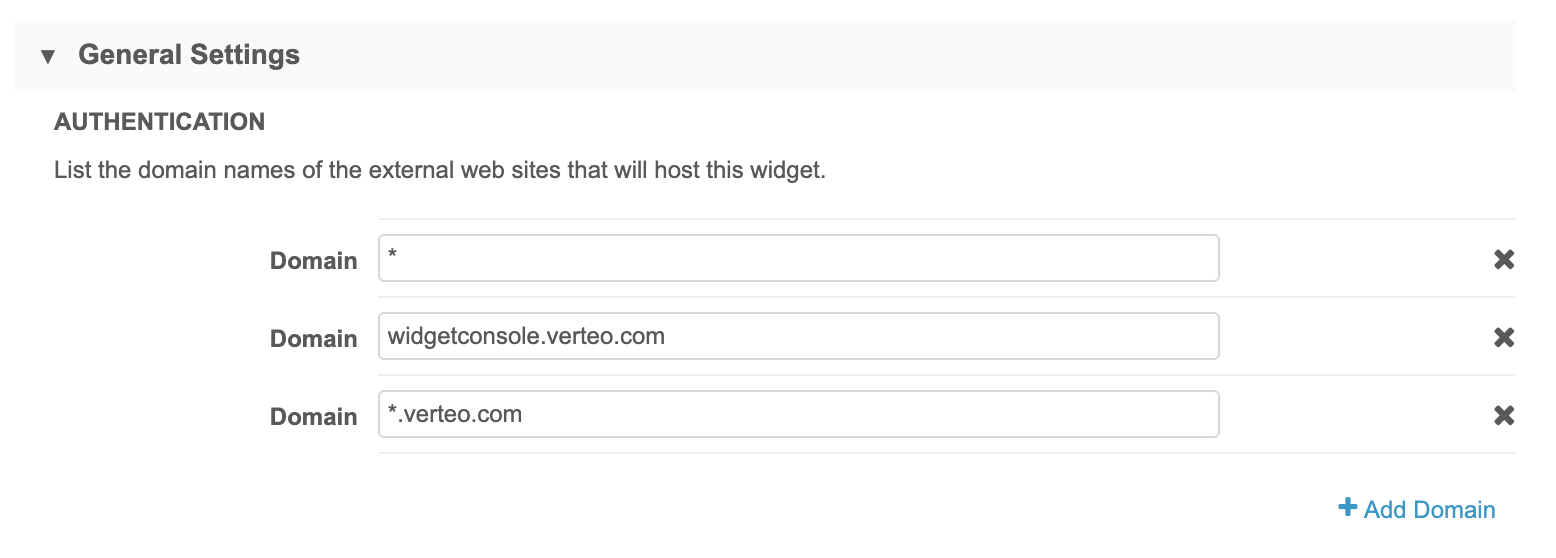
General Settings
The General Settings section contains options for customizing the widget.
-
Authentication - Type the domain name for the internal website that will host the widget.
Multiple domain names can be added. Wildcards are supported in case the domain changes and to support multiple domains.
Click +Add Domain to specify additional domains.
Examples
-
Network Portal - If you are embedding the widget into the Network portal, use *.veevanetwork.com or your instance URL; for example, verteo.veevanetwork.com.
-
Salesforce - If you are embedding the widget into a Salesforce Visualforce™ page, use *.visual.force.com.
Hosting website requirements
Widget type Details Production widgets For security, the hosting website must use the HTTPS protocol. If the website does not use HTTPS, the widget cannot be accessed. Sandbox widgets These widgets can be hosted on websites that use the HTTP or HTTPS protocol.
Allowing HTTP for sandbox provides flexibility to developers to test the widgets on a local host server.Note: If developers are implementing the widgets using a local host server, add an asterisk (*) to the domain list in the widget.
-
- Languages - Define the languages that should display in your affiliation widget. English is defined by default. Click +Add Language to specify additional languages.
-
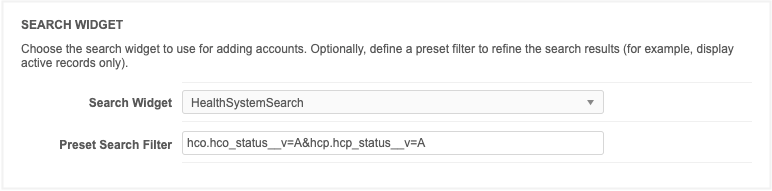
Search Widget - Choose the Search widget that will be used to add accounts to a health system.
Preset Search Filter - (Optional) Define conditions to filter the records that users can access through the Search widget to add to the health system. Multiple filters are supported; use the ampersand (&) to separate each filter. Only reference fields can be used to filter records.
Tip: Define a preset filter to display and be able to add active HCPs and HCOs only : hco.hco_status__v=A&hcp.hcp_status__v=A.
-
Add Text to Canvas - Choose to allow users to annotate the canvas by adding text. The Add Text setting is enabled by default.

If the setting is not enabled, the Add Text tool does not display on the Edit Canvas toolbar in the widget.

If you turn off the Add Text setting, any current text remains on the influence map but users will no longer be able to add text.
-
Hashtags - Hashtags display by default on affiliations on the influence map canvas. To customize hashtags, click the Hashtags link.
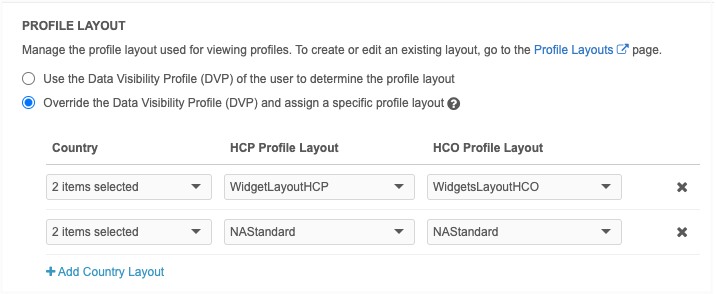
- Profile Layout - Determine which layout to use for viewing profiles.
Typically, the layouts assigned to the user's data visibility profile contain all of the fields in the Network data model. You can override this default behavior and assign specific profile layouts for each country to the widget. For example, you can use custom profile layouts to standardize the widget so all widget users see the same fields or to limit the number of fields so widget users only see the essential fields.
Choose one of the following options:
Use the DVP of the user - Typically, the layouts assigned to the DVP contain all of the fields in the Network data model.
Override the DVP and assign a specific profile layout - Use custom profile layouts to standardize the widget so all widget users see the same fields or to limit the number of fields so widget users only see the essential fields.
If you choose this option, define the Country and profile layouts for HCPs and HCOs.
Tip: You can configure field and object settings on custom profile layouts to simplify add and change requests submitted through Network widgets. For details, see Widget profile layouts.

Therapeutic Areas & Products
Define the Therapeutic Areas and Product for your widget. Users will use these options to filter the canvas to find affiliations for specific diseases and products.
The values in these lists are the reference codes that you created for these fields in the Account_Link object. If the lists are empty, you must load the reference data.
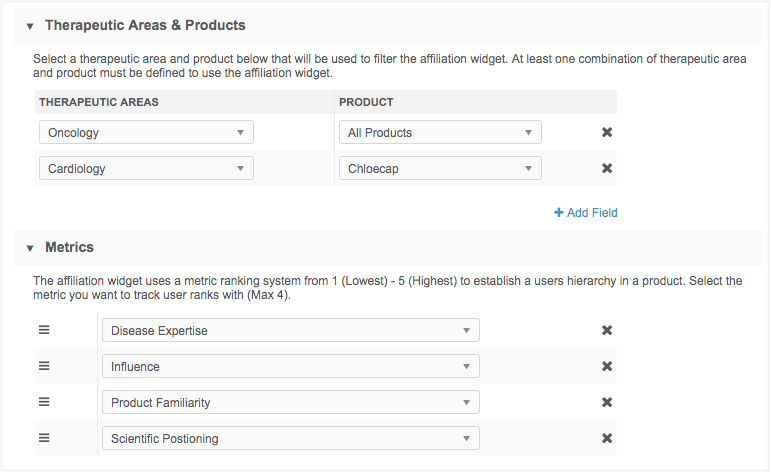
Metrics
In the Metrics section, add a maximum of four metrics. These are the metric fields that you created for the Account_Link object. Use the handle ![]() to reorder the metrics depending on how you want them to display in the widget.
to reorder the metrics depending on how you want them to display in the widget.
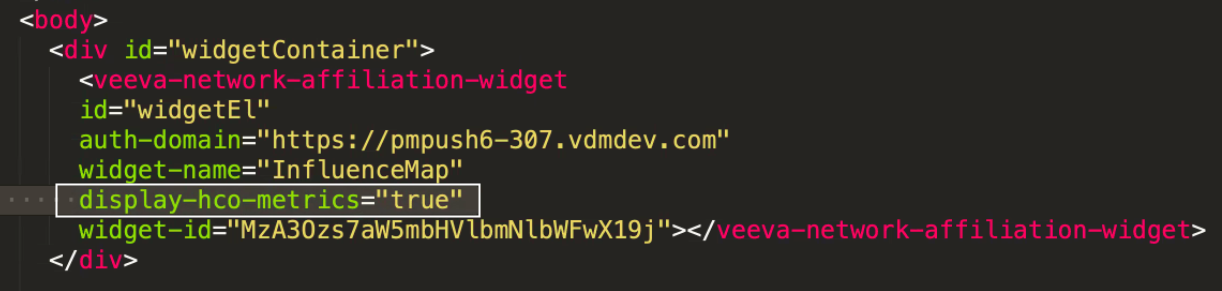
HCO metrics
HCP metrics display by default in your Affiliation widget. To display HCO metrics, the following code must be added to the widget code that was automatically generated by Network.
display-hco-metrics = "true"
This code was added to the <body> of your internal application.
Example
Parent HCO relationships
In the Define Fields to be Populated for ParentHCO Relationships, choose the custom fields that you want users to complete when they add or edit a relationship. There is no limit to the number of fields that you can add. Complete for both relationship types (HCO to HCO and HCP to HCO).
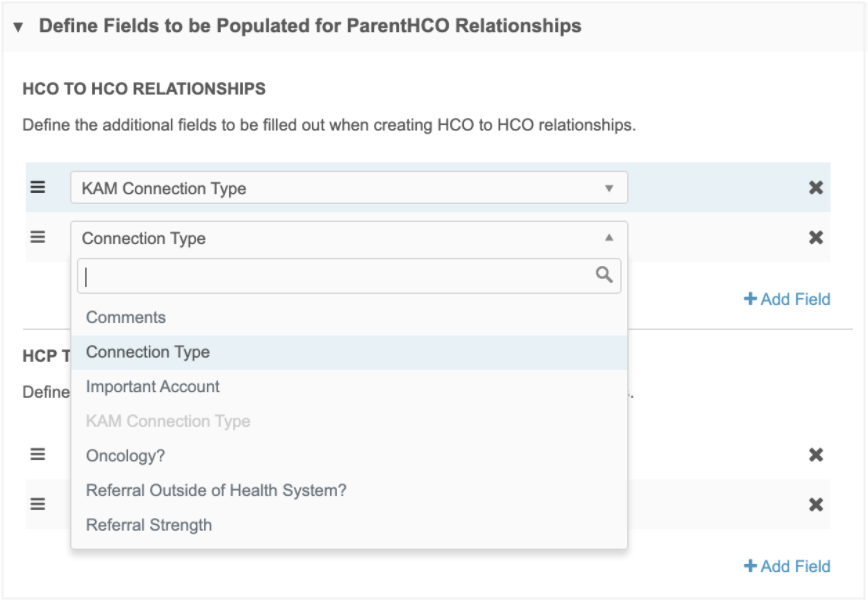
The fields must be custom fields so the changes can be auto-approved.
The following types are supported:
-
Reference - The reference values that display in the widget will be filtered based on the HCP's country.
-
Boolean Checkbox
-
Text
-
Integer / Number
Primary fields and system fields are not supported.
When users add or edit HCP-HCO or HCO-HCO relationships in the Affiliation widget, the fields display so users can add details.
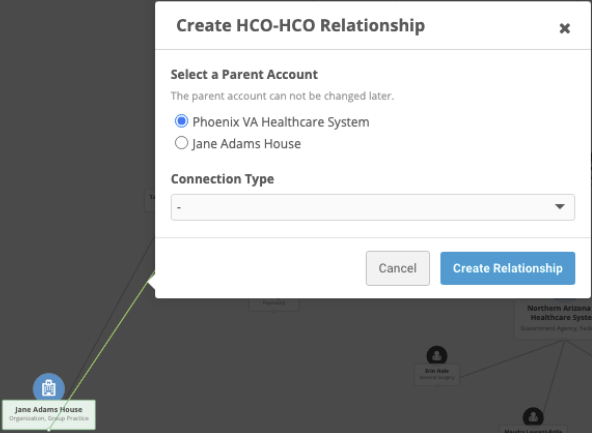
When HCO-HCO relationships are created, the Select a Parent Account setting is automatically added to the dialog.
In the widget, when users click Create Relationship, a data change request (DCR) is submitted with the additional fields. The relationship is automatically approved as a local relationship; the DCR is not routed to Veeva OpenData.
Fields display if the following criteria is met:
-
The field is enabled
-
It is available for the HCP/HCO's country. When you create an HCO-HCO relationship, the fields must be available for both countries.
-
The field is not read-only.
-
The field is not a restricted field for the user.
If no fields display, users can define the parent account and create the relationship.
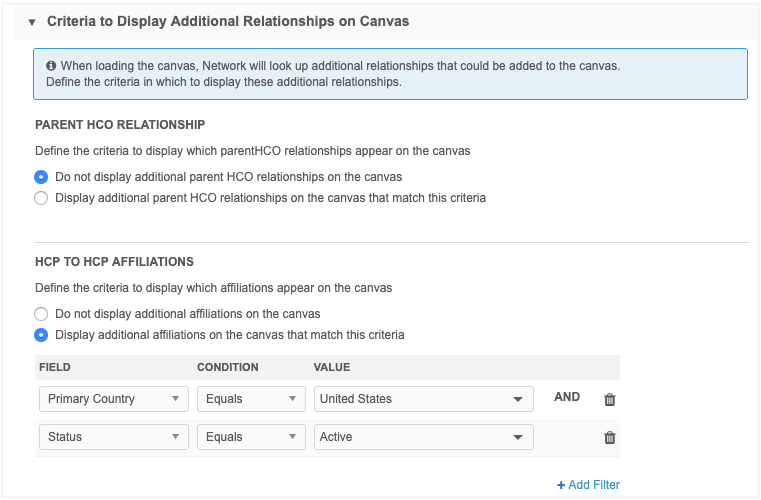
Display Additional Relationships
Use the Criteria to Display Additional Relationships on Canvas section to determine if the widget displays additional relationships and affiliations when they are loaded into your Network instance. This setting ensures that you have control over the health care system's canvas.
Choose one of the options for parent HCO and HCP to HCP affiliations:
-
Do not display additional relationships on the canvas - No relationships/affiliations will be added to the canvas automatically.
-
Display additional parentHCO relationships on the canvas that match this criteria - Define the condition for allowing relationships/affiliations to display. Any reference type fields can be used to filter the relationships/ affiliations that are added.
Tip: Filtering the relationships and affiliations that are added is useful in the early stages of populating your widget, as the Influence Maps evolve through data loads from particular sources. After the Influence Maps are available to widget users, you might choose the Do not display additional parentHCO relationships on the canvas setting to ensure that users have full control over the canvas.
Denote Health Care System
In the Denote Health Care System section, choose the custom field that you created to identify a health care system . The list contains all enabled custom checkbox fields on the HCO object.
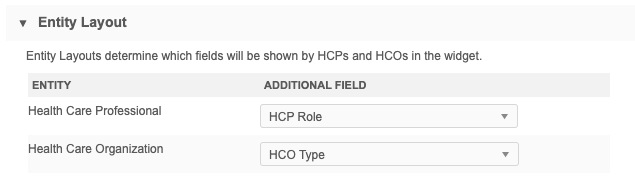
Entity Layout
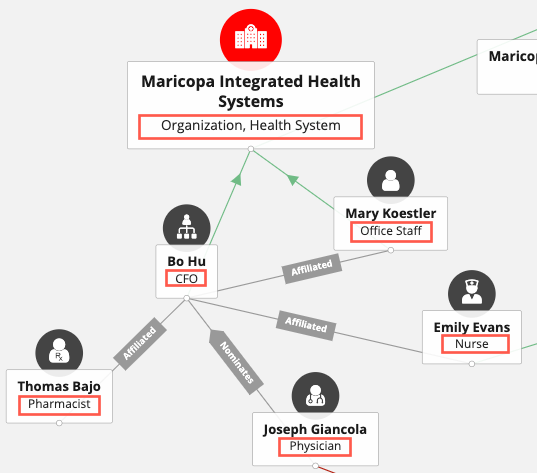
The Entity Layout determines the label that displays below the HCP or HCO name in the Affiliation widget. Chose a field from the list.
Example
You might use a custom field called HCP Role to differentiate professionals. The reference codes that apply to the record display as the label.
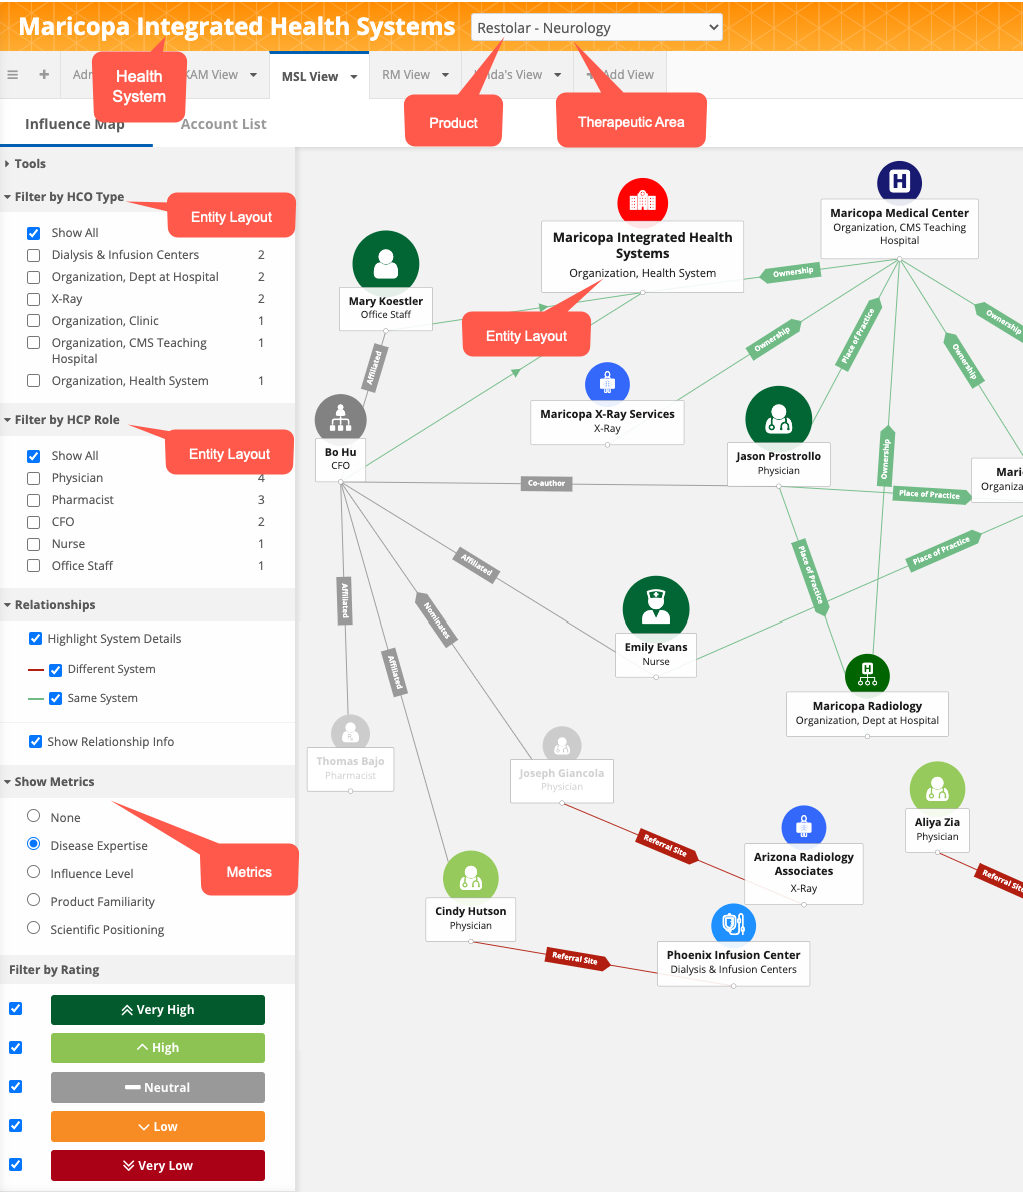
This setting also determines the filters that are available for HCPs and HCOs on the Influence Map canvas. If custom branding hasn't been applied, the fields that you choose for the Entity Layout are used as the entity filters.
The settings that you define in the widget configuration map to the following areas on the view.
Branding
In the Branding section, customize the style of the widget.
-
Widget header- Choose whether your widget should display a header.
By default, a header is not included so the widget displays seamlessly into your internal portal. If you include a header, you can add a custom logo and title.
-
Images - If you choose to include a header, upload a logo to add to the widget.
Image files in .JPG and .PNG formats are supported. The image name cannot contain spaces. The image file will be automatically resized to fit in the appropriate space. The maximum height and width is 24px by 24px.
The uploaded image displays in the Preview section.
- Fonts - Choose the font family to be used in the widget. By default, Open Sans is selected.
- Colors - Customize the colors for your widget.
- Link Color - Used for all links. Default, #3A78BB
- Icon Color - Used inside the HCP and HCO icons. Default, #FFFFFF
- HCP Icon Color - The default icon color for HCPs when a metric is not selected. Default, #444444
- HCO Icon Color - The default icon color for HCOs when a metric is not selected. Default, #005FB1
Labels
In the Labels section, define the following options:
-
Widget Title -The languages that you defined for the widget are listed. If you chose to have a widget header, type the Widget Title label for each language.
By default, the title is Network Affiliation. It can be a maximum of 80 characters.
- Health Care System - If your company uses a different term to refer to health care systems, define that term here so it is used in the affiliation widget.
Save changes
Save your changes.
The widget configuration is complete. Saving the widget generates the code that web developers will use to embed the affiliation widget in your application.
Note: Generate the code any time you make changes to the widget configuration.
Data components
If you want data components to display so users can access report data or external information about the record in the widget, add the widget to the data component configuration (Widgets & Portal > Data Components).
For details, see Data components.