Managing users
Administrators can manage the users that have access to the Network MDM instance. User profiles contain information about the user and defines the data visibility profiles and inbox task groups that users are assigned to.
Add or edit a user profile
After you create a user profile, an email notification is sent to the user with a welcome message and instructions on setting their password.
-
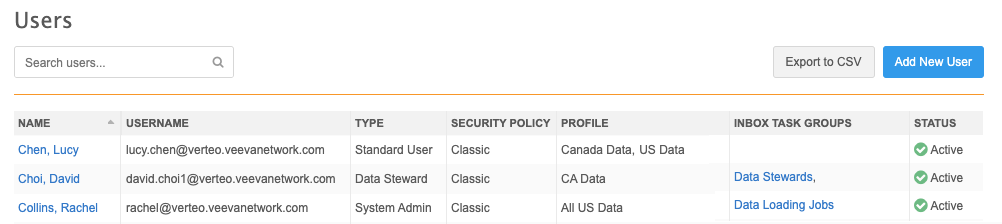
In the Admin console, click Users & Permissions > Users.
The Users page displays the list of existing users.
-
To create a new user, click Add New User. To edit an existing profile, click the user's name in the list.
For new users, the Add New User page displays. For editing existing users, the user's profile page displays.
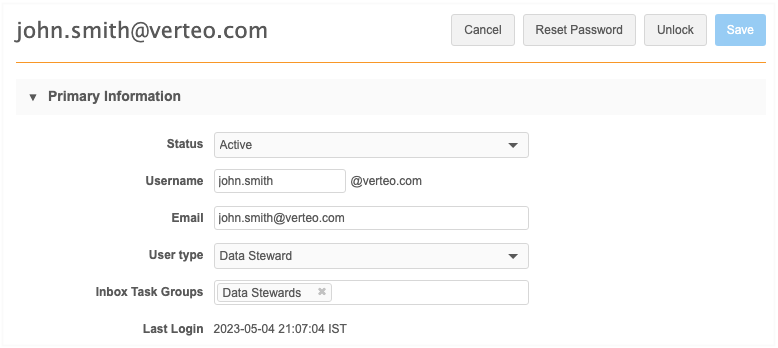
Example - Existing user page
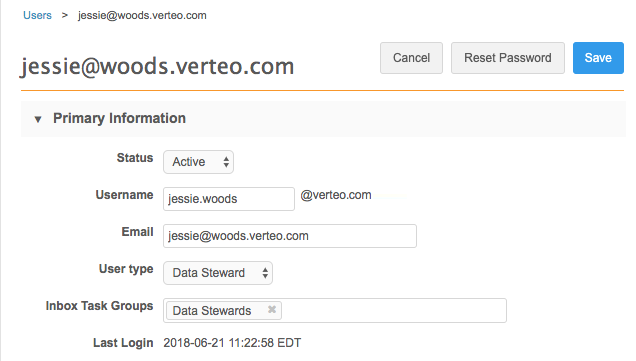
Primary information
In this section, define the basic information of the user.
-
In the Status list, specify whether the user is active or inactive.
Only active users can log into the Network MDM instance.
-
In the Username field, type the user name that this user will log into the instance with.
Considerations for user names:
- Supported: Letters (Latin alphabet), numbers, and the following special characters: !#$%&'*+-/=?^_` {|}.
- Restrictions: Names cannot start or end with a period (.) . Also, a period cannot be followed by another period within the user name.
This field is required for Portal Users but will not be used by the user.
-
In the Email field, type the user's email address. Network MDM notifications will be sent to this address.
-
Choose the User type from the list. The user types are listed alphabetically.
User Type Details Data Manager Users can perform all Data Steward tasks, as well as some administrative system interface and data model tasks. This user cannot manage users, configure , access audit logs, or manage administrative settings. Data Steward Users can manage add requests, change requests, and suspect match tasks from the inbox and has record management capabilities on the profile page. Integration User Users cannot access the Network MDM user interface and are intended for developers using the Network MDM API or for third party data vendors that need access to specific folders on the FTP server. For more information about the Network MDM API, see http://developer.veevanetwork.com/. Portal User Users that have access only to the Network Portal. These users cannot access the Network MDM UI. Standard User Users can search, view, and add records. They can also use the Network Explorer. System Admin Users can access all Network MDM UI pages, including system configuration, user management, and the inbox. This user cannot manage data change requests and does not have access to Data Steward capabilities on the profile page. System and Data Admin Users that have the combined access and capabilities of Data Stewards and System Admins. This user is created by default when new Network MDM instances are deployed. 
-
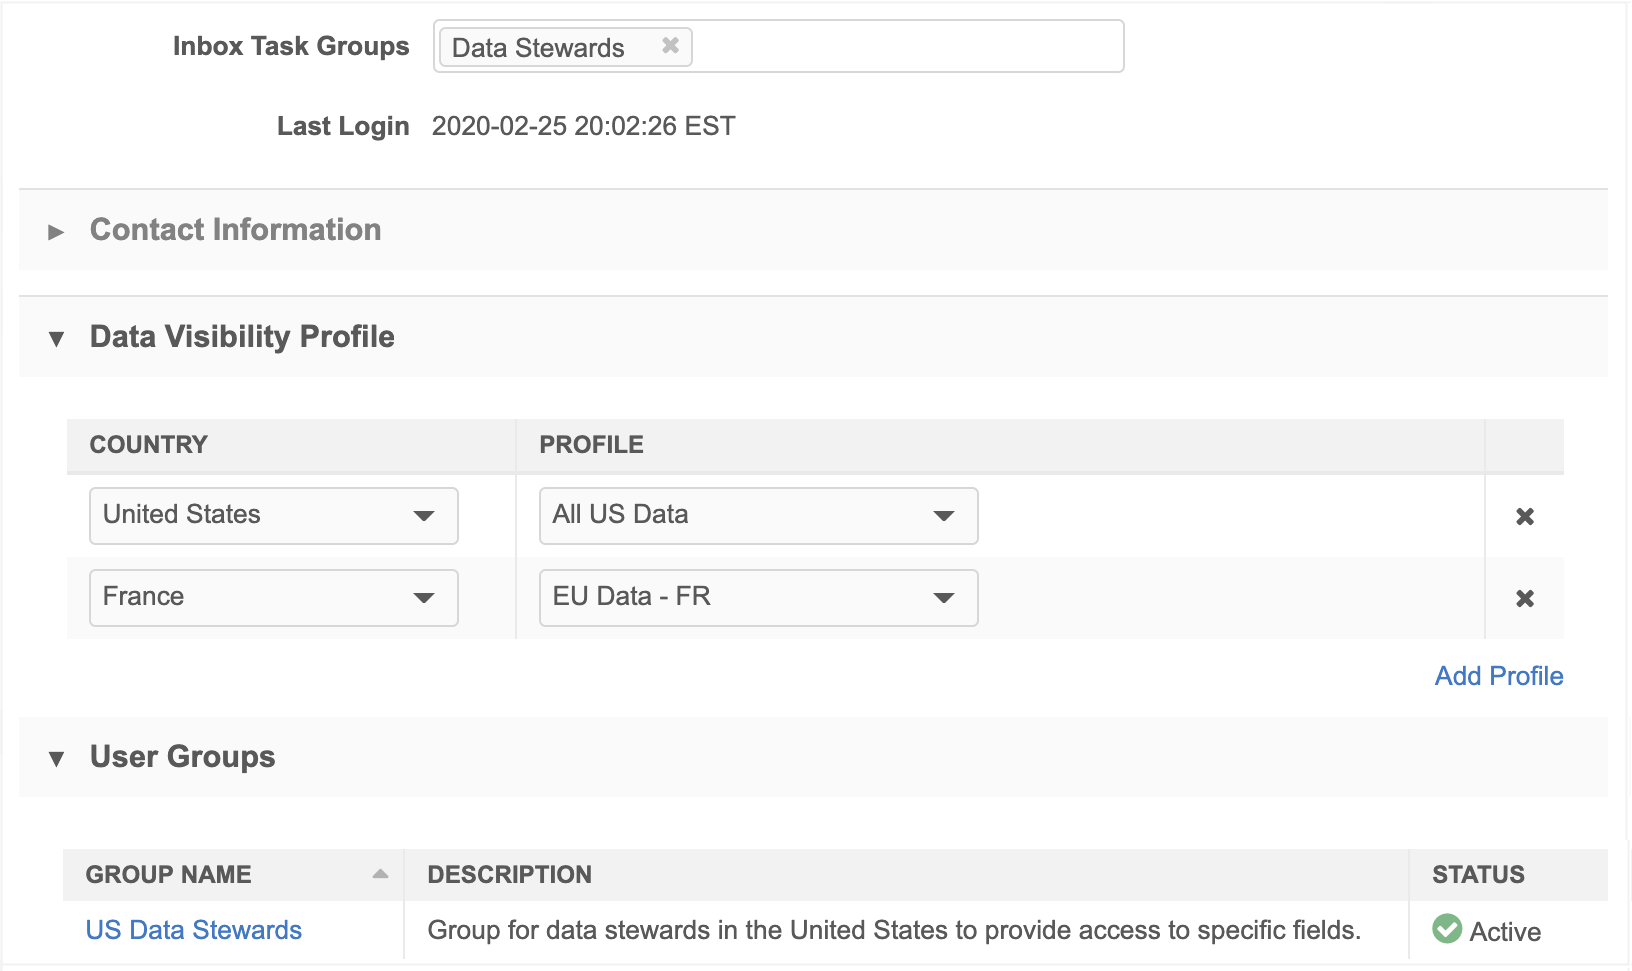
Specify the Inbox Task Groups to assign to the user. Default groups display for each user type. As you type, suggested groups will display so you can automatically complete your selection.
Task groups enable you assign tasks to specific groups, for example, according to job role or region.
This option does not display for the Standard User, Integration User, and Portal User types.
-
Define a Portal Username (Portal User types only) - This is the username for accessing the Network Portal only. The username must be unique. It cannot be the same as any other Network MDM Username or Portal Username. This enables you to log into the Portal using a Portal Username or your Network MDM Username if you have both.
Tip: For the best experience, use the user's corporate email address as their Portal Username.
- For existing users, the Last Login displays the last time the user logged into Network MDM through the UI, the API, or through single sign-on (SSO).
Contact information
In this section, the user's First Name and Last Name are required. Add other optional contact details.
Password
This section displays only when you are creating a new user.
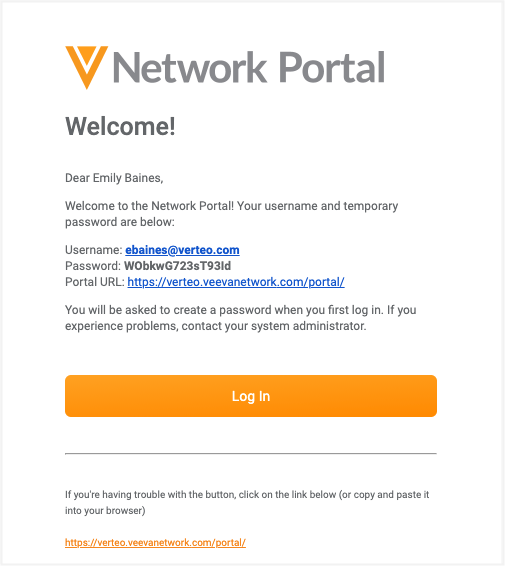
- Generate temporary password and notify user - This option is selected by default.
When you save the user's profile, they will receive a welcome email with a temporary password. The email contains the assigned user type and Network MDM instance URL. A link in the email helps them to log into Network MDM so they can change the password. Clear the checkbox to notify the user yourself and allow them to set their own initial password.
For Portal Users, ensure this option is selected. Their welcome email contains a link to the Network Portal and their username and temporary password.
Data Visibility Profile
Data visibility profiles (DVPs) determine the user's access to records for a specific country. Users cannot access data for the country until the data visibility is assigned to their account. Each DVP also specifies a set of permissions related to the records for that country.
-
In the Data Visibility Profile section, select a country and a corresponding data visibility profile (DVP) for the user.
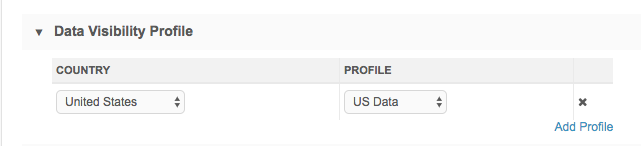
- Click Add Profile to assign additional DVPs for this user.
User Groups
The table displays the system managed groups that the user is automatically assigned to, based on their user type. System managed groups are read-only. It also displays any custom groups that the user has been manually added to. A count of the active users in each group also displays in the table.
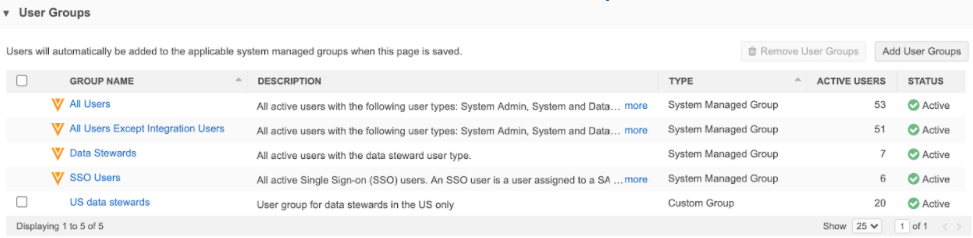
Remove user from a custom group
To remove the user from a custom group, click the checkbox beside the custom user group name and click Remove User Groups. The group is immediately removed from the table. The user will be removed from the group when you save the user page.
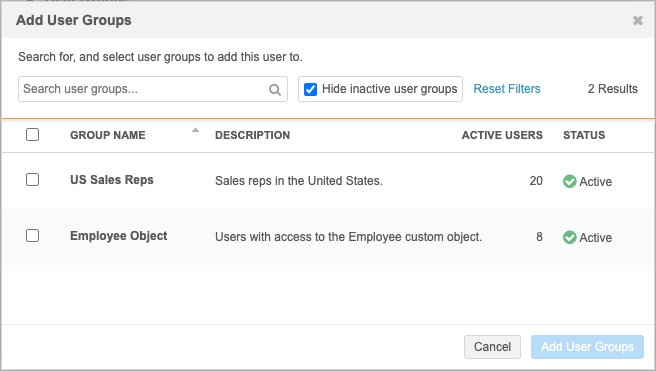
Add user to custom groups
You can add a user to a user group directly from the user detail page. Click Add User Groups. The pop-up displays any custom groups that the user is not already assigned to.
To add the user to multiple groups, click the checkbox beside Group Name to select all of the groups.
Restricted field access
This section displays on existing profiles if the user has edit or read-only permission to a restricted field. Each field restriction can be edited directly from this page.

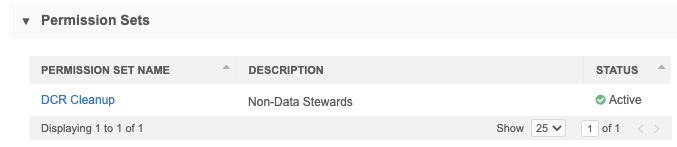
Permission Sets
This section displays on existing profiles if the user has edit or read-only permission to a restricted field. Each field restriction can be edited directly from this page.
DCR Approval Rules
This section displays on existing profiles. It lists any DCR approval rules that can be triggered by the user as a Rule Initiator.
Dynamic Access Control
This section is read-only. Users can be assigned to rules and user groups to give them access to specific custom objects that are enabled in your Network MDM instance. For more information, see Dynamic access control.

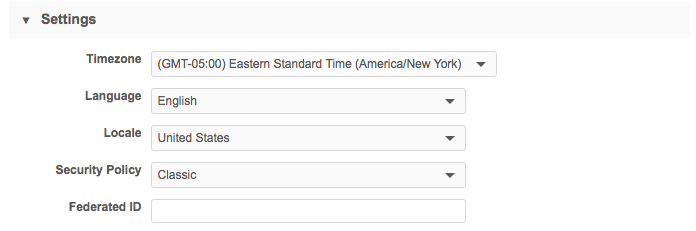
Settings
Define the following details in the Settings section:
-
Timezone - The user's time zone.
-
Language - The language to use for the Network MDM UI.
-
Locale - The user's region. This setting determines the icon color for locally managed records. The icon color depends on the country you choose.
-
If you set the locale to China, locally managed records are identified by green
 icons.
 -
If you set the locale to any other country, locally managed records are identified by gray
 icons.
The color is applied to icons for all locally managed records for all countries that the user views in your Network MDM instance.
-
-
Security Policy - The password policy for the user.
The security policy determines password requirements and other security settings for the user.
If the user is assigned to a security policy that is used in an IP access control rule, the Security
 icon displays beside their account on the Users page.
 - Federated ID - Define a unique federated ID for users configured for single sign-on. For more information, see Provision users to use SSO.
Additional Permissions
The additional permissions for each user type can vary because of the features that they can access.
Examples
Note: Additional permissions do not apply to Portal Users.
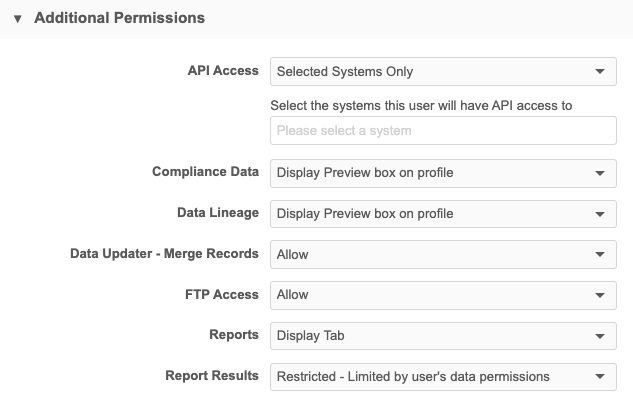
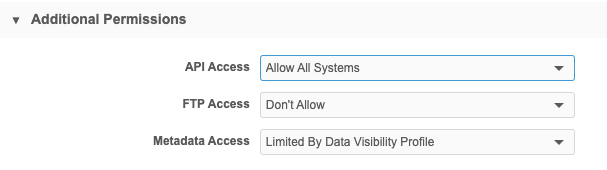
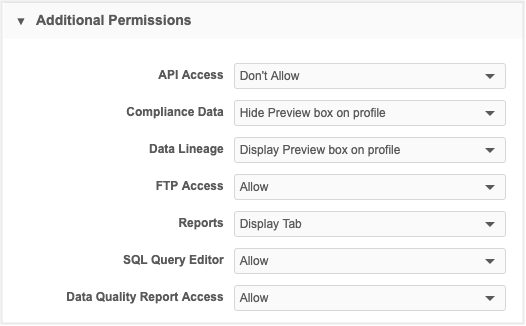
Define the level of permissions for each of the following areas:
-
API Access - Change the value if the user needs access to the Network MDM APIs.
- Don't Allow - The user has no access to the Network MDM API.
- Allow All Systems - The user can access any system using the Network MDM API.
-
Selected Systems Only - The user has access to perform API calls from the systems that you specify in the field.
Linking users to a specific system ensures that they can perform API calls and access records only for those systems.
- Compliance Data - Change the value to Display Preview box on profile if the user needs access to this US compliance data; the Transparency Reporting preview box will display on the Profile page.
- Data Lineage- Change the value to Hide Preview box on profile if the user does not need access to this feature. The Data Sources preview box will not display on the Profile page.
- Data Updater - Merge Records (Data Managers, System Admin, and System and Data Admin) - Change the value if the user can access the Data Updater option to merge records.
-
FTP Access - Change the default value (Don't Allow) if the user requires FTP access. This provides the user with access to the Network MDM file system in File Explorer, or in a third- party FTP application.
-
Allow - Give the user access to all directories.
-
Allow Directory, identify an existing directory on the FTP server that this user can access.
A user can have access to one root directory only. For example, if you have a root directory called /SAP, configure the SAP® source and target subscriptions to sub-directories of /SAP; configure your source subscriptions to point to /SAP/in and target subscriptions to point to /SAP/out. This ensures that users can access the files related to SAP, but they cannot access files from other data vendors.
-
- Reports- Change the value to Hide Tab if the user does not need access to Network MDM reporting. The Reports tab will not display on the .
Reports can be enabled or disabled globally using the General Settings. If the Network Reporting setting is not enabled for your instance, this option does not display here.
-
Report Results (Data Managers, System Admin, and System and Data Admin) - Change the value to Unrestricted - Full access to data so users can run reports without any of their data permissions applied.
By default, report results are based on the data that you have permission to access. This means that each report query is rewritten to calculate your data visibility profiles, inbox task groups, and any dynamic access control restrictions for custom objects. This can cause the query to be slow or to timeout. When data permissions are ignored, the queries and reports will complete faster and fewer timeout errors will occur.
Consider changing this the permission to Unrestricted for users that already have access to all data.
- SQL Query Editor (Data Steward, Standard User, System and Data Admin) - Change the value if the user should have permission to create advanced report queries. If the Reports permission is set to Hide Tab, this permission does not display in this list.
-
Data Quality Report Access - (Data Steward, Standard User, and System and Data Admin) Change the value if the user needs more than read-only access to this feature. If the Reports permission is set to Hide Tab, this permission does not display in this list.
-
Metadata Access - (Integration Users only) - Change to Full Access to provides users access to view and export all objects and fields in the Metadata API regardless of their data visibility profile permissions. By default, this permission is set to Limited by Data Visibility Profiles.
Note: This permission applies only if the API Access permission is set to Allow All or Allow Selected Systems Only.
Veeva Support
When Veeva Support is assisting you with an issue, It can be helpful for them to log in and view your Network MDM instance from an active user's perspective.
In the Veeva Support section, you can give them access to your Network MDM instance through this user account. Select a duration for which Veeva Support should be granted and click Grant Access.
For more details, see Veeva Support.
Switching existing users
Administrators can switch user types for an existing user. For example, if you have IDs for a Data Steward and a System Administrator, you can switch one of these IDs to the System and Data Admin user type.
Important: Each Network MDM instance must have one active Admin user. This can be an Administrator or System and Data Admin user. If there is only one Admin user in the instance, the Admin user cannot be switched to another non-Admin user type.
When you switch a user type in the user's profile, the user type changes but data permissions and settings are not updated automatically. You must adjust permissions for the System and Data Admin user to they have access to the data and settings they need.
Tip: Consider switching the most active user with access to as many groups and features as possible. The newly updated user should belong to the superset of groups from each of the previous users.
After you've updated one of the user types, remember to inactivate users you no longer need.
Switching from a Data Steward user type
When switching from a Data Steward to System and Data Admin type, you might want to manually adjust the following settings so the user has all of the intended capabilities:
- Inbox Task Group - Add the Data Loading Jobs group.
- Data Updater - Merge Records permission - Change to Allow.
- FTP Access permission - Change to Allow or Allow Directory.
- SQL Query Editor permission - Change to Allow.
- Data Quality Report Access permission - Change to Allow.
Switching from an Admin user type
When switching from an Admin user to System and Data Admin type, you will likely have a number of groups and profiles to assign to the new user type.
Update the user profile to include all new groups and data visibility profiles:
- Inbox Task Group - Add relevant inbox task groups.
- User Groups - Add relevant user groups.
- Data Visibility Profiles - Add data visibility profiles for relevant countries and data sets.
Export user profiles
When you export user profile, a .csv file containing user profiles is saved to your local file system. You can open the .csv file in a spreadsheet application.
To export the user file, on the Users page, click Export to CSV
The .csv file includes the details from each user profile, for example, status, email address and the inbox task groups and data visibility profiles assigned to the user. It also includes a column for the Last Login: the last time the user logged into Network MDM through the UI, the API, or through single sign-on (SSO).
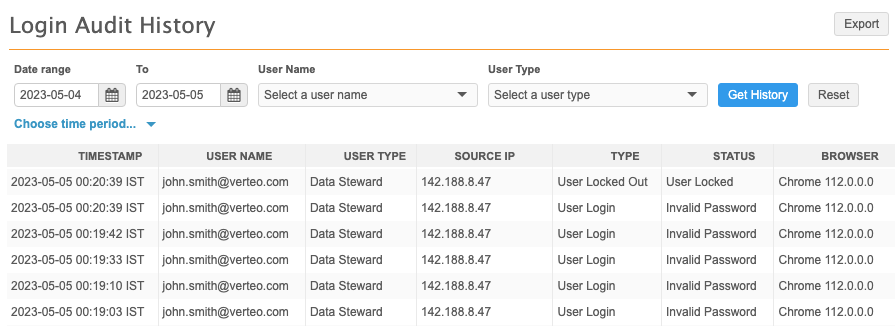
Unlock and password reset
For security, users are locked out of Network MDM after five consecutive login attempts. To regain access, Administrators can unlock user accounts or reset their password.
Note: Users can reset their own passwords using the Forgot your password link on the Network MDM login page.
These options are supported for active users that do not use single sign-on.
Unlock account
When a user is locked out, you can unlock their account so they can continue using their current password.
-
Click Unlock on the user account.
This button displays only on accounts that have been locked out.
-
Advise the user that their account is unlocked so they can log in using their current credentials.
You can see when a user have been locked out in the Login Audit History.
Reset password
If a user has forgotten their password, you can reset it for them.
-
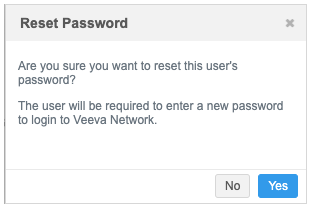
Click Reset Password on the user account.
After you click the button, confirm that you want to reset the password for this user.
A message displays to indicate that the password reset is complete.
Users will receive an email to notify them that their password has been reset. The email is sent from network-emails@veevanetwork.com.

Users can click Reset Password to change their password and regain access to Network MDM.
The link to reset the password can be used once and expires after 24 hours.
Logs
The System Audit History tracks the user that has reset a password or unlocked a user account.