Network configuration for Concur
A Network administrator must complete the following configuration steps in Network to enable the integration with SAP Concur®.
- Create credentials to connect SAP Concur to your Network instance
- Create a security policy for SAP Concur
- Enable Concur Connector in Network
- Map SAP Concur fields to Network
- Create reference aliases in Network for SAP Concur reference fields
Create credentials in your Network instance
Network can store credentials for external applications so that they are added once and can be referenced whenever you need them.
To create credentials to connect to SAP Concur, see SAP Concur credentials.
Create a security policy
SAP Concur has specific security standards for their application connector.
-
All usernames and passwords must be a minimum of 10 characters and a maximum of 50 characters.
This means that the credentials for the Network Integration user assigned to the Concur Connector must meet these requirements.
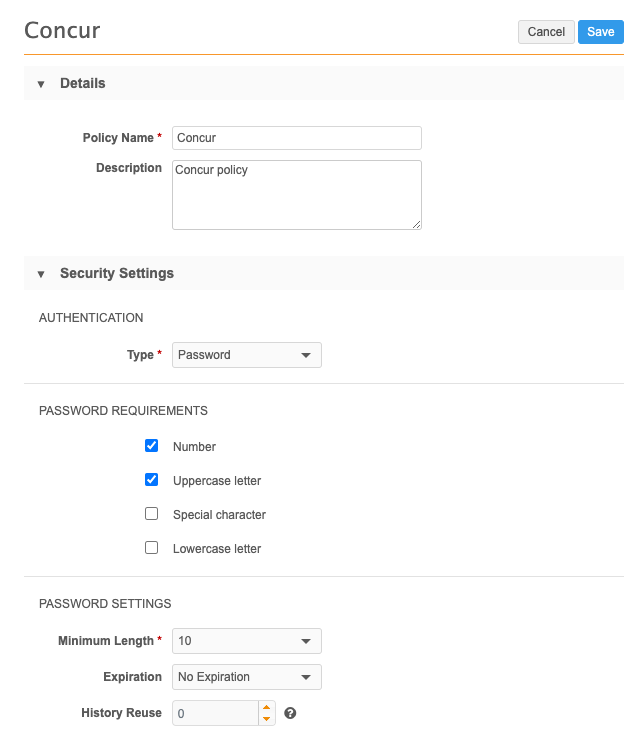
Create the policy
-
In the Network Admin console, click Settings > Security Settings.
-
Click Add New Policy.
-
Type a Name (for example, Concur) and a Description.
-
In the Authentication section, accept the default Password type.
-
In the Password Requirements sections, you can select any requirements that are applicable to your corporate policy. There are no specific requirements for Concur.
-
In the Password Settings section, expand the Minimum Length list and select 10.
The Expiration value is typically No Expiration for Integration users.
-
Save the policy.
Assign the policy to the Integration user
When you create the Integration user that you will use for the Network Concur Connector, ensure that this security policy is assigned to the user profile.
-
In the Network Admin console, click Users & Permissions > Users.
-
Create the Integration user. For detailed instructions, see Managing users.
-
On the user profile, in the Primary Information section, ensure that the entire Username (including @veevanetwork.com) is no longer than 50 characters.
-
On the user profile, in the Settings section, expand the Security Policy list and choose the policy that you just created; for example, Concur.
-
In the Additional Permissions section, ensure that the API Access value is Allow All Systems.
-
Save your changes.
Enable the Concur Connector in Network
A Network administrator must complete the configuration in Network to enable the connection between Network and a SAP Concur environment so that SAP Concur users can search for and add HCP attendees to expense reports. Administrators can add several SAP Concur environments.
Prerequisite
Veeva Support must enable the Network Concur Connector so that it is available in your Network instance. Ensure that you have talked to Veeva Professional Services to have this enabled.
To add an SAP Concur environment to the Concur Connector:
-
From the Admin console, select System Interfaces > Concur Connector.
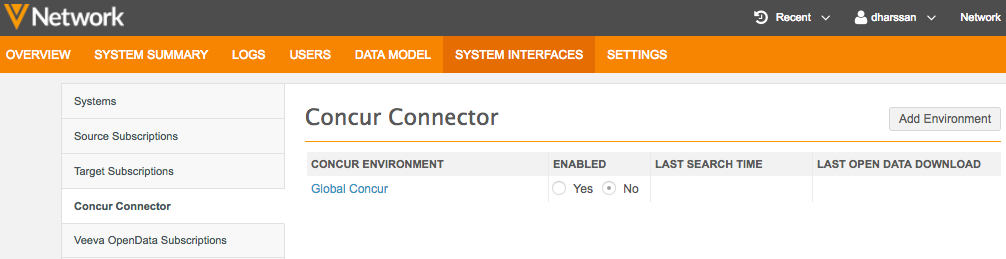
A Global Concur environment is automatically created with default settings, but it is not enabled by default. The concur__v system is also automatically created if it doesn't exist in your Network instance. This system is linked to the Global Concur environment.
To complete the Global Concur environment configuration, it must be enabled and a Network integration user must be defined.
-
On the Concur Connector page, click Add Environment.
The New Environment page displays so you can provide the details for your new SAP Concur environment.

- Next to Connector Enabled, choose Yes to enable the Concur Connector for this environment.
- Type a Name.
-
Select the Network System associated with the SAP Concur environment.
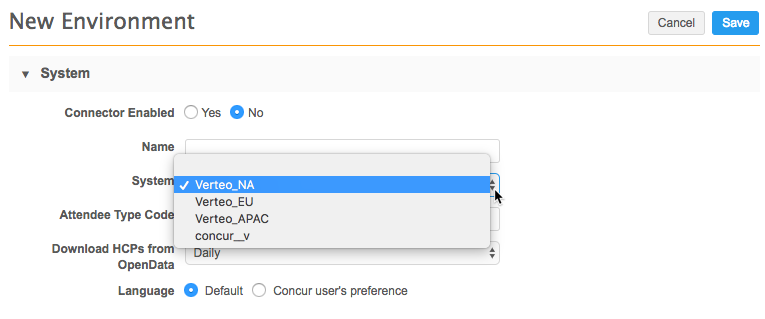
Source systems are defined in System Interfaces > Systems.
- In the Attendee Type Code field, type
HCPto match the attendee type code used in SAP Concur. (This code can be anything, as long is it matches the type you set in SAP Concur.) This is required to ensure that all Veeva OpenData records added to expenses in SAP Concur are also added to your Network instance. - In the Download HCPs from OpenData drop-down list, select the frequency for downloading records. Daily is recommended.
- Select the preferred Language.
-
In the Connection Settings section, select the Network Integration User that will be linked to this SAP Concur environment.
An integration user can be associated with one SAP Concur environment only. This is the user that you provided during the SAP Concur system configuration. Search requests from SAP Concur are made with this user.
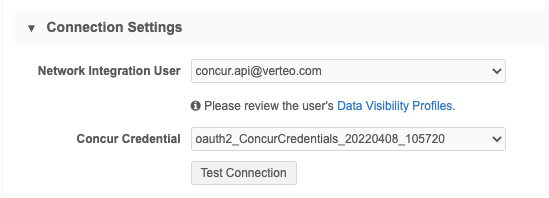
- In the Concur Credential list, find the OAuth2 authentication credential for SAP Concur configuration for this Network instance.
- Click Test Connection to ensure the credentials are correct.
- Complete the Field Mappings. For more information, see Setting up field mappings below.
- In the Filter Search Results section, define the records that you want returned during a search. For more information, see Searching Network data in SAP Concur.
- Save the configuration.
Note: When you are saving changes to your SAP Concur environment, ensure that your browser does not unexpectedly autofill your credentials.
After you've enabled a SAP Concur environment in Network, it takes at least 30 minutes for the configuration to take effect.
Field mappings
If fields in SAP Concur that correspond to Network fields have been customized they will have to be mapped accordingly in Network. Network supports custom field mappings for string fields, reference fields and alternate keys.
For example, a field in SAP Concur may have been edited to show options as a list, while the corresponding field in the Network data model contains free text. A Network administrator should configure reference aliases to manage these mappings. The Concur Configuration Report can also help with field and alias mappings.
Setting up field mappings
You need the following information before you begin setting up field mappings:
- Concur field name – the Field Column Label from the configuration report for the form being used.
- Concur field type – the Data Type column from the configuration report for the form being used; or, the Data Type value in the Modify Fields window.
- Concur default maximum length – the Default Max Length from the Modify Fields window.
- Network field name – from the Network Data Model page.
- Network entity type – HCP, Parent HCO, License, or Address.
Example
| Field Name | Concur Field Type | Concur Default Max Length | Network Field Name | Network Entity Type |
|---|---|---|---|---|
| LAST_NAME | VARCHAR/Text | 100 characters | last_name__v | HCP |
| MI | VARCHAR/Text | 1 character | middle_name__v | HCP |
| CUSTOM1 | TIMESTAMP/Date | N/A | birth_date__v | HCP |
| CUSTOM7 | VARCHAR/Text | 100 characters | license_number__v | License |
| CUSTOM5 | List | N/A | license_status__v | License |
| City | VARCHAR/Text | 100 characters | locality__v | Address |
View the Configuration Report
Use the Configuration Report to retrieve the Concur field name and field type to help you define the field mappings.
To view the report in SAP Concur, select Administration > Expense > Configuration Report.
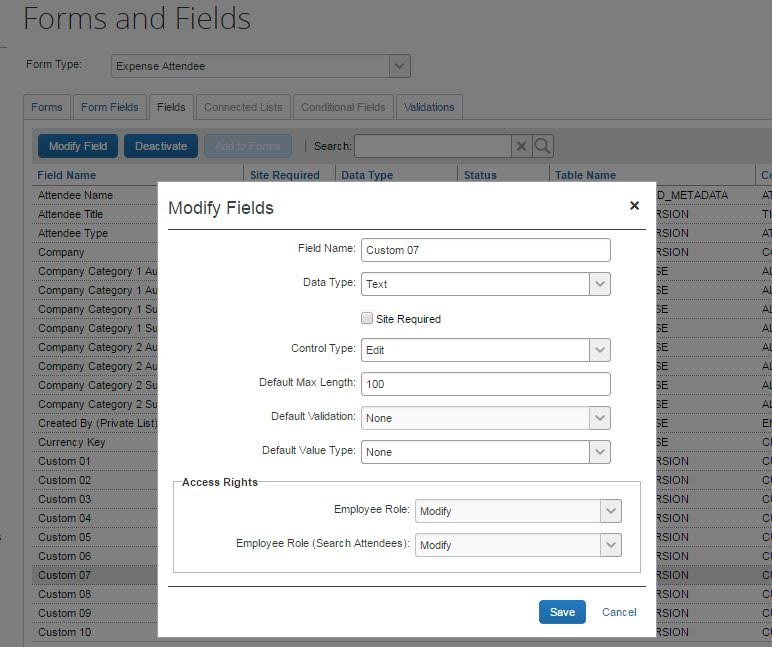
View the Modify Fields dialog
Review the Modify Fields dialog to find the Concur field type and default max length needed for field mappings.
To view the modify fields dialog:
- Select Administration > Expense > Forms and Fields.
- From the Form Type drop-down list, select Expense Attendee.
- Select a field and click the Modify Field button.
Supported mappings
The following data type mappings are currently supported:
| Concur Field Type | Network Field Type |
|---|---|
| Amount/MONEY | Decimal |
| Boolean/BOOLEANCHAR |
Checkbox |
| Date/TIMESTAMP | Date |
| Integer/INTEGER | Integer |
| List/LIST | Reference Type |
| Numeric/NUMERIC | Decimal |
| Text/VARCHAR | Text, Long(Network ID), Alternate Key, Year, Date and Time, and so on (any Veeva type can be mapped to the Text type) |
Map fields in Network
Administrators can map Concur fields to Network fields or objects using the Concur Connector in the Network instance.
Mapping the fields defines the fields that users can search on in Concur and the fields that are returned to Concur after a Network search.
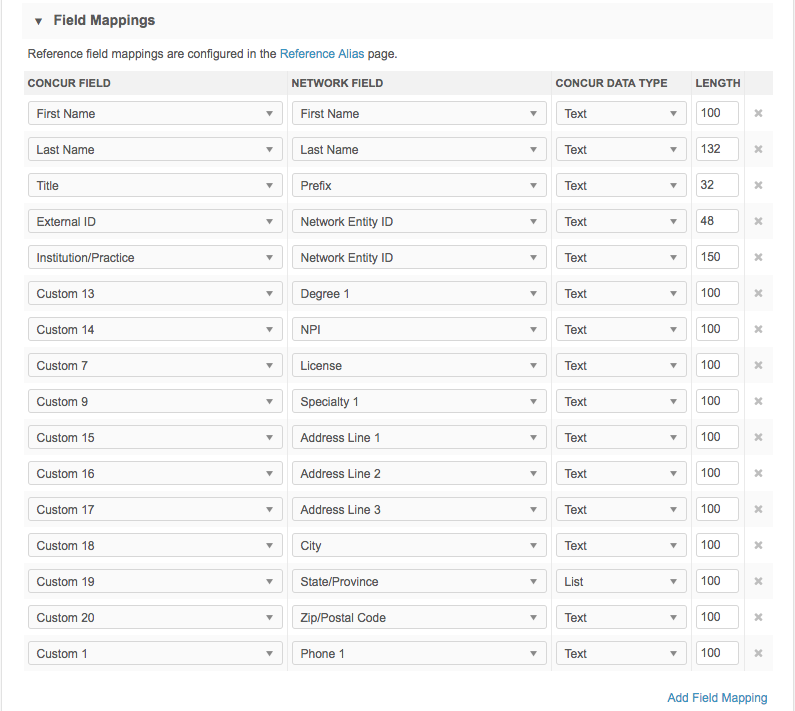
To configure the field mappings:
- In the Admin console, click System Interfaces > Concur Connector.
- In the Field Mappings section, click Add Field Mapping.
- In the Concur Field column, select a Concur field from the list.
Tip: To find the Concur field name descriptions, use the Concur Configuration Report. To view the report in Concur, select Administration > Expense > Configuration Report.
-
In the Network Field column, select a Network field from the list. Ensure that the Network field is compatible with the Concur field.
The Network fields are organized by entity type: License, Parent HCO, HCP, Address, and Custom Key.
- In the Concur Data Type column, select the type of data from the list.
-
The Network data type must be compatible with the Concur data type. For example, most fields have a text data type (first name, address, phone, license number).
Network IDs and Alternate Keys should be mapped as text field types in Concur.
-
In the Length column, type the maximum length of the Concur field.
If the Network field is longer than the maximum Concur field length, a truncated value is sent to Concur.
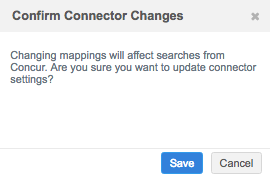
- Save your changes.
In the Confirm Connector Changes dialog, click Save.
If there are compatibility issues between the Concur and Network data field types, when you save your changes, a warning displays beside the mapping with a message.

The compatibility issue must be resolved before you can save your changes.
Mapping the State address field
When you are mapping fields in the Concur Connector, be advised of the following:
Map either the State address field or Licensing Authority field, but not both.
Network will attempt to return the best address and state license for your search criteria, so mapping only the State field is recommended.
Define the State address field as a List field in Concur (recommended).
If address state is defined as a Text field then Network will not be able to return the best address in all cases.
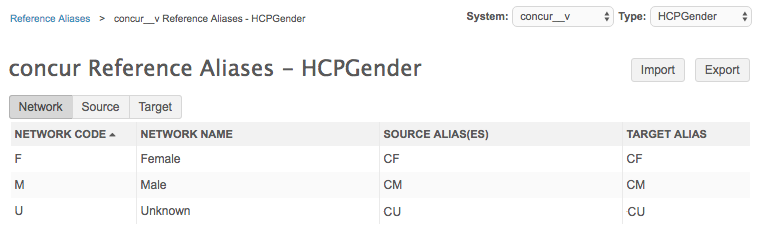
Add reference aliases
SAP Concur has its own code values that are different from the values used by Network. Use reference aliases to tell Network what the equivalent SAP Concur source codes are for each reference code value in Network.
For example, the HCP gender values in Network are “M” for Male but the SAP Concur value is “CM”. Define a reference alias to tell Network that “CM” is an alias for “Male”.
To add reference aliases, in the Admin console, click System Interfaces > Reference Aliases. Select the concur__v system and add aliases, using the .csv file, for any of the applicable reference types.
For detailed information, see Reference aliases.