Custom tables
DM
DS
ST
Advanced reporting users can create their own data tables in the SQL Query Editor. Administrators and Data Managers can also create custom tables by loading data directly from source and target subscriptions.
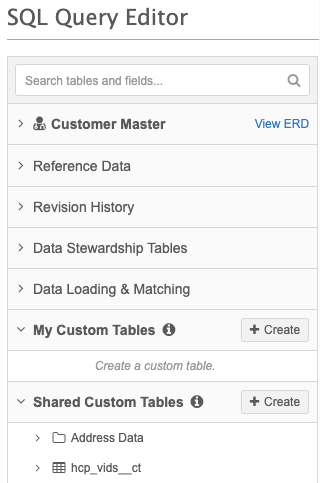
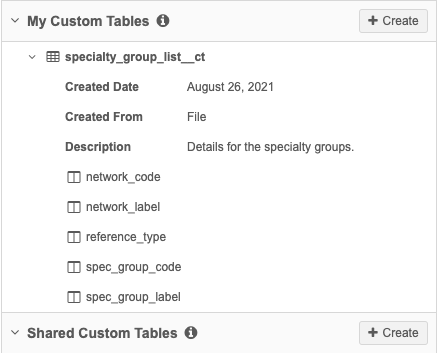
In the SQL Query Editor (Reports), the following custom table sections display in the tree view:
-
My Custom Tables - Data tables that you create for your private use. No other users can access the tables in this category.
-
Shared Custom Tables - Data tables created by you and other users in your Network MDM instance. These tables are available to everyone in your instance that has access to SQL Query Editor.
These sections are empty by default.
Example use cases
-
Compare existing data in your Network MDM instance to a source file before a data load.
-
Upload a file instead of using the Lookup Tables feature.
Lookup tables are available to Administrations and Data Manager users only and the tables are limited to 1GB or 5 million rows. Custom tables are available to all users that have access to advanced reporting and the tables do not have a file size limit.
-
Create a table based on your report results so you can create complex queries that don't time out.
-
Create snapshots of current data in Network MDM.
Use transformation queries to create a snapshot of data for a data model object, a reporting table, a lookup table, or another custom table.
For details, see Create snapshots of current data.
-
Load data from a source file into a custom table.
For example, load data into a custom table that you want to store in your Network MDM instance and report on but does not need to be in custom object (the data does not require search, revision history, data lineage, data change requests, and other features).
For details, see Loading data directly from a source file.
-
Prevent unnecessary transformation query
 The ability to use SQL queries to pre-process or post-process data during the subscription process within Network. output from being included in target export packages
When target subscriptions include multiple transformation queries that run in sequence, an output is created for each query. To prevent query output from being exported to downstream systems, you can create custom tables as the output of any intermediary queries so that data remains in Network MDM.
For details, see Prevent intermediate files in subscription packages.
About custom tables
-
Tables can be created for your own use or to share with other users.
-
Tables are available to immediately query after they are created.
-
Existing tables can be updated to overwrite the original table.
-
Table names must be unique in your instance. For example, two users cannot have the same table name in their My Custom Table sections.
-
All users with advanced reporting permissions can access the tables in the Shared Tables section.
-
You can create a hierarchy of folders in the custom table sections and move the tables in and out of folders.
-
Queries can be run against the tables in the following Network MDM features:
-
SQL Query Editor
-
Saved Reports
-
Data Quality Reports
-
Data Maintenance subscriptions (Advanced)
-
Transformation queries
Custom tables cannot be used in the Basic Report Builder or the Aggregate Report Builder features.
Note: Queries written on custom tables will return null values for a column if that data model field is disabled in your instance.
-
Creating custom tables
Custom tables can be created in the following ways:
-
Uploading a file
- Using report results
-
Loading data from a source or target subscription using data transformation queries
Note: Custom tables created by loading data from subscriptions can be saved to Shared Custom Tables only. Subscriptions are not applied to individual users so sharing to personal custom table folders is not possible.
To learn how to create custom tables from subscriptions, see Loading data into custom tables using transformation queries.
Create a table by uploading a source file
The My Custom Tables and Shared Custom Tables categories display in the SQL Query Editor; they are empty by default.
Supported files
Source files have the following requirements.
| File details | Support |
|---|---|
| Type |
Considerations for compressed files
|
| Format | Files must use UTF-8 encoding. |
| File size | Unlimited |
| Delimiters |
|
| Column headers |
Column names must be unique, must start with a letter, and can contain only the supported characters.
Supported characters
Unsupported characters
Duplicate column names and blank column names are not supported. Important: Avoid using Network MDM field names as column headers. Column header validation To help column headers pass validation, Network MDM takes the following actions:
|
Create a table
To create a private or shared custom table:
-
On the , click Reports > SQL Query Editor.
-
In the tree view, on the My Custom Tables or Shared Custom Table heading, click Create > Custom Table.
The Create Custom Table wizard opens.
-
On Step 1, Table Details, provide the following information:
-
Table Name - Type a meaningful name for this table. The name is automatically appended with the __ct suffix.
Table names must be unique for all custom tables in the Network MDM instance. If the Table name already in use message displays, another user has used the name for their custom table. A table name can be used again if the custom table has been deleted.

-
Description - Type a meaningful description. The description displays in the table metadata in the tree view.
-
Table Type - The custom table category that you chose is automatically selected and cannot be changed.
-
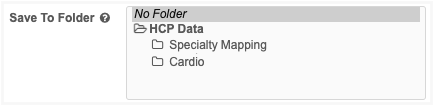
Save to Folder - If folders have been created in the custom table section, you can select where the table should be saved. Otherwise, the table will be created in the top level of the section.
-
Third Party Data - Indicate if the file that you are uploading contains third-party data. If you choose Yes, confirm that you either have a TPA in place, or that your agreement with the third-party data provider does not require a TPA for Veeva to receive the data.
The responses to these questions are logged in the System Audit Log. For details, see Confirming third-party agreements.
-
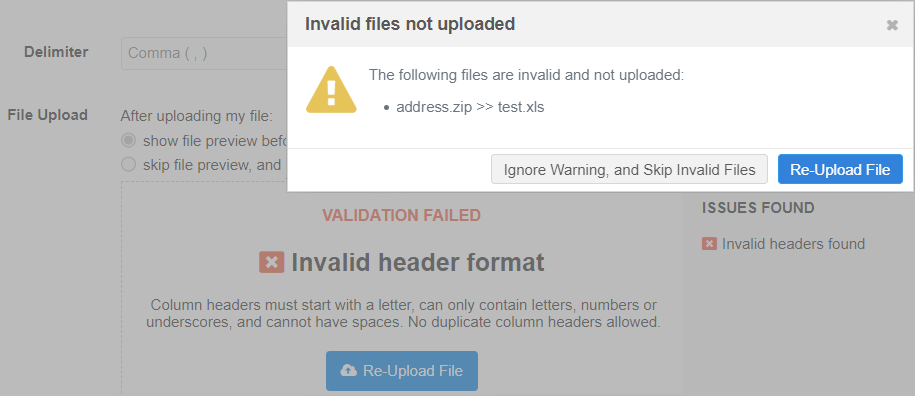
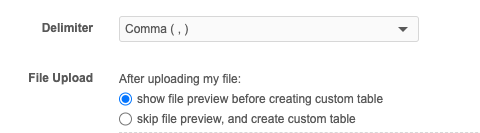
Delimiter - If you are uploading a .csv file or a compressed file containing .csv files, you can define the delimiter used in the file.
Note: If you upload a compressed file that contains multiple .csv files, the delimiter must be the same for all files. If the delimiter is different, none of the files will be loaded.
-
File upload - Choose how to proceed after you upload the file.
-
show file preview before creating custom table (default) - Display a sample of the table so you can preview the data before creating the table.
-
skip file preview and create custom table - Immediately create the table.
The file is still scanned and validated. If any issues are found with the file or with the column headers, they must be fixed before the table is created.
-
-
Upload File - Drag your file to the box or click Upload File to choose it from your local computer.
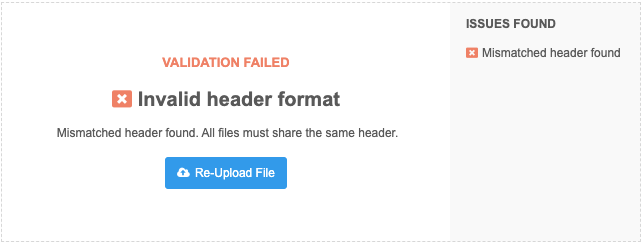
The file is scanned and validated when it is being uploaded. If any issues are found, warnings or a failed message displays.
The upload will fail if any of the following issues are found:
-
Malformed Line Found - The file contains a malformed line.
-
Invalid file format - Files must be in .csv format.
-
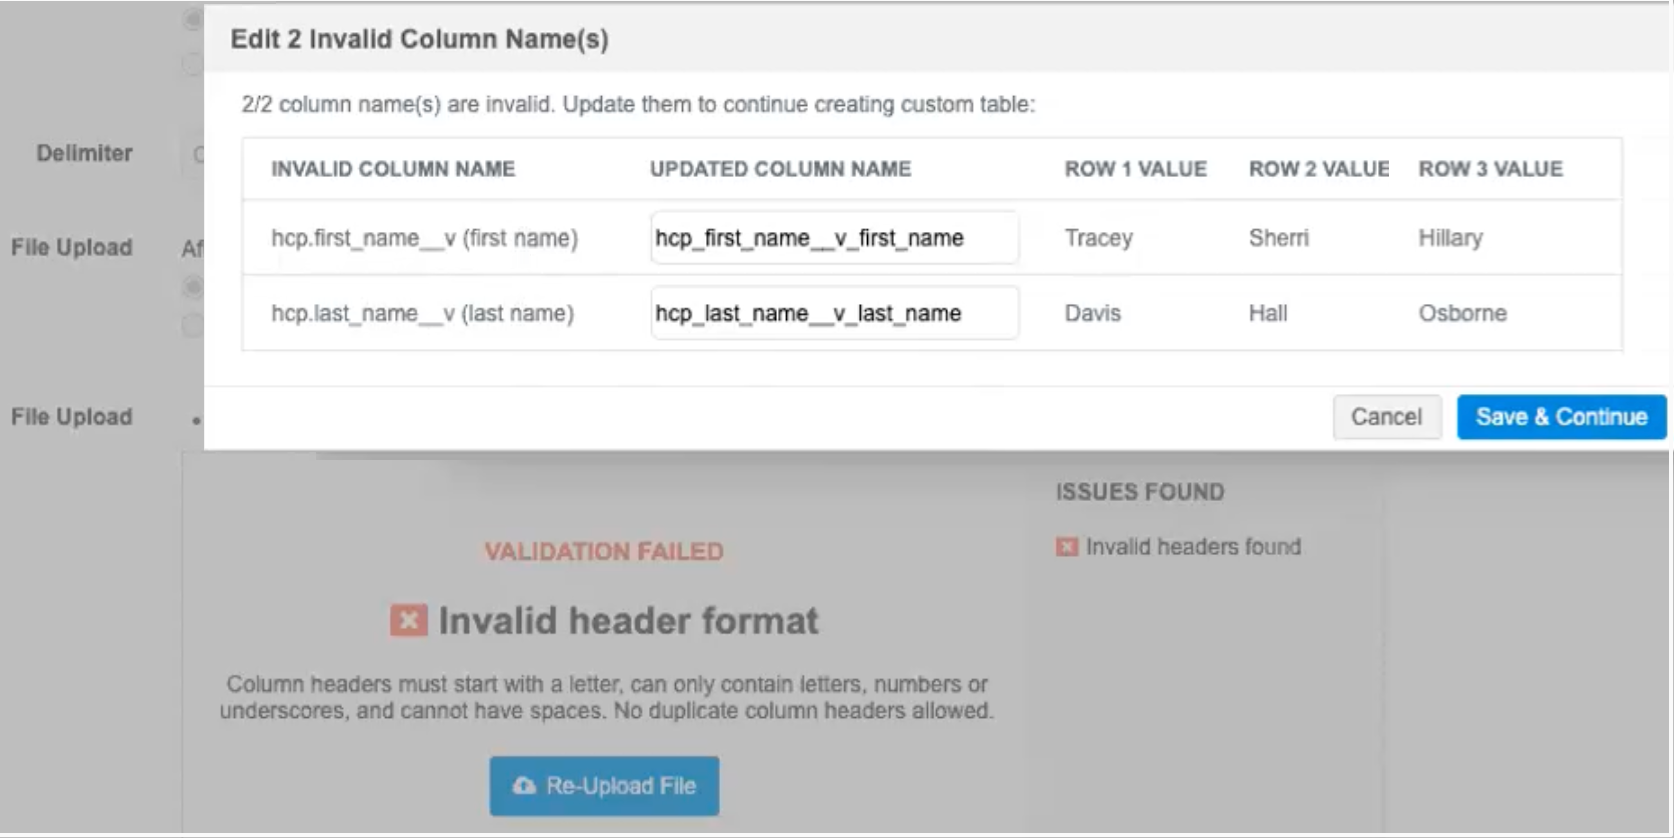
Invalid header format - Spaces, special characters, or duplicate column names were found.
-
Something went wrong - An unknown issue occurred.
-

-
-
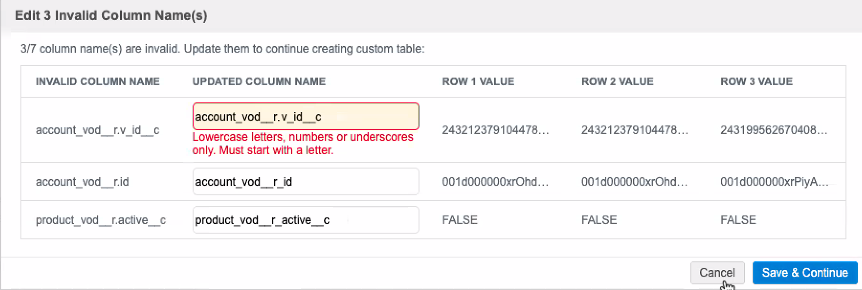
If column name issues or duplicate column names are found, a pop-up displays so you can change the names that are flagged.
-
Unsupported characters or reserved words - Suggested updates are provided in the Updated Column Name field.
Edit the column name or accept the suggestion by clicking Save & Continue.
-
Duplicate column names - Manually edit the name in the Updated Column Name field.
Examples
Invalid Column Name Updated Column Name Details hcp.first_name__v (First Name) hcp_first_name__v _first_name Issue: Unsupported characters found: period (.), space, uppercase letters, brackets ()
Fix:- Uppercase letters are automatically converted to lowercase letters
- Unsupported characters are replaced with underscore (_)
- Brackets () are removed.
oid oid_1 Issue: Reserved word in column name.
Fix:- _1 is automatically appended to the reserved name.
hcp_first_name__v hcp_first_name__v Issue: Duplicate column name.
Fix:- You must manually change the column name.
If you edit the column name, it is validated again to ensure that it is not a duplicate column name and that it doesn't contain unsupported characters.
-
-
If you chose to skip the file preview, the table is created.
-
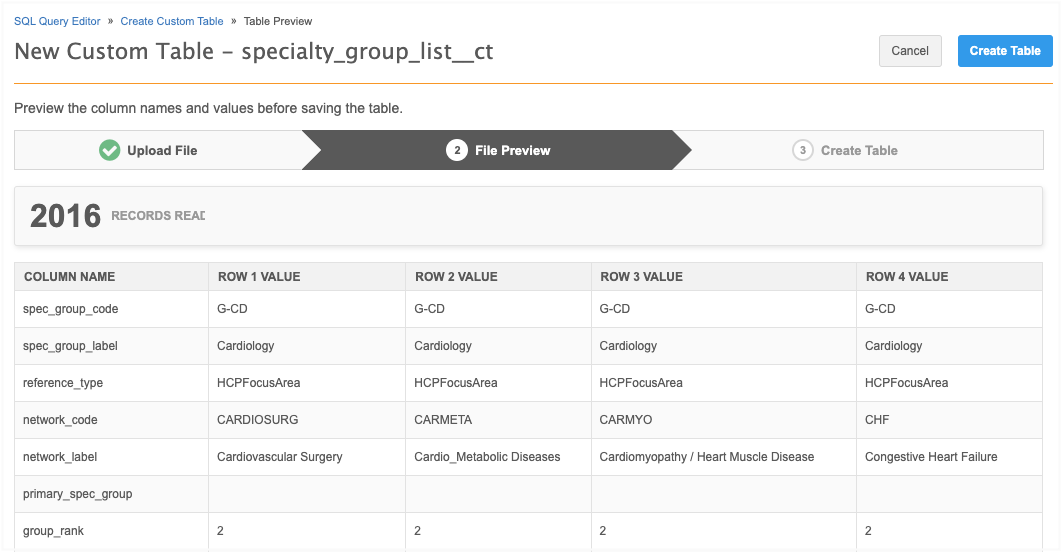
If you chose to preview the file after it is uploaded, the File Preview tab opens.
A count of the records displays. This is the total number of rows that will be created in the custom table, not including the column header. The first four rows of the file display so you can preview the data before you create the table.
If you click Table Details to return to the first step, the Third Party Data setting will be reset and the file must be uploaded again. If you click Cancel, the table will not be created.
- Click Create Table to generate the custom table.
When the update is complete, the SQL Query Editor opens with the custom table section opened to the new table. Expand the table to review the metadata and the columns that were created.
Note: All fields under custom tables are text data type fields.
You can now use the table and fields in a report query.
Create a table from report results
Using report results to create a custom table enables you to create complex queries that will not timeout.
To create a table using results:
-
In the SQL Query Editor, write a valid query in the query box.
-
Click Run Query.
-
In the Report Results section, click Create Custom Table.
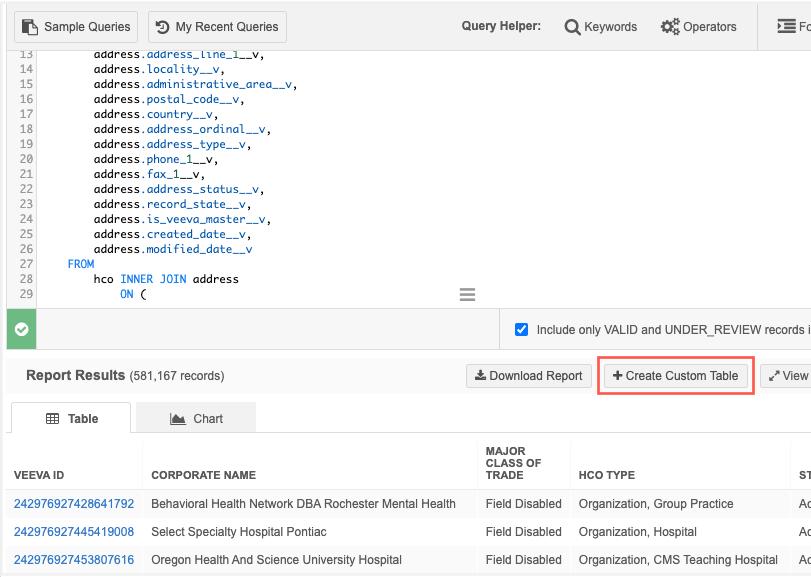
The Create Custom Table wizard opens.
-
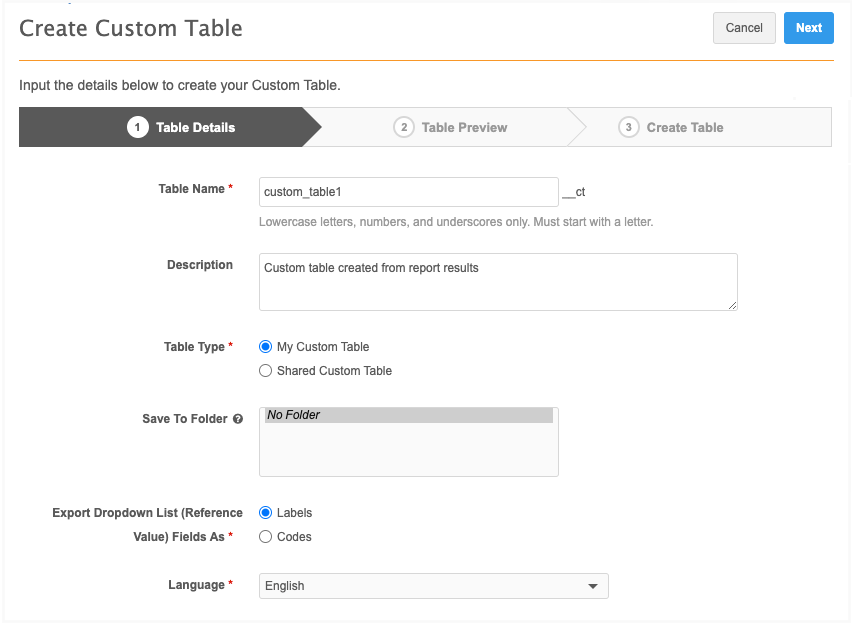
On Step 1, Table Details, define the settings for the custom table.
Define the following information:
-
Table Name - Type a meaningful name for this table. The name is automatically appended with the __ct suffix.
Table names must be unique for all custom tables in the Network MDM instance. If the Table name already in use message displays, another user has used the name for their custom table. A table name can be used again if the custom table has been deleted.
-
Description - Type a meaningful description. This displays in the table metadata in the tree view.
-
Table Type - Choose the type of custom table to create: My Custom Table or Shared Custom Table.
-
Save to Folder - If folders have been created in the custom table section, you can select where the table should be saved. Otherwise, the table will be created in the top level of the section.
-
Export Dropdown List (Reference Value) Fields As - Specify whether reference codes appear in the results, or their corresponding localized labels. Labels will display in the language you select from the drop-down list.
-
- Click Next.
-
On Step 2, Table Preview, a count of the records displays. This is the total number of rows that will be created in the custom table, not including the column header. The first four rows of the file display so you can preview the data before you create the table.
Column header validation
Network MDM validates the column headers so the custom table is created without issues. If the column header names have issues, the table cannot be created; the Create Table button is dimmed.
Column name requirements:
-
Must start with a lowercase letter.
Network MDM trims spaces before and after the column header name and automatically converts uppercase letters to lowercase.
-
Can contain only lowercase letters, numbers, and underscores (_).
-
Can be SQL reserved words.
Errors will display for any of the following issues:
-
Duplicate or blank column names
-
Spaces within the column names
-
Special characters are used. Only underscores are supported.
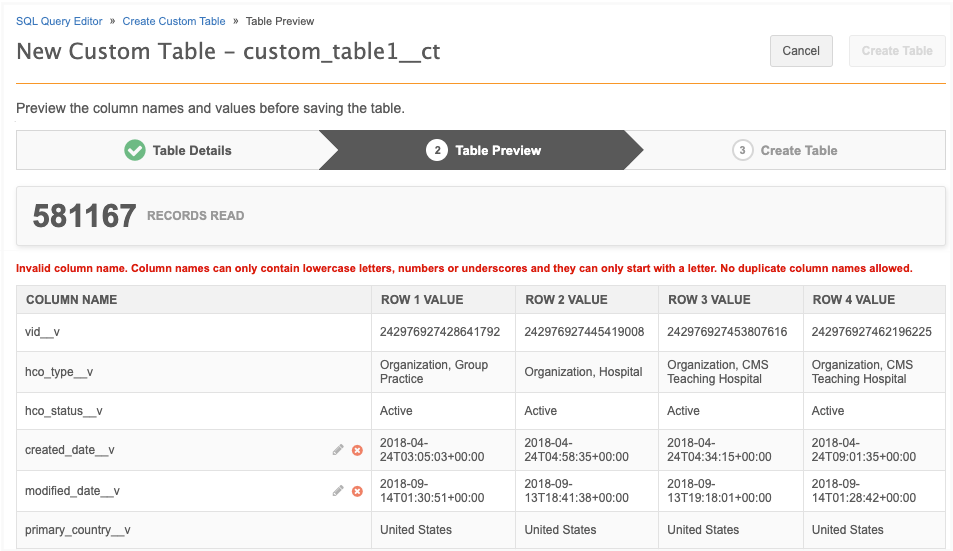
Validation issue example
The column names that display are the data model field names from the report query, not the field label.
In the report query, the
created_date__vfield is used for both the HCO and Address object, so the field name becomes a duplicate column name.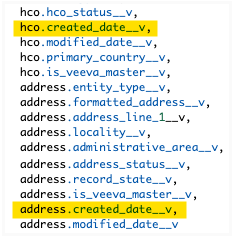
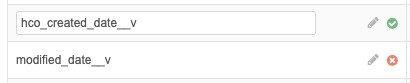
To fix the issue, edit the column name. For example, add an hco_ prefix to the created_date__v column name. When the issue is resolved, the validation icon updates to a green checkmark.
-
-
When any column header validation issues have been resolved, click Create Table. The table will be added to the custom table section that you specified.
Tip: To share the tables you created in the My Custom Tables section, you can drag and drop them into the Shared Custom Tables section.
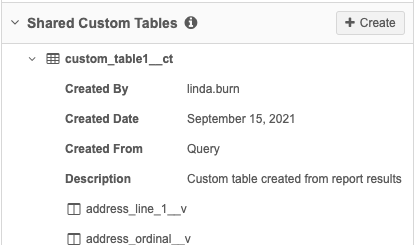
Expand the table name to view the table metadata and the columns that are available to use in your queries.
Note: All fields under custom tables are text data type fields.
Retrieving the source query
If you create a custom table using report results, you can retrieve the query that was used to create the table.
-
Hover over the custom table name to display the action buttons. Click the Copy Source Query to Clipboard icon to copy the query.
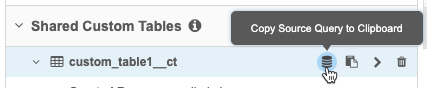
Table actions
Highlight a table to use the action buttons, Copy to Clipboard and Add to Query. Click the More icon to access the Update Table and Delete Table options.
Note: Table names must be unique. If you delete a custom table, the name can be re-used. You can also update a table to overwrite it and use the same name.
Update existing custom tables
Supported tables
-
Existing custom tables only
Tables cannot be updated using the Create custom table button after running a query.
-
Shared custom tables
Any user can update a table in the Shared Custom Table section.
-
My Custom Tables
Users can update tables they have created in the My Custom Table section.
Key considerations
-
Table names - The table name cannot be changed to ensure that existing queries will not fail.
-
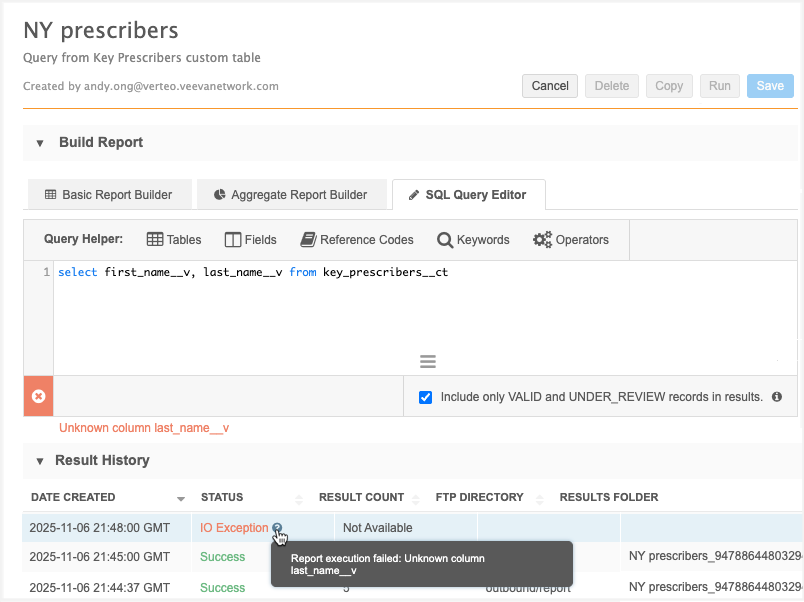
Changing the table structure - If the table structure is changed, any saved reports that used column headers that are no longer there will fail.
Example
A custom table was updated and the last_name__v column was removed. The saved report that uses the custom table fails with an IO Exception.
Update a custom table
-
Expand the My Custom Tables or Shared Custom Tables sections in the tree view.
-
Hover over the table name to display the More
 icon and select Update Table.
 -
On the Upload File tab, the following settings display:
-
Name - The table name cannot be changed to ensure that existing queries will not fail.
-
Description - Optionally change the description for the table changes.
-
Third Party Data - Reconfirm whether a TPA is required and is in place.
-
Delimiter - Optionally change the delimiter.
-
File Upload - Choose one of the following options:
-
show file preview before creating custom table
-
skip file preview, and create custom table
-
-
Upload file - Drag the updated file into the field or click Upload File to browse.
Resolve any validation issues that occur.

-
-
A pop-up displays to advise that you are overwriting the table and that any saved reports might fail if column names change.

Click Yes, Continue to confirm that you want to continue with the changes.
-
If you chose to skip the file preview, the table is created.
-
If you chose to preview the file after it is uploaded, the File Preview tab opens.
A count of the records displays. This is the total number of rows that will be created in the custom table, not including the column header.
The first four rows of the file display so you can preview the data before you create the table.
Updated table details
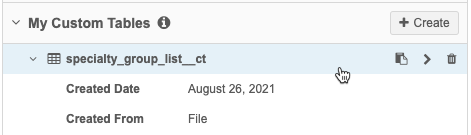
Updates to the table are tracked. Expand the table metadata to see the following details:
-
Updated By - User that updated the custom table.
Displays in the Shared Custom Tables section only.
-
Updated Date - Date that the table was updated.
-
Updated By - Method the table was updated. The value is always File Upload even if the table was created from a reporting query or transformation query.

Audit
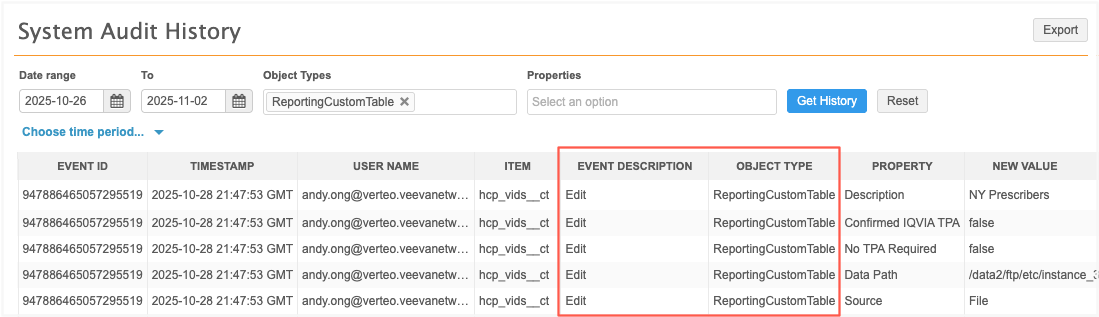
Administrators can track updates to custom tables in the System Audit History.
To quickly find these updates, use the following Object Type filter: ReportingCustomTable. The Edit Event Description is added to support update action.
Delete tables
You can clean up the custom tables that you no longer use by deleting them.
-
To delete a table, hover over the custom table name to display the action buttons. Click the Delete icon.
My Custom Tables
All of the tables in this section can be deleted because you created them.
Shared Custom Tables
Tables in this section can be deleted if you created them. System Administrators and System and Data Admin users can delete any custom table.
If the Delete Table option is dimmed, you do not have access to delete the table.

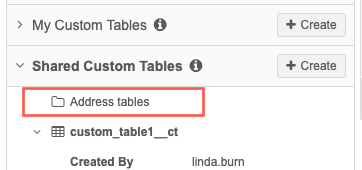
Create folders
To organize your tables, you can create folders and sub-folders in the custom table sections.
To create a folder:
-
In the My Custom Tables or Shared Custom Tables section, click Create and choose Folder.
-
On the Create Folder pop-up, type the folder name. Click Create Folder.
The folder is added to the section above any existing tables.
-
To organize your existing tables, drag them into the new folder. The hierarchy will be updated.
-
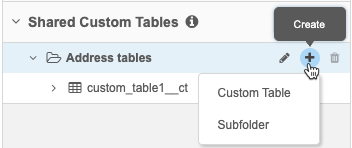
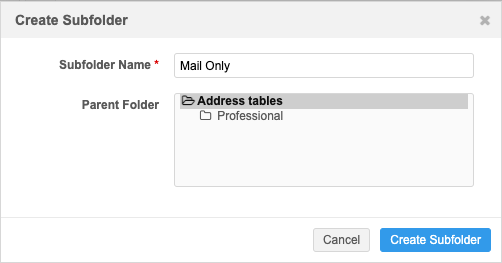
You can also create sub-folders within a folder. Hover over the existing folder and click the Create (+) icon and click Subfolder.
The Create Subfolder pop-up displays the hierarchy so you can choose where to add the sub-folder.
Edit folder names
Folders and sub-folder names can be changed.
-
Hover over the folder and click the Pencil icon. Make your updates in the name field. Folder names must be unique within the hierarchy; for example, in a top-level folder, two sub-folders cannot contain the same name.
Move folders
Folders can be moved into other folders so you can easily organize the hierarchy within your My Custom Tables and Shared Custom Tables sections.
-
Drag and drop a folder into another folder.
The contents of the folder and any sub-folders will also move. Folders cannot be moved between the two sections.
Delete folders
Folders and sub-folders in the Shared Custom Tables sections can be deleted by all reporting users. You can delete all folders in your My Custom Tables sections.
-
Hover over the folder and click the Delete icon. In the confirmation pop-up, click Yes, Delete Folder. The folder is removed from the custom table section.
The icon is dimmed if the folder contains tables. When you delete a folder that contains empty sub-folders, all of the folders are deleted at the same time.
Search for tables
Use the search bar in the tree view to find custom tables and their fields. Folders do not display in the search results.
Your search term displays below the search bar so you can see what the results are filtered on. Click Clear Search to clear the filtering and view the entire tree view again.

Logs
All of the actions (creating, deleting, and editing table names and folders) are tracked in the System Audit History (Logs).
Saved reports considerations
Tables from the My Custom Table category can be used in Saved Reports.
Saved Reports use the data permissions of the user who last modified the report. When the user who last modified the report is the creator of the private custom table the report will run successfully. If the Saved Report results are shared with other users, those users might see data from the private custom table. This is expected behavior.
If the Saved Report contains a private custom table and the user that last modified the report is not the creator, then the SQL validation will fail or the user will see an error.