
Introduction
Once you’ve completed designing your widget, you now need to integrate the widget with Service Cloud. The main two concepts we will go over is the download mechanism options and tagging records that have been downloaded to Service Cloud.
Downloading records to Service Cloud
Display the Add Account button
When a user clicks on the "Add Account" button (the label can be customized), we want to create a new account record into Service Cloud using the data from Network. The new account should contain information from the HCP, HCO record, and child records such as licenses, addresses, and parent affiliations. Users can add accounts from the Search screen, Profile page or Add Request page. All three will trigger the same download process. The add account button can be customized through the Admin page; by default the label will display "Select."
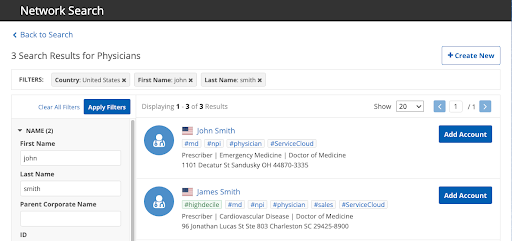
Add account from the Search results page
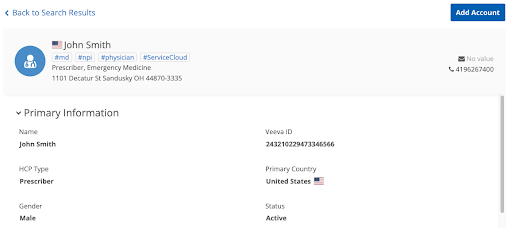
Add account from the Profile page
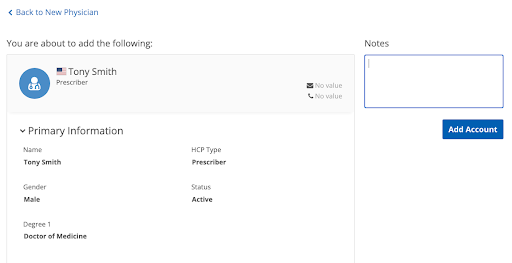
Add account from the Add Request page
Integrating with the Add Account button
How does this work? From a high-level perspective, when a user clicks on the Add Account button (or the Select button), we will fire an event that will provide the developer with a JSON document containing the details of the record. The developer will need to take the details of the record from the JSON and create an account in Service Cloud using that information.
From a developer point of view, when the Add Account button is selected, we will fire the following event for the search widget.
'veeva-network:<your-widget-name>:select'
For this event, the JSON is provided in the event data. Here is an example of how to pull the JSON data.
(ev) => {
	const { entity } = ev.detail.entity;
}
Using the JSON, developers will be able to get the record details and create an account in Service Cloud. To view more technical details on capturing the event data and creating accounts in Service Cloud, please refer to our case study on the developer site.
Reference data mapping using reference aliases
When viewing the JSON, you may notice that reference fields will have code displayed by default. For example, for the HCP type, you may see ‘P’ displayed for prescribers.
For each system in Network, you will be able to define reference aliases. Reference Aliases will help you with integrating new data sources that have different reference codes than Network and exporting data to a downstream system that requires their own reference mappings.
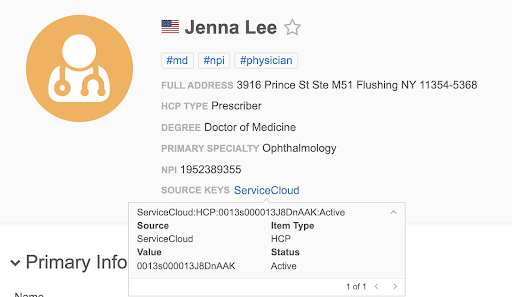
For widgets, each search widget must be tied to a system. After applying reference aliases to your widget’s system, the JSON returned after records are downloaded will have the reference alias displayed.
For example, if the following reference alias mappings are done for our Service Cloud system, when a prescriber is downloaded, we will see D as the HCP type value.
| Network Code | Network Name | Target Alias |
|---|---|---|
| O | Business Professional | BP |
| P | Prescriber | D |
Tip: This can be useful for State/Province mappings.
Tagging records downloaded to Service Cloud
There are cases where customers may want to know what records were added to Service Cloud via the Search Widget. This could be for a number of different reasons:
- Pushing updates for only those records in Service Cloud
- Searching for records and identifying those records in Service Cloud
- Debugging purposes
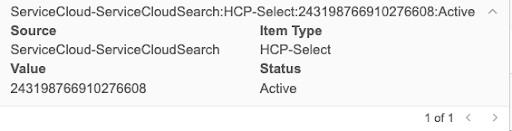
The way to tag these records is using Network’s custom key object. We can create a custom key called "ServiceCloud" with the Account ID. When pushing updates to Service Cloud via a target subscription from Network, you can filter on the custom key to only export records that are in your Service Cloud org. This way not all records in your Network instance will be pushed to ServiceCloud.
There are two ways to create a custom key via the Search widget when records are downloaded or added:
- Generated custom key by the widget
- Associate custom key method
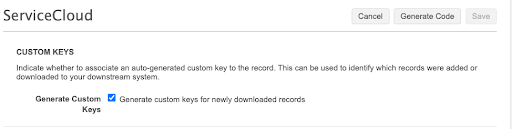
Generated custom key by the widget
The first way is very simple: In the search widget configuration, there is an option to generate a custom key. This will create a custom key that will use the widget name, system and VID. However, this will not contain the account ID of the record.
Associate Custom Key
For a more dynamic and flexible approach, developers can leverage our associate custom key method for widgets. When a record is downloaded, developers can use the associate key method as shown below:
associateCustomKey(vid__v, custom_key_source_type, custom_key_item_type, custom_key_value, system_name)
Developers will need to provide the VID, source, item type, value and system. This will them to create custom keys that contain the account ID after a record is created in Salesforce. To read more about the associate key method, please see our developer guide.
This should help to summarize integration with widgets after downloading and adding accounts. See the following related articles for more information: