Create a DCR Status widget
Network administrators create and customize the DCR Status widget (previously called My Requests widget) in their Network instance. When the configuration is saved, Network generates the code that web developers will use to embed the widget in the internal application. You can also add the widget to an application to use in the Network Portal.
DM
DS
ST
Configure the DCR Status widget
To add a DCR Status widget:
- In the Admin console, click Widgets & Portal > Network Widgets.
- Click Add Network Widget.
-
In the New Network Widget dialog, select DCR Status Widget from the list.
- Click Create Widget.
The New My Widget page displays. -
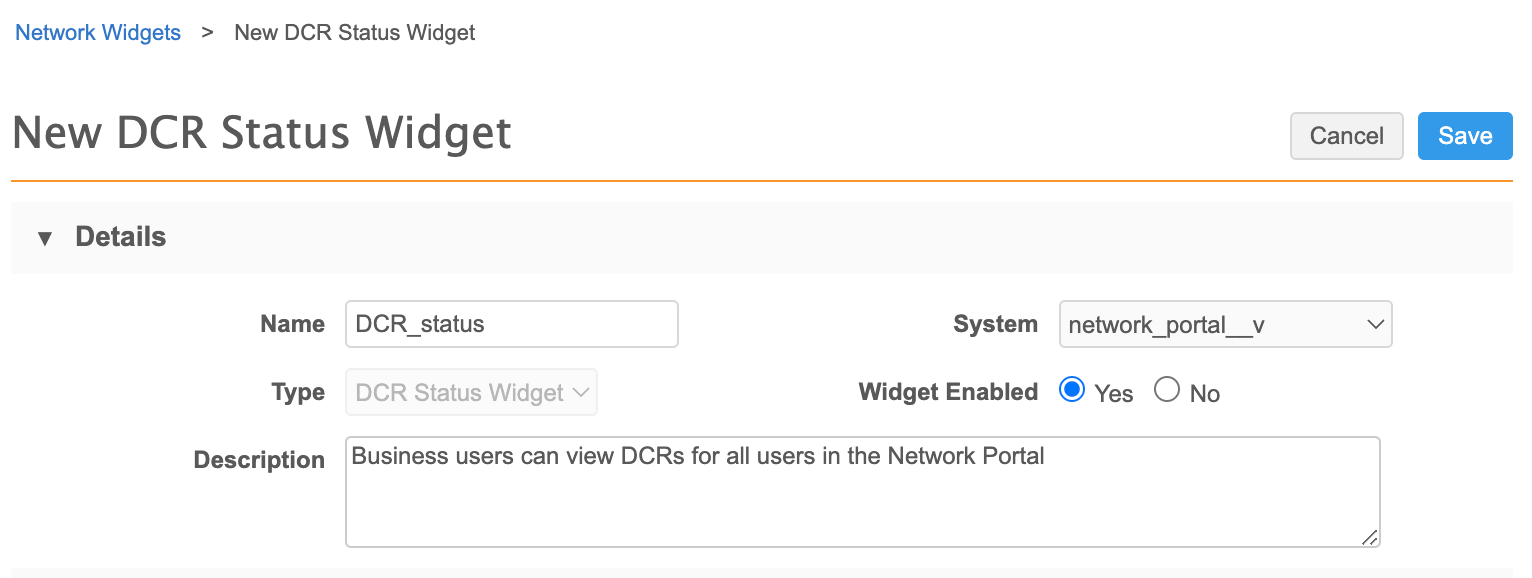
In the Details section, define the following information
- Name and Description.
-
System - Select a source system.
- Type - DCR Status Widget is selected by default.
- Widget Enabled - Yes is selected by default.
-
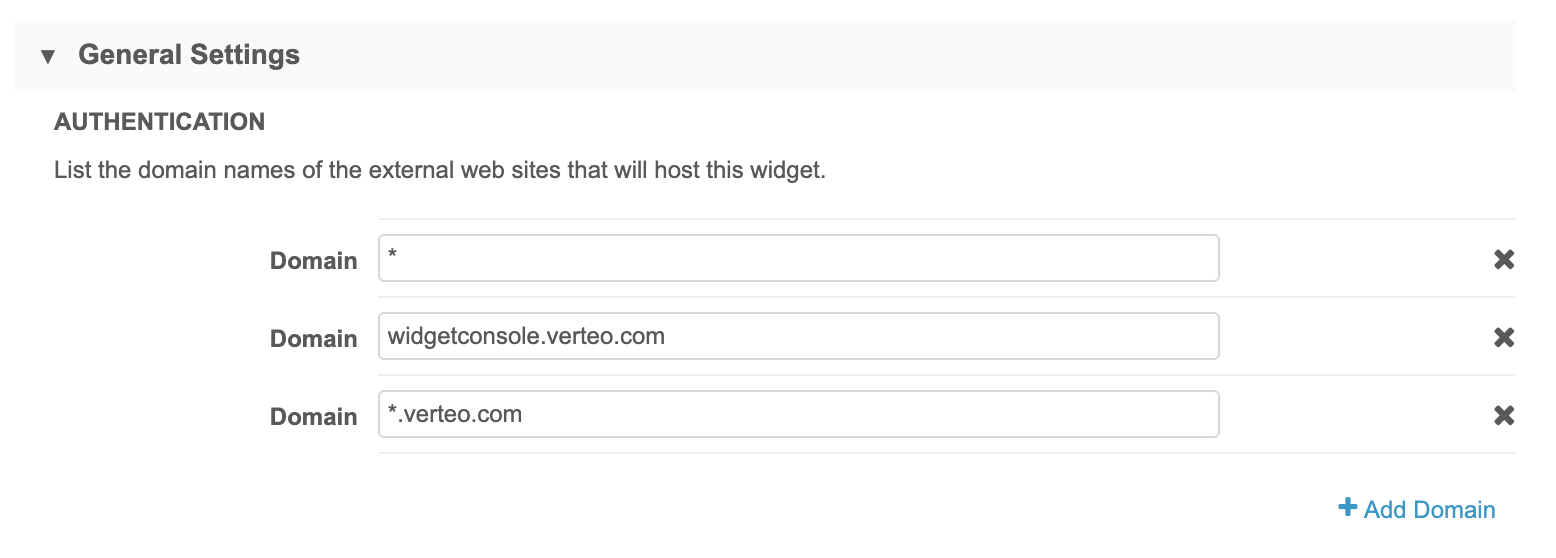
In the General Settings section, define the domain and behavior for your widget.
-
Authentication - Type the domain name for the internal website that will host the widget.
Multiple domain names can be added. Wildcards are supported in case the domain changes and to support multiple domains.
Click +Add Domain to specify additional domains.
Examples
-
Network Portal - If you are embedding the widget into the Network portal, use *.veevanetwork.com or your instance URL; for example, verteo.veevanetwork.com.
-
Salesforce - If you are embedding the widget into a Salesforce Visualforce™ page, use *.visual.force.com.
Hosting website requirements
Widget type Details Production widgets For security, the hosting website must use the HTTPS protocol. If the website does not use HTTPS, the widget cannot be accessed. Sandbox widgets These widgets can be hosted on websites that use the HTTP or HTTPS protocol.
Allowing HTTP for sandbox provides flexibility to developers to test the widgets on a local host server.Note: If developers are implementing the widgets using a local host server, add an asterisk (*) to the domain list in the widget.
-
-
Languages - Any languages that should display in the widget. English is defined by default.
-
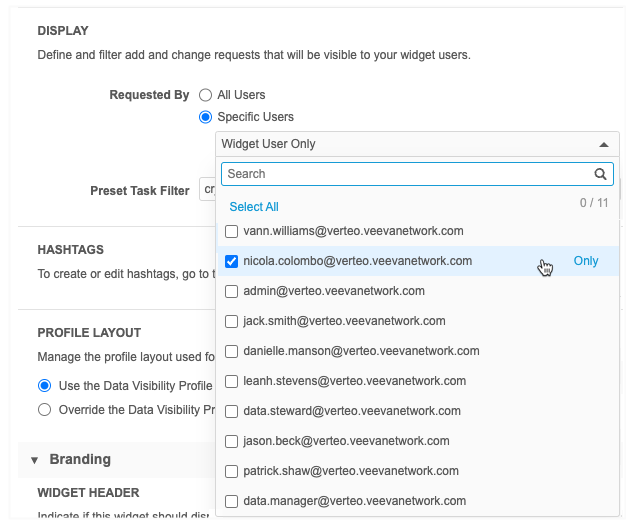
Display - Define the DCRs that will display for business users.
Requested By - Use this list to add users to the widget. Business users will be able to view the DCRs submitted by these users.
-
All Users - Select to include all current users and new users that will be added to the list.
-
Specific Users - Expand the list to choose individual users. Only active users display in the list.
By default, this option is set to Widget User Only for new and existing widgets
Use Select All to choose all current users. This option does not automatically include new users that are added to Network.
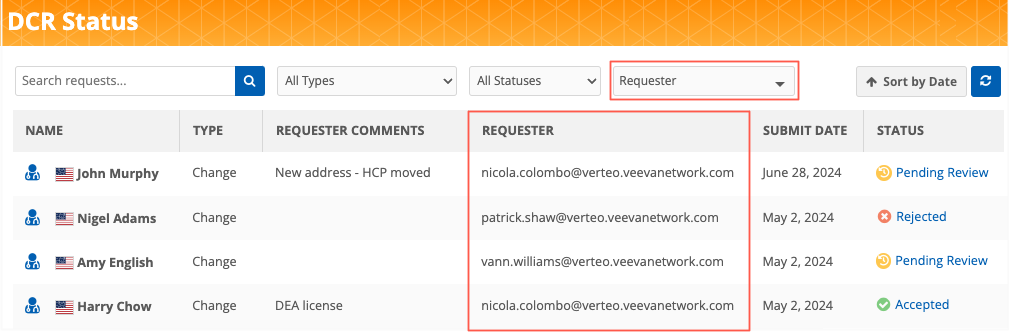
If additional users are defined, the widget is updated to include the Requester column. The Network user name displays in the column. The Requester filter is also added so you can filter the widget to view tasks submitted by specific users.
Preset filters - Configure the widget to only display only specific tasks.
Example - One filter
To configure the widget to display DCRs that have been rejected, set the following filter:
cr_status:REJECTED
Widget users will only see tasks that have been rejected.
Example - Multiple filters
Use the Tilde (~) symbol to combine filters.
To configure the widget to display tasks from a specific system that are waiting to be reviewed, set the following filter:
cr_status:PENDINGREVIEW~system:EngagementPortal
Widget users will only see pending tasks that were submitted from their Engagement Portal.
 Supported filters and values
-
task_type - ADD_REQUEST, CHANGE REQUEST
-
task_status - NEW, IN_PROGRESS, CLOSED
-
task_country - Country to which the task belongs (for example, US)
-
resolution - CHANGE_PENDING, CHANGE_ACCEPTED, CHANGE_REJECTED, CHANGE_PARTIAL
-
created_at - Date the task was created (for example, 2024-07-26)
-
cr_status - REJECTED, PENDINGREVIEW, ACCEPTED, PARTIALLYACCEPTED
-
creator - Name of the user that submitted the task
-
completed_at - Completed date of the task (for example, 2024-07-26)
-
completed_by - The ID of the user that approved the task
-
system - The name of the system that generated the task
-
entity_type - HCP or HCO
-
owner - ID of the task owner
-
-
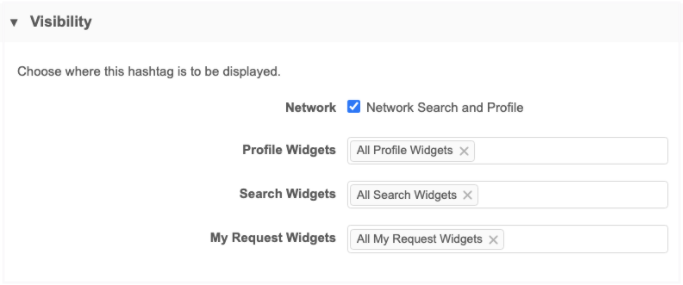
Hashtags - Network hashtags display in enabled DCR Status widgets by default. Hashtags are automatically applied to requests to summarize important details on the record.
Click the Hashtags link to go to the Network Hashtags configuration. You can open a hashtag and go to the Visibility section to define the hashtag settings for this widget.
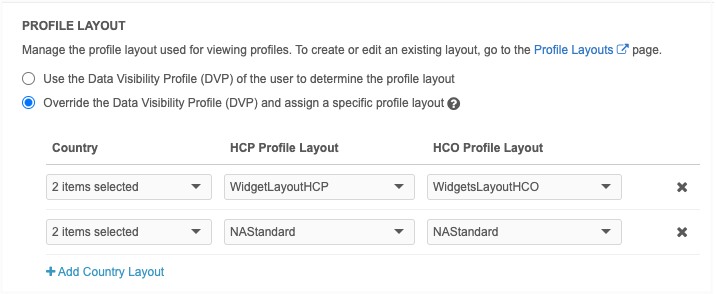
- Profile Layout - Determine which layout to use for viewing profiles.
Typically, the layouts assigned to the user's data visibility profile contain all of the fields in the Network data model. You can override this default behavior and assign specific profile layouts for each country to the widget. For example, you can use custom profile layouts to limit the number of fields so widget users only see the essential fields.
Choose one of the following options:
Use the DVP of the user - Typically, the layouts assigned to the DVP contain all of the fields in the Network data model.
Override the DVP and assign a specific profile layout - Use a custom profile layout.
If you choose this option, define the Country and profile layouts for HCPs and HCOs.
Important: If you override the layout to display a limited set of fields in record profiles, it also impacts that fields that display in their requests. If the field isn't included in the layout, it will not display in the request.
-
Branding - Customize the appearance of the widget.
-
Widget header- Choose whether your widget should display a header. For the Network Portal, a header is not required.
By default, a header is not included so the widget displays seamlessly into your internal portal. If you include a header, you can add a custom logo and title.
-
Images - If you choose to include a header, upload a logo to add to the widget.
Image files in .JPG and .PNG formats are supported. The image name cannot contain spaces. The image file will be automatically resized to fit in the appropriate space. The maximum height and width is 24px by 24px.
The uploaded image displays in the Preview section.
- Fonts - Choose the font family to be used in the widget. By default, Open Sans is selected.
- Colors - Customize the colors for your widget.
- Link Color - Used for all links. Default, #3A78BB
- Icon Color - Used inside the HCP and HCO icons. Default, #FFFFFF
- HCP Icon Color - The default icon color for HCPs when a metric is not selected. Default, #444444
- HCO Icon Color - The default icon color for HCOs when a metric is not selected. Default, #005FB1
-
-
-
In the Labels section, define the Widget Title -The languages that you defined for the widget are listed. If you chose to have a widget header, type the Widget Title label for each language.
By default, the title is Network My Request. It can be a maximum of 80 characters.
- Save your changes.

The DCR Status widget can be added to a new or existing application in your Network Portal. This enables users with access to the Network Portal to view their DCR requests.
For detailed instructions, see Network Portal administration.