Creating configuration packages to export
Exported packages can be created and exported to a Network target environment, eliminating the need to do configuration updates manually.
Updating a target environment with configuration packages has the following benefits:
- The process is transparent, documented, and auditable.
- Only authorized users can make deployments to target systems.
- Manages the complexity of dependent configuration objects.
- Deployments are non-disruptive to target system processes.
Considerations for Network features
Before creating packages, review these details for specific Network features.
General settings
Feature settings are not included in the export package. Features must be explicitly enabled in the target environment.
Primary fields
When configurations are imported to a target environment, Network Calculated primary fields can be duplicated if they have different names on the source and target environment.
Before you create a package, do the following to prevent duplicate primary addresses or affiliations :
- Ensure that any exported and imported Network Calculated primary fields have the same field name in source and target environments.
- After importing a primary type field, ensure there are no other Network Calculated primary fields on the entity.
Veeva Connectors
Veeva Connectors can be exported to a target environment but credentials and schedules cannot; schedules and credentials must be defined on the target instance.
Network Bridge
Single and multi-country bridges can be exported to a target environment.
The following dependencies are automatically added:
-
Child bridges (if it's a multi-country bridge)
-
System
-
Target subscription
The following dependencies are excluded from the package:
-
External Credentials
-
Schedules
Schedules and credentials must be created in the target environment.
Multi-country bridge name updates
Changes to the multi-country bridge name in the source environment will not update child bridge names that have been added in the target environment.
Job triggers
Subscriptions can be configured with triggers to start a subsequent job or to send an email when the current job completes. Job triggers are not included when subscriptions are added to export packages. They must be configured on the target environment.
Create a package to transfer to a target environment
Use this method to package configurations and transfer them to an associated Network instance.
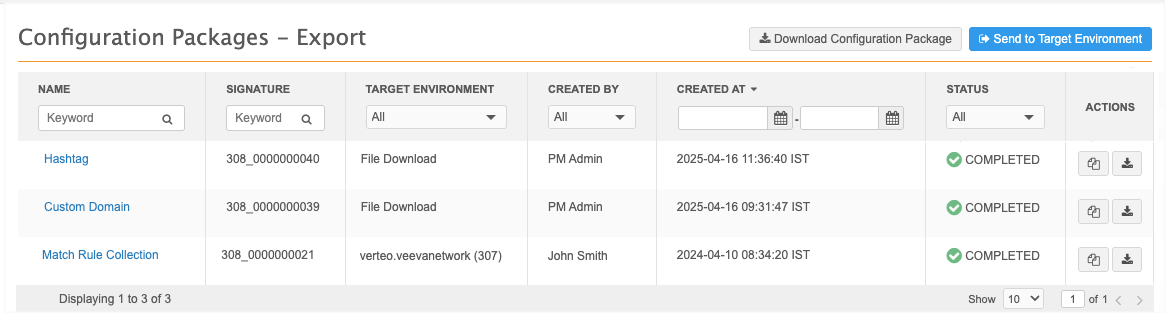
- In the Admin console, click Settings > Configuration Export.
- On the Configuration Packages - Export page, click Send to Target Environment.
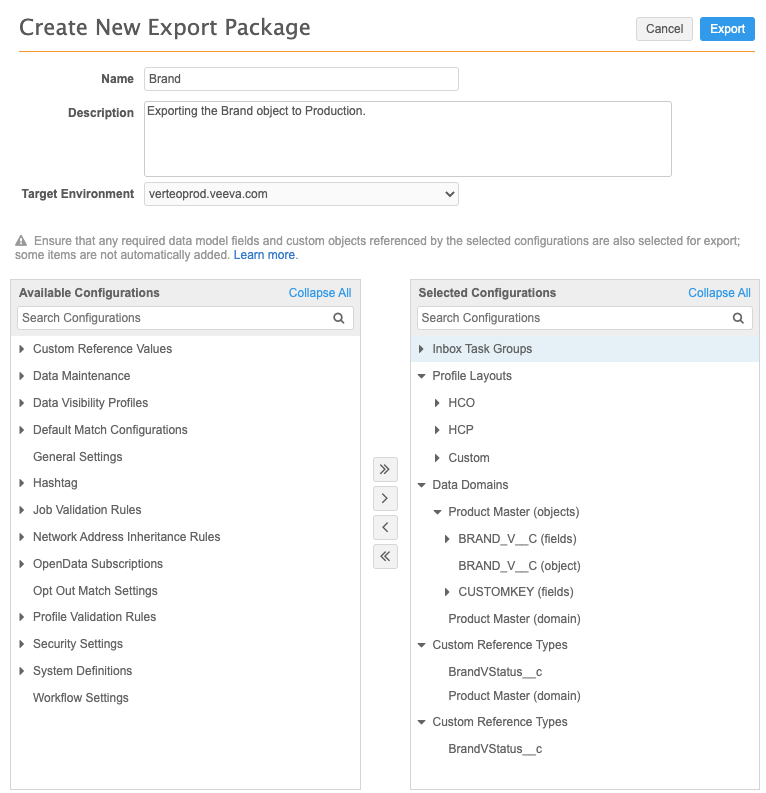
- On the Create New Export Package page, define a name and a description for the package.
- In the Target Environment list, select the server to export the package to.
The list is pre-populated with a list of available environments. Each environment on the same domain can be a source or a target environment at the same time, enabling bi-directional deployment of configurations.
If the list contains targets that should not be available for package deployment (for example, POC environments), contact Veeva Support to request that they be removed from the list. Veeva Support can also manually add any target environments that are missing from the list.
Tip: If the target environment is not associated, use the Download Configuration Package option so you can download the package locally and upload it to any target environment.
-
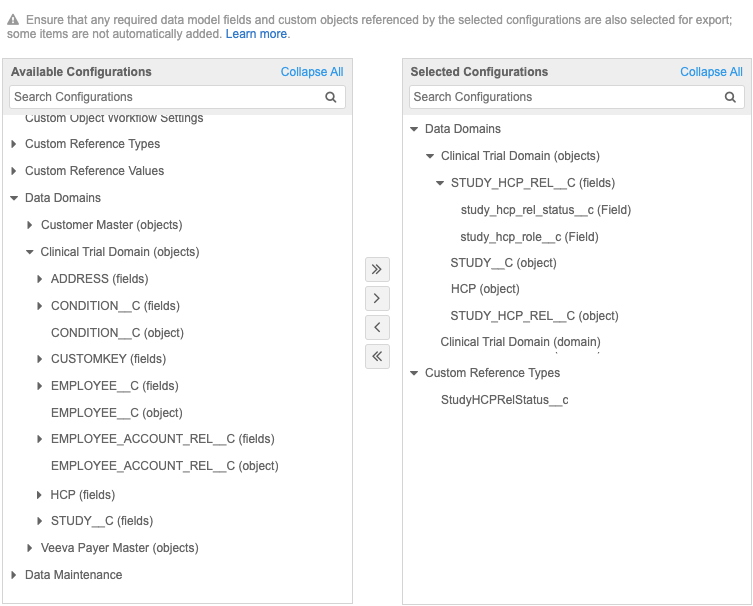
Select the configurations to export by expanding the nodes in the Available Configurations pane and moving your selections to the Selected Configurations pane.
-
Add dependencies to the export package.
When you move configurations into the Selected Configurations pane, the selections are validated to check for dependencies. When you select Veeva standard objects and custom objects, most dependencies are automatically added but custom data model fields are not.
Also, when you add some feature configurations to your package, custom object dependencies are not added. For more information, see Custom object dependencies.
If you remove configurations from the selection, the package must be validated again by clicking the Validate button.
- Click Export to deploy the package to the target environment.
-
On the Confirm Export dialog, ensure that the target environment is correct. Click Proceed.
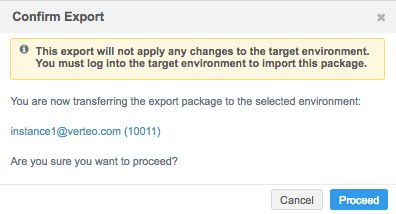
The configuration package is transferred to the target environment, but the configuration is not applied to the target. The changes are only applied when the package is imported on the target environment.
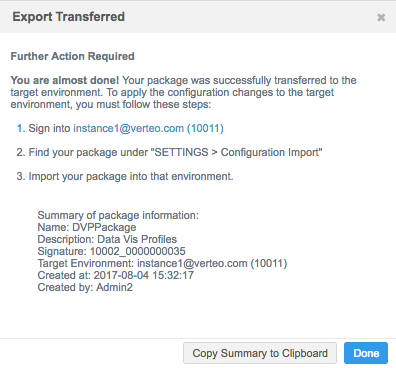
- The Export Transferred dialog provides the status of the export, a summary of the package, and details for importing the package to the target environment. Click Done.
Next steps
See Importing configurations to learn how to import the package to the target environment.
Creating an export package to download
Configurations can be packaged and downloaded locally so they can be uploaded and deployed to any Network sandbox.
To create a file to download:
-
In the Admin console, click Settings > Configuration Export.
-
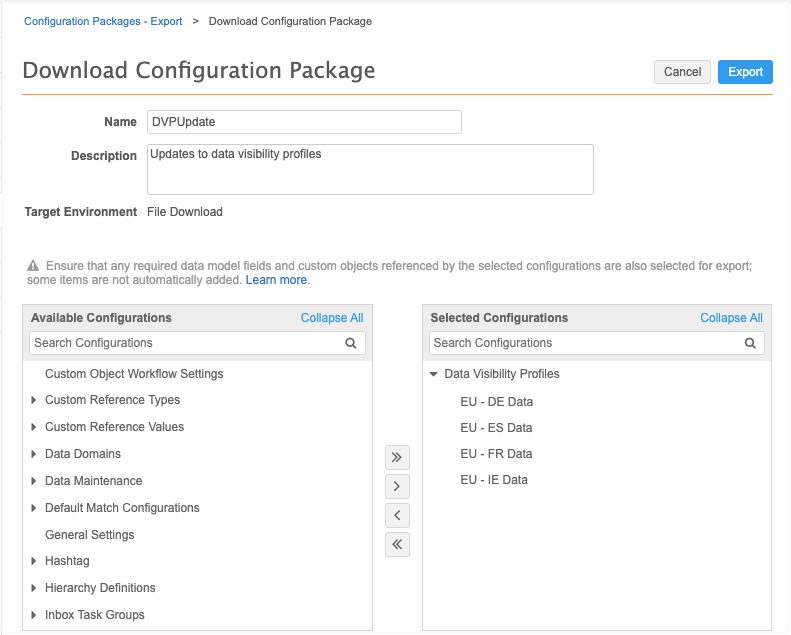
On the Export page, click Download Configuration Package.
-
On the Download Configuration Package page, type a meaningful Name and Description.
-
The Target Environment is set to File Download.
-
Select the configurations to export by expanding the nodes in the Available Configurations pane and moving your selections to the Selected Configurations pane.
-
Add dependencies to the export package.
When you move configurations into the Selected Configurations pane, the selections are validated to check for dependencies. For Veeva standard objects and custom objects, most dependencies are automatically added. Dependencies are not added for custom data model fields and some custom object dependencies. For more information, see Custom object dependencies in the Veeva Network Online Help.
-
If you remove configurations from the selection, the package must be validated again by clicking the Validate button.
-
Click Export to create the file.
-
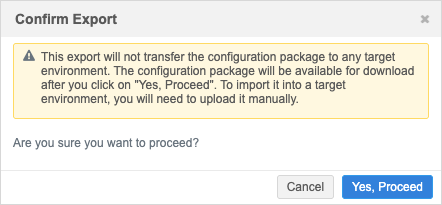
A dialog displays to remind you that the file will be downloaded and not exported to a target environment. To confirm and create the file, click Yes, Proceed.
-
The Export Transferred dialog displays with the details of the package. Click Download Configuration Package.
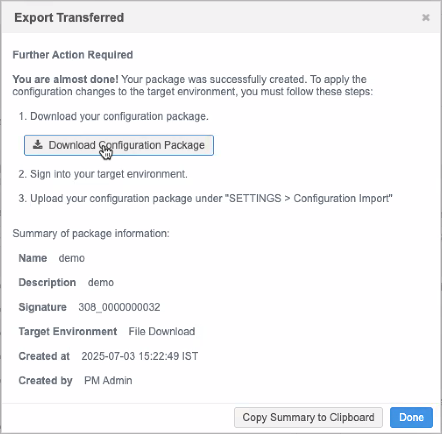
To close the dialog, click Done.
-
The Details page for the file package displays. You can Download or Clone the package from this page.
Review the exported package file
The file is downloaded to your local computer with the following naming convention: ConfigPackage_instance_<instance_ID>_<date>_<time>_<timezone>.zip.
Example: ConfigPackage_instance_308_2025-07-03_091455_IST.
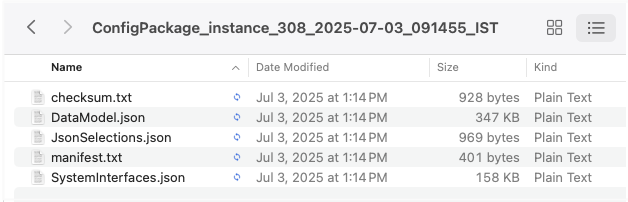
The package contains the following files:
-
checksum.txt - This is a new file that is used to validate that the package has not been changed after it was created.
Important: No changes can be made to the package. It must be imported to the target instance in its original form.
-
manifest.txt - Metadata of the package.
The file includes the package version. Packages created before the Download Configuration Package option was available are version 1.2 and lower. The file must be version 1.3 or higher for files to be validated when they are uploaded to a Sandbox instance.
-
JsonSelections.json - Stores the configurations selected for the package.
-
.json file - A file for each configuration category.
Next steps
Optionally import the package to a target environment. See Importing configurations.
Custom object dependencies
When you create an export package that contains feature configurations (for example, source subscriptions), ensure that all the custom objects and fields are also added so your package is complete. Network does not validate the custom field dependencies or custom object dependencies when feature configurations (for example, Profile Layouts) are added to your export package.
Data domains
There is an automatic dependency between all main objects and data domains. If you have a main object in two different custom domains; both data domains are added when you move the main object into the export package. This is true for custom main objects and Veeva main objects (HCO or HCP).
You can remove data domains from the export package as long as one data domain remains. This is helpful if you have data domains in your development environment that you do not want to export to production environments.
Note: If you remove all data domains from the package, when you click Validate Selection they will all be moved back into the package.
In the Data Domains category, each custom domain has the following configuration nodes:
- <custom_object>__C (object)
- <custom_object>__C (fields)
If the custom domain contains Veeva standard objects, the following configuration nodes might display:
-
HCP (object)
-
HCP (fields)
-
HCO (object)
-
HCO (fields)
-
Address (fields)
-
License (fields)
-
ParentHCO (fields)
HCP and HCO object nodes are included to ensure that their association to the custom domain is exported. Address, license, and parent HCO objects do not have object nodes because they are indirectly associated to the custom domain through their related main object.
Note: In the Customer Master domain, HCOs and HCPs do not have object nodes because they are automatically associated to the Customer Master domain in any target environment.
Custom sub-objects and relationship objects
When custom sub-objects or relationship objects are added to an export package, the linked main object (HCP, HCO, or custom object) is automatically added to ensure the data model is intact in the target environment.
All custom domains associated with the main object are added to the export package. You can remove custom domains from the export package as long as one data domain remains.
Dependent custom object fields
The <custom_object>__C (fields) configuration node contains any custom fields that you created for that custom object. Move the <custom_object>__C (fields) configuration node, or expand the configuration node and select individual fields to move into the Selected Configurations pane.
Example
To export the STUDY custom object to a target environment, select the STUDY__C (object) configuration node and any required fields from the STUDY__C (fields) configuration node and move them into the Selected Configurations pane.
Custom object dependencies for feature configurations
If you include other feature configurations in the export package, custom object dependencies are not automatically included. For example, if you created a target subscription to export the STUDY custom object, ensure that the STUDY custom object is included in the package, or already exists in the target environment. The custom object is not automatically added to the package.
These feature configurations do not export the following dependencies:
| Configuration Object | Dependencies that must be manually added to the export package |
|---|---|
| Ad-hoc Match Configurations | Custom fields, custom objects, custom sub-objects, custom relationship objects |
| Data Maintenance Jobs | Custom fields, custom objects, custom sub-objects, custom relationship objects |
| Profile Validation Rules | Custom fields, custom objects, custom sub-objects, custom relationship objects |
| Data Visibility Profiles | Profile layouts |
| Default Match Configuration | Custom fields, custom objects, custom sub-objects, custom relationship objects |
| Inbox Task Groups | Custom reference values, custom objects |
| Match Rule Collections | Custom fields, custom objects, custom sub-objects, custom relationship objects |
| Merge Rules | Custom objects, custom sub-objects, custom relationship objects |
| Network Address Inheritance | Custom fields, custom reference values |
| Profile Layouts | Custom fields, custom sub-objects, custom relationship objects |
| Source Subscriptions | Custom fields, custom objects, custom sub-objects, custom relationship objects |
| Target Subscriptions | Custom fields, custom objects, custom sub-objects, custom relationship objects |
| Workflow Settings | Custom objects |
Review packages
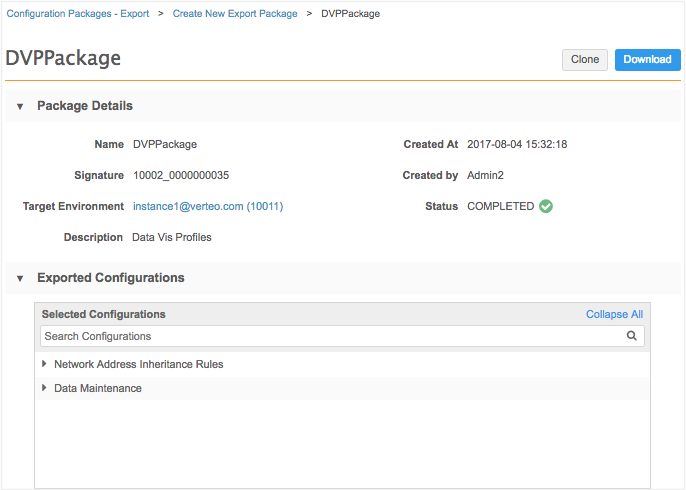
After the configuration package has been exported to the target environment, it displays in the list on the Configuration Packages - Export page. You can review, download, and clone exported packages that are listed on the page.
Persisted packages can be opened so that you can review the package details. To open a package, click a package in the list.
All of the information on the details page is read-only. You can download the package using the Download button.
Download packages
Administrators can download .zip files of packages that have previously been transferred to a target environment. To download the package, click the Download icon ![]() .
.
Review packages
Using a text editor to look at the JSON files, you can view the detailed configurations that the package contains. You can also compare the content of the package with the content of a second package, that was previously exported, by doing a line-by-line comparison in a third-party diff tool.
Clone packages
If you want to use the same selection of configurations from a previous package and export it to the same or a different target environment, you can clone a package. Cloning is helpful for the following situations:
- Deploy a configuration to two separate test environments.
- Syncing the same target environment with updates in the current environment
- Redeploying a package that failed. Deployment can fail if the target server was unavailable.
To reuse a package:
- In the package row, click the Clone icon
 .
. - On the Clone Package page, the name, description, target environment and selected configurations are pre-populated with the values of the cloned package. Change any of the existing values, if required.
- Optional. Make any changes to the selected configurations.
- Click Export to transfer the cloned package to the selected target environment.