Inactivating sub-objects
DM
Administrators and data managers can create jobs to inactivate sub-objects on inactive entities. Jobs can take some time to run, so prioritize your data and work with small, logical sets of data.
Prerequisite:
Optional. Run a report to understand which sub-objects will be inactivated when you run a job. For more information, see Previewing impacted sub-objects.
Create an inactivation job
To inactivate sub-objects on inactive HCOs or HCPs:
- In the Admin console, click System Interfaces > Data Maintenance Subscriptions.
- Click Add Subscription.
- On the Add Subscription dialog, select the Sub-Object Inactivation action.
A New Sub-Object Inactivation Job page displays.
- Specify a Name and Description for the job.
After a sub-object inactivation job has been created, the Action option cannot be changed.
New subscriptions are Enabled by default. For more information, see Inactive subscriptions.
- In the Settings section, select any of the available options:
- Allow File Reprocessing - All files in the source folder will be loaded, regardless of whether or not they have previously been loaded. This setting is enabled by default.
Job Error Log - Export the error log to your FTP server.
If the job produces errors and this setting is on, you retrieve the error log from Network MDM FTP.
Choose where the logs should be stored:
Default - The default error log path is logs/<source system>.
Custom - Define a custom directory.
You can define a custom path for the logs and Network MDM will create the folders in FTP when the subscription runs. For details, see Custom error log directory.
- Inactivation Log - The log identifies the sub-objects that changed during the data maintenance job. A .zip file called CHILD-OBJECT-INACTIVATION-LOG-<timestamp>-<job id>.zip is exported to the outbound folder. Each sub-object has its own .csv log file with the following naming convention: <Object>-Inactivation-LOG.csv. In the event that you need to revert any changes, the log files provide enough information so that you can. This log file is always exported with every sub-object inactivation job.
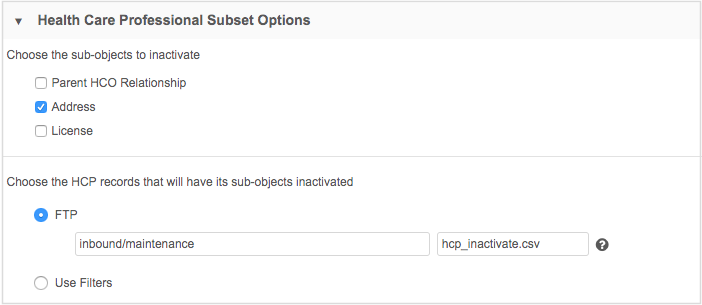
- In the HCP Options and HCO Options section, choose the sub-objects that you want to inactivate: Address, License, Parent HCO Relationship.
- Choose how you will specify the records to inactivate.
- FTP - Create a .csv file with the of the HCPs or HCOs. Define the path and file name of the .csv file.
- Notes:
- You can use one file to contain both HCOs and HCPs and identify it in either the HCP Subset Options or the HCO Subset Options section.
- If you use separate files, the file names can be different, but the FTP path must be the same.
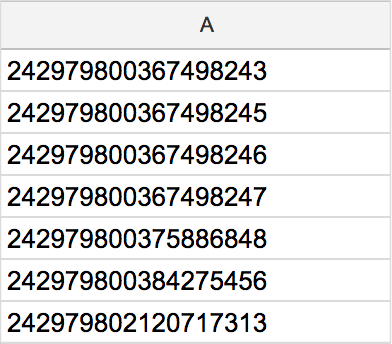
Requirements for the .csv file:
- One column only that contains the lists of Network IDs
- Column header is optional and must not have any other characters around the text
- Network IDs must be listed in separate rows
- Double quotation marks ("") around Network IDs are permitted
- No extra characters; for example, commas (,) after Network IDs
- File name must be exactly the same format as it is on the FTP site; capitalization matters (for example, VIDS.csv is not the same as VIDs.csv)
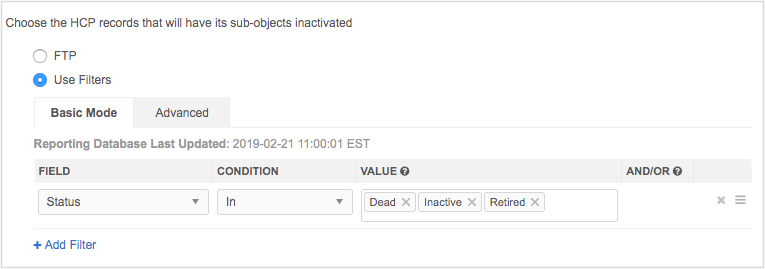
- Use filters - Use basic filters or an advanced filter (using SQL) to identify the records where you want to inactivate sub-objects. To use filters, Network MDM Reporting must be available.
Basic mode
The default filters can be changed or added to.
Advanced mode
Using advanced mode, you can apply different inactivation rules in different countries.
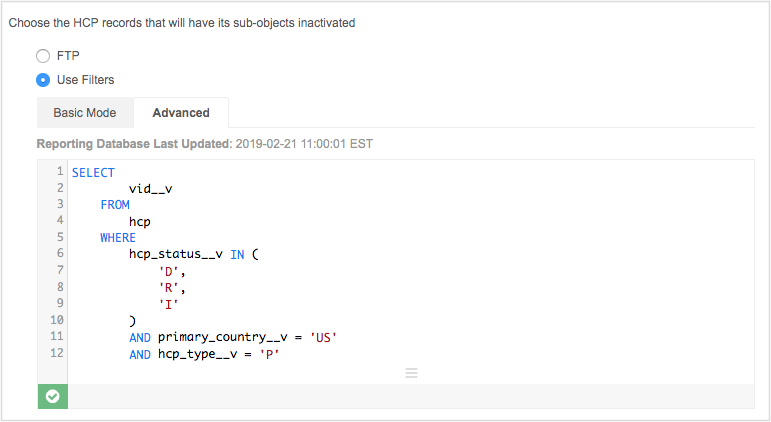
The reporting database identifies the records that are selected in Basic or Advanced queries. You might see a discrepancy between what reports or filters indicate versus the actual status of records in the instance. When you are analyzing inactive sub-objects, take note of the Reporting Database Last Updated time to know when the reporting database was last updated for your instance.
- FTP - Create a .csv file with the of the HCPs or HCOs. Define the path and file name of the .csv file.
-
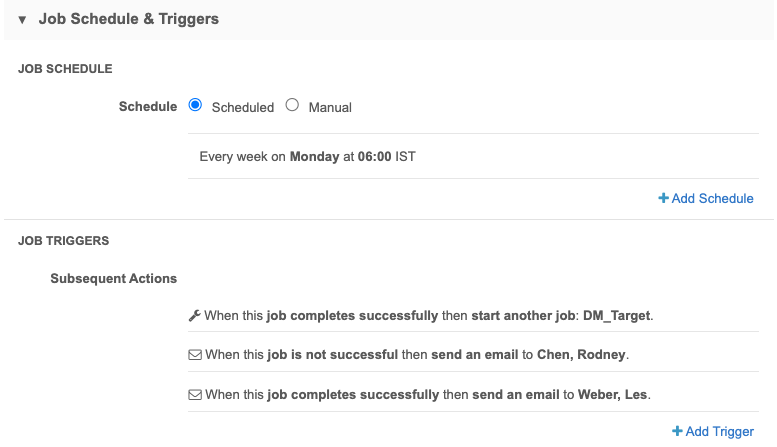
In the Job Schedule & Trigger section, define the schedule for the job and any subsequent actions that will start when this job finishes.
Job Schedule - Run the subscription manually or on a scheduled basis. If you select Manual, the subscription only runs when you click the Start Job button on the subscription page. During testing, select Manual; scheduled jobs should not be paused.
Job Triggers - Trigger other actions to start after a job runs.
Available triggers:
- Send email - Specify users that should be notified for successful and unsuccessful job outcomes.
- Start a job - Start a subsequent job when this job successfully completes.
For more information, see Subscription job triggers.
- Save your changes.
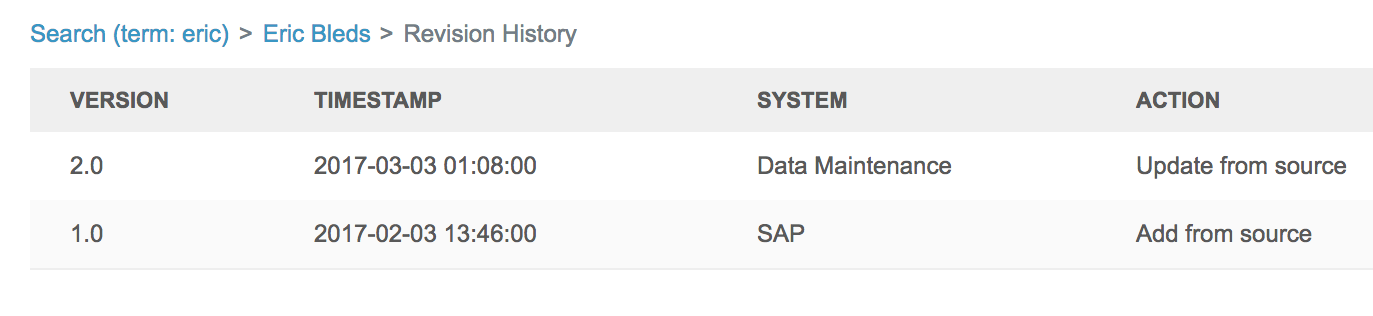
If sub-objects are inactivated, Network MDM business rules run on the record, so there might be changes to other fields. All changes will be documented on the Revision History page (Profile > Revision History).
Viewing results
After a sub-object inactivation job has run, click the job name on the Data Maintenance page and view the Job History section at the bottom of the page.
The summary table displays the outcome and the count of sub-objects inactivated for each job.

Job details
For more information about each job, click the link in the ID column to open the Job Details page.
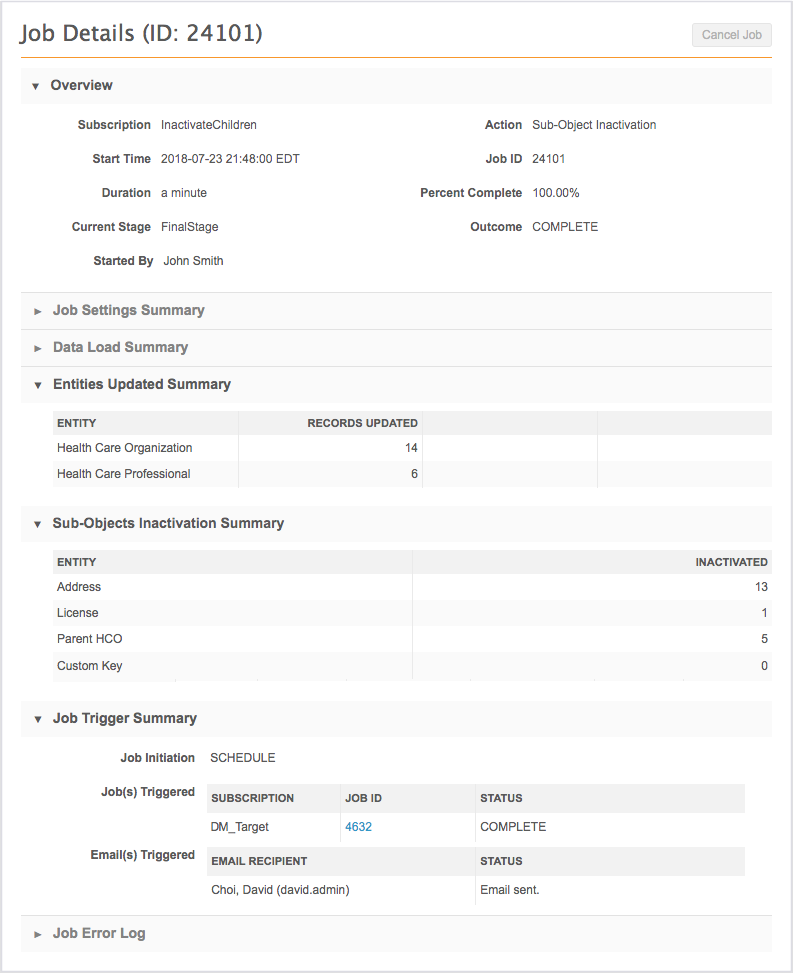
The Job Trigger Summary section identifies how this subscription job started. It could have been started from a job trigger on another subscription (for example, an OpenData subscription or a source subscription).
The Job Initiation value could be any of the following:
- Manual
- Scheduled
- Job ID - The job ID link displays if this job was triggered by the successful completion of another job.
If subsequent jobs or emails were triggered by this job, the details displays beside those headings.
Inactivation logs
An inactivation log is created for each sub-object that you chose in the job configuration. Each log provides information on the records that were inactivated during the job. If a mistake was made, you can use this information to create a source subscription to revert the changes.
Address

License

Parent HCO

Tracking changes
All sub-object inactivation changes to an HCP or HCO record can be viewed in the Revision History from the profile page. Any changes to other fields on the record because of an inactivated sub-object is also documented here.
Reverting changes
If a sub-object is inactivated in error, you can use the information in the inactivation log file to create a source subscription and undo the specific changes.