Step 1: Configure the Hierarchy Explorer widget
Create and customize the Hierarchy Explorer for your internal application. When you save the configuration, Network MDM generates the code that web developers will use to embed the widget in your application.
You can add it to the Network Portal, embed it in Vault CRM Online, or add it to an internal application, or Veeva CRM Online.
Note: If Hierarchy Explorer is added to an internal application or Veeva CRM Online, single sign-on is required.
Prerequisite
The Hierarchy Explorer widget is not available by default. To have it enabled for your Network MDM instance, contact Veeva Support.
For details, see Enable the widget.
Create a widget
-
In the Admin console, click Widgets & Portal > Network Widgets.
The Network Widgets page displays a list of widgets that are configured in your Network MDM instance.
- Click Add Network Widget.
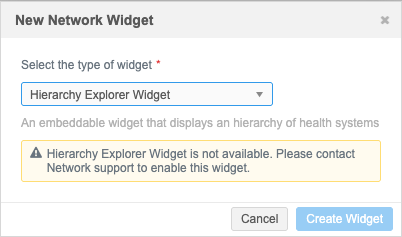
- In the New Network Widget dialog, select Hierarchy Explorer Widget. Click Create Widget.
If Hierarchy Explorer is not enabled in your Network instance, a message displays when you try to add the widget:
Hierarchy Explorer Widget is not available. Please contact Network support to enable this widget.
Details section
Define the following information in the Details section:
- Name and Description.
-
System - Select a source system.
- Type - This list is read-only. It specifies Hierarchy Explorer Widget by default.
- Widget Enabled- Choose Yes.
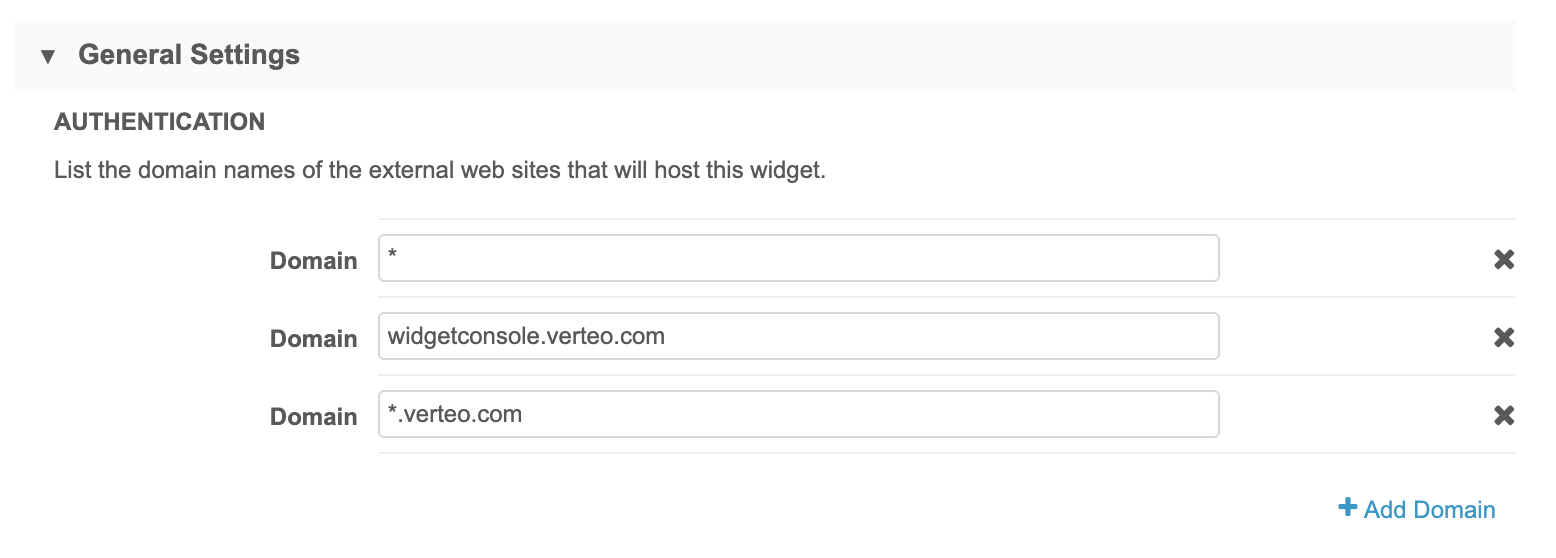
General Settings
The General Settings section contains options for customizing the widget.
-
Authentication - Type the domain name for the website that will host the widget.
Multiple domain names can be added. Wildcards are supported in case the domain changes and to support multiple domains.
Click +Add Domain to specify additional domains.
Examples
-
Network Portal - If you are embedding the widget into the Network portal, use *.veevanetwork.com or your instance URL; for example, verteo.veevanetwork.com.
-
Salesforce - If you are embedding the widget into a Salesforce Visualforce™ page, use *.visual.force.com.
Hosting website requirements
Widget type Details Production widgets For security, the hosting website must use the HTTPS protocol. If the website does not use HTTPS, the widget cannot be accessed. Sandbox widgets These widgets can be hosted on websites that use the HTTP or HTTPS protocol.
Allowing HTTP for sandbox provides flexibility to developers to test the widgets on a local host server.Note: If developers are implementing the widgets using a local host server, add an asterisk (*) to the domain list in the widget.
-
- Languages - Define the languages that should display in your affiliation widget. English is defined by default.
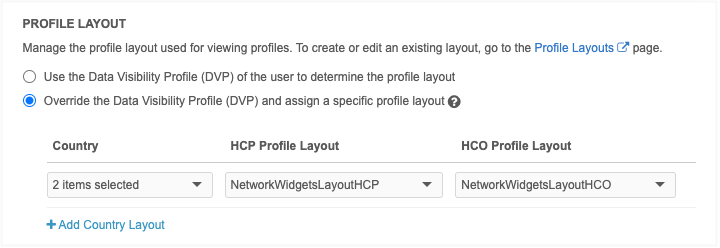
- Profile Layout - Determine which layout to use to display HCP and HCO profiles.
Typically, the layouts assigned to the user's data visibility profile contain all of the fields in the Network MDM data model. You can override this default behavior and assign specific profile layouts for each country to the widget. For example, you can use custom profile layouts to standardize the widget so all widget users see the same fields or to limit the number of fields so widget users only see the essential fields.
Choose one of the following options:
Use the DVP of the user - Typically, the layouts assigned to the DVP contain all of the fields in the Network data model.
Override the DVP and assign a specific profile layout - Use custom profile layouts to standardize the widget so all widget users see the same fields or to limit the number of fields so widget users only see the essential fields.
If you choose this option, define the Country and profile layouts for HCPs and HCOs.
-
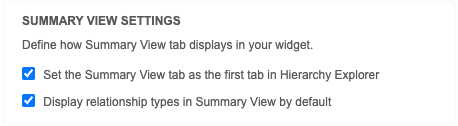
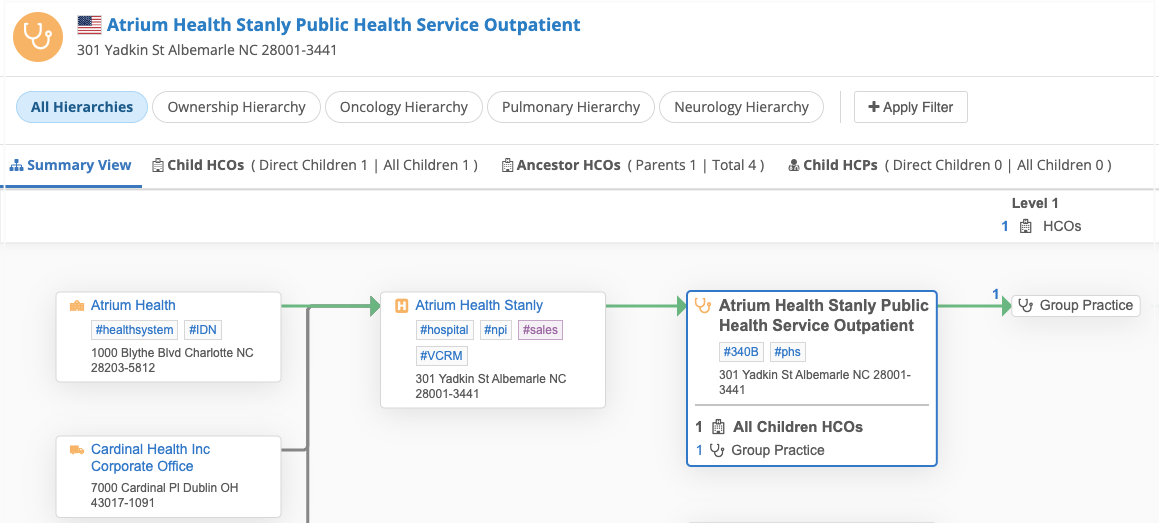
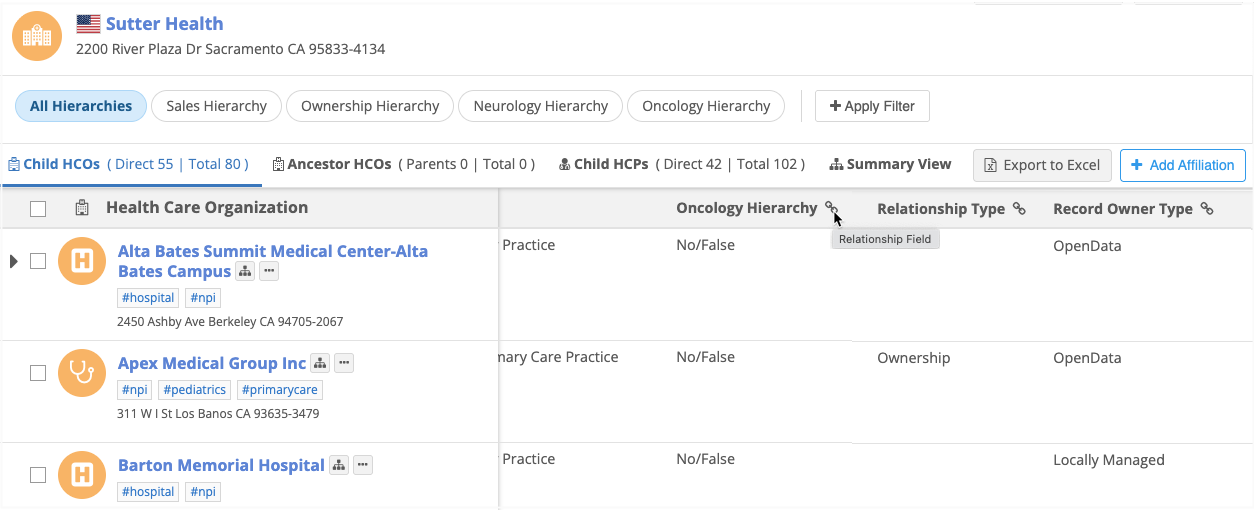
Summary View Settings - Define the display settings for the Summary View tab.
-
Set the Summary View tab as the first tab in Hierarchy Explorer - Display the Summary View tab by default when widget users open a health system so they can immediately see how the HCO is affiliated in the hierarchy.
-
Display relationship types in Summary View by default - Set the Show Relationship Types option to be on by default so users can immediately understand how the HCOs are related.
-
-
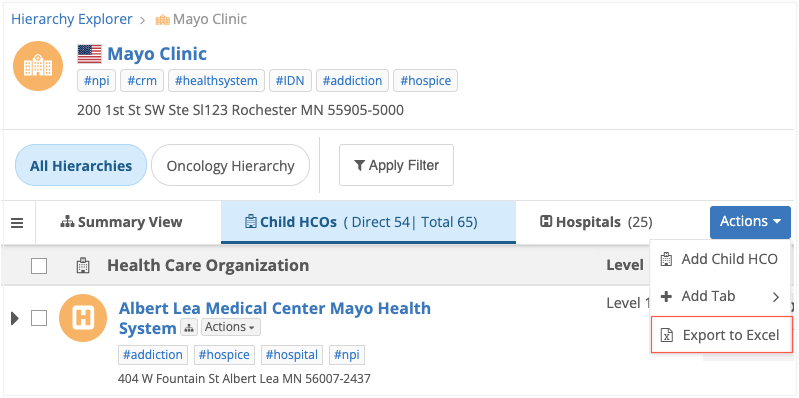
Export to Excel Settings - The option to export HCP and HCO hierarchies to a Microsoft ® Excel file is enabled by default
Clear the checkbox to prevent users from exporting hierarchies (for example, if required for compliance).

The Export to Excel option displays in the Actions menu on the Child HCPs , Child HCOs, and custom tabs.
For details, see Export data from Hierarchy Explorer.

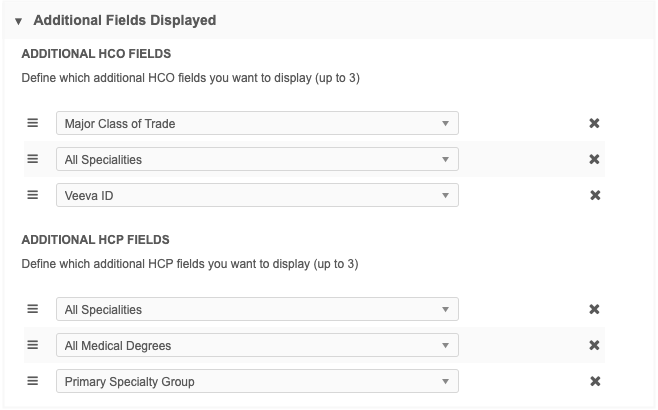
Additional fields displayed
Choose the fields to display for HCOs and HCPs in the hierarchy.
Selected fields will be used in the following:
-
Hierarchy details - Fields display as columns in the hierarchy
-
Filters - Users can filter the hierarchy using these fields.
-
Export file - Fields are exported if users click export the data (Actions > Export to Excel).
Default fields
The following fields display by default:
-
HCOs - HCP Type, Roll-Ups (HCO, HCP)
-
HCPs - HCP Type, Relationship Type
Choose up to three additional fields to display.
Tip: Use the handle ![]() to reorder the fields. The first field in the Additional HCO Fields section will also display on the widget homepage in the Recently Opened view and in the directory Table View.
to reorder the fields. The first field in the Additional HCO Fields section will also display on the widget homepage in the Recently Opened view and in the directory Table View.
Supported fields
-
Fields for the root HCP and HCO.
-
Reference, text, and checkbox fields.
-
Active fields.
Important: All fields used in the widget must be included in the Fields in the Hierarchy Index worksheet.
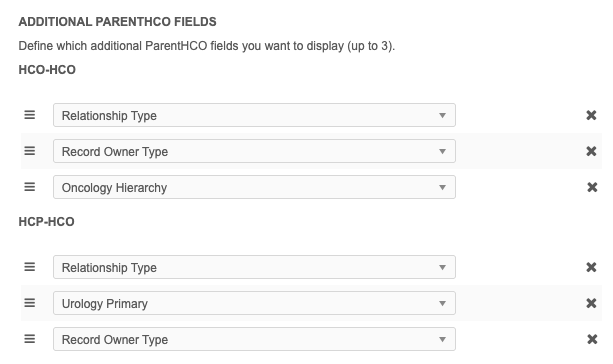
Additional ParentHCO fields
Include relationship fields for accounts to provide more details about their affiliations. For example, you can add Relationship Type and Record Owner Type fields.
Supported fields
-
Reference fields
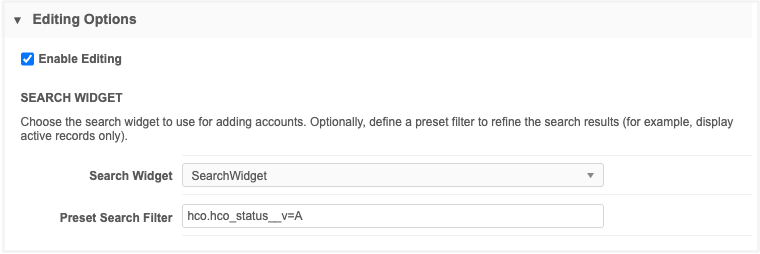
Editing Options
Choose Enable Editing to allow business users to manage affiliations and edit account profiles in the widget.
When editing is enabled, users can make the following changes by default:
-
Edit account profiles
-
Add and remove affiliations in the following hierarchies:
-
All Hierarchies
-
Ownership Hierarchy
-
Enable editing for custom hierarchies
To allow users to manage affiliations in a custom hierarchy, enable editing in the hierarchy configuration (Data Model > Hierarchy Management).
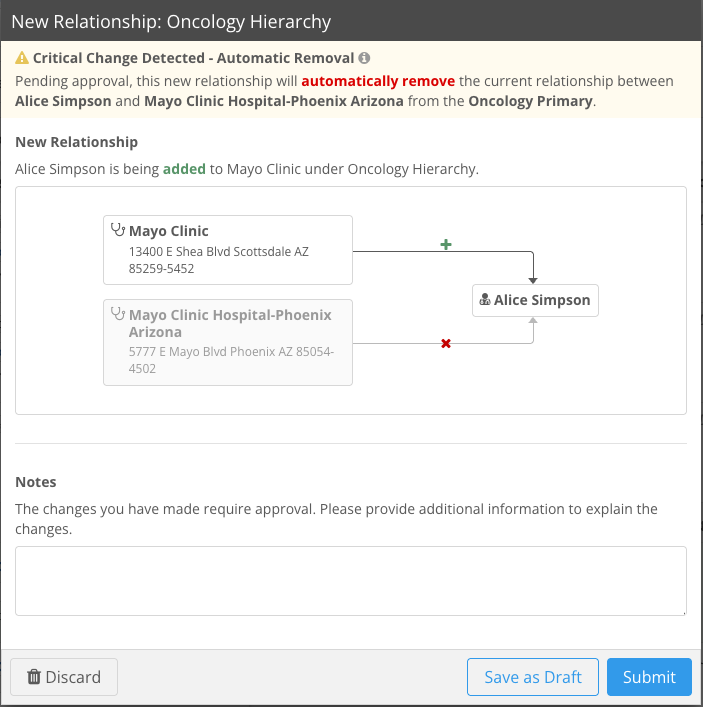
Alerts for Primary Affiliation Changes
Choose the Display Primary Affiliation Alerts to Users to display a warning if a user updates a relationship that will impact an existing primary affiliation.
The alert ensures that users are aware of the impact so they can decide whether to proceed with the change.
Search widget
When users search for affiliations to add to a hierarchy, the results display accounts from your Network instance.
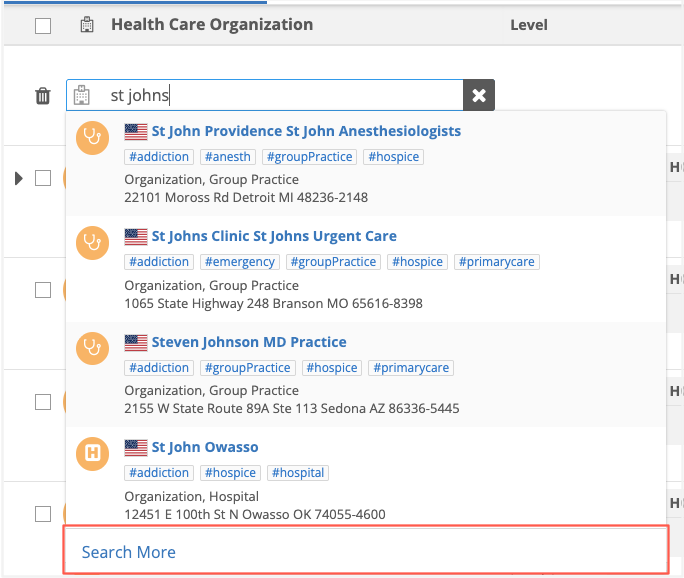
Integrate a Search widget so users can find accounts in Veeva OpenData that have not yet been downloaded to your Network instance. Users can also add accounts using the Search widget functionality.
-
Search Widget - Expand the list and select the widget users can access within the Hierarchy Explorer widget.
-
Preset Search Filter (optional) - Add a preset filter to determine the accounts that will display for Hierarchy Explorer users. For example, to ensure that only active HCOs can be added as affiliations, define the following filter: hco.hco_status__v=A. When users access the Search widget from Hierarchy Explorer, the results will display active HCOs only.
When a Search widget is integrated, users will see a Search More link in the search results when they are adding affiliations. Clicking the link will open the Search widget within Hierarchy Explorer.
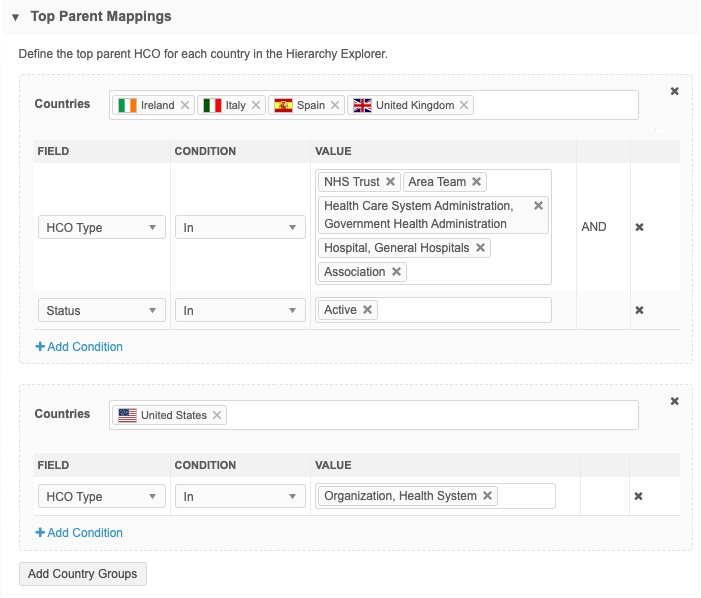
Top Parent Mappings
Define the fields that will identify the top-level HCOs for the Hierarchy Explorer. All of the HCOs that meet the requirements defined here will display in the directory view of the Hierarchy Explorer.
The mappings can be configured for individual countries or for multiple countries that have the same criteria.
Define mappings
Default mappings display for countries if your Network instance contains a data visibility profile for the mapped country. You can edit or remove the default mappings.
To add a mapping, click Add Country Groups.
-
Countries - Choose at least one country to add to the country group.
The list contains countries that are mapped to the data visibility profiles in your Network instance. Countries that belong to an existing group are dimmed in the list.
-
Field - Select the field that determines the criteria. The list contains an intersection of the fields available in the selected countries.
Supported fields
-
Fields that apply to all the countries in the group can be included in the condition.
If you add a country to a group and an existing field is not available for the new country, an error displays and the country group cannot be saved.
-
Reference type and checkbox fields.
-
Active fields.
-
Custom fields.
-
-
Condition - The In condition is supported.
-
Value - Choose the values that apply.
Map all countries to a custom field
To simplify the top Parent HCO definitions, you can create a custom field to flag key networks/IDNs and then map all countries to the field.
Example
Use the existing custom field called Customer Key Network? (key_hco_network__c) to define the top parent for all countries. This field identifies top-level HCOs that are considered key networks or IDNs (Integrated Delivery Networks) in your Network instance. The field is managed by Veeva OpenData.
-
On all HCO records that are key networks/IDNs, set the field Yes/True.
-
In the Top Parent Mappings section, create one country group and add all countries.
-
Add the condition that Customer Key Network? is Yes/True.
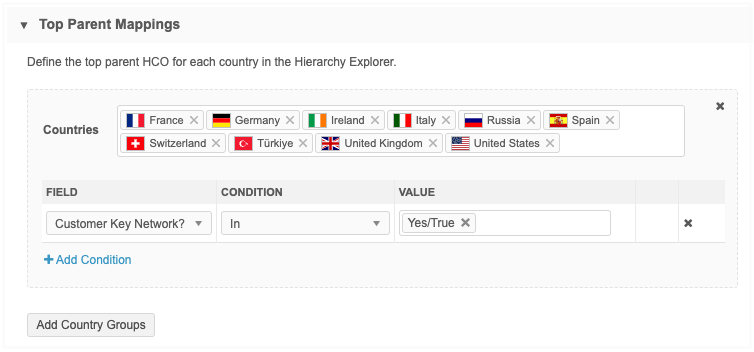
The HCOs that are flagged as a key network/IDN will display as a health system in the Hierarchy Explorer widget for those countries.
Branding
In the Branding section, customize the style of the widget.
-
Widget header- Choose whether your widget should display a header.
By default, a header is not included so the widget displays seamlessly into your internal portal. If you include a header, you can add a custom logo and title.
-
Images - If you choose to include a header, upload a logo to add to the widget.
Image files in .JPG and .PNG formats are supported. The image name cannot contain spaces. The image file will be automatically resized to fit in the appropriate space. The maximum height and width is 24px by 24px.
The uploaded image displays in the Preview section.
- Fonts - Choose the font family to be used in the widget. By default, Open Sans is selected.
-
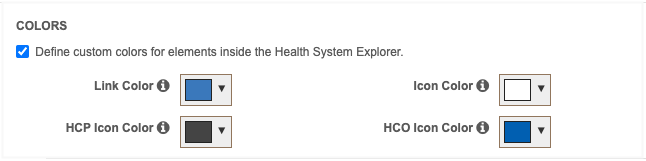
Colors - Use the default colors or customize the colors for your widget.
The default colors indicate record ownership for HCP and HCO icons; Veeva OpenData (orange), third party (blue), and local (gray).
To use custom colors, select Define custom colors for elements inside the Health System Explorer.
-
Link Color - Used for all links. Default, #3A78BB
-
Icon Color - Default is #FFFFFF
-
HCP Icon Color - Default is #444444.
-
HCO Icon Color - Default is #005FB1.
-
Labels
In the Labels section, define the following options:
-
Widget Title -The languages that you defined for the widget are listed. If you chose to have a widget header, type the Widget Title label for each language.
By default, the title is Network Hierarchy Explorer. It can be a maximum of 80 characters.
- Top Parent - Define the terms that your company uses to refer to top parent HCOs. For example, Health Care System, Key Network, or IDN.
-
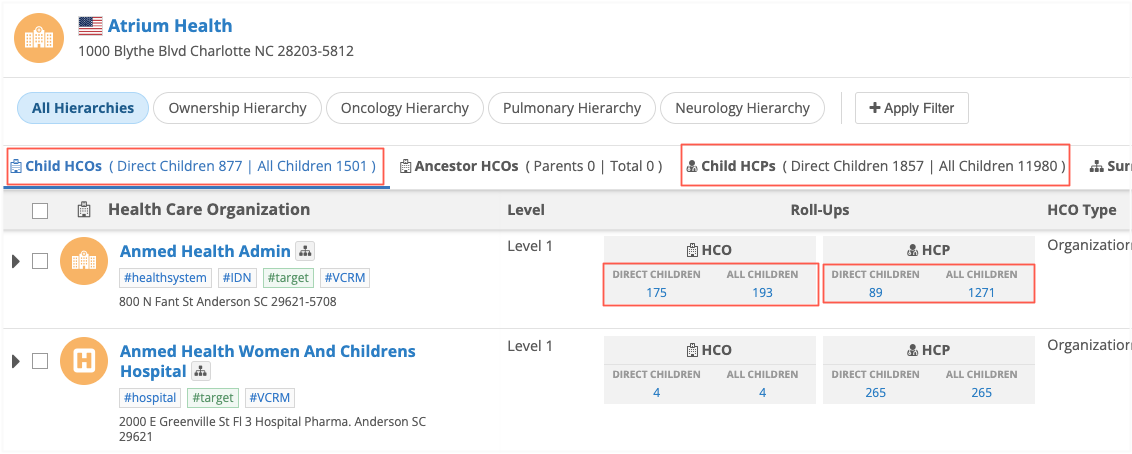
Override Labels - Define labels to replace the Direct and Total counts that display on the Child HCOs and Child HCPs tabs and in the Roll-Ups section for each HCO and HCP listed.
Default labels:
-
Direct - The count refers to the number of HCOs and HCPs that are direct children of an HCO.
-
Total - The count refers to the total number of child HCOs and HCPs that are directly or indirectly affiliated with an HCO.
 Example
To ensure that users understand that the counts refer only to child HCOs and HCPs, you can change the labels to Direct Children and All Children.

-
Save changes
Save your changes.
The widget configuration is complete.
| Step 2: Embed your Hierarchy Explorer widget |