Working with saved reports
DM
DS
ST
When you save a report, you can access it later from the Saved Reports page. This page also contains predefined Network System reports, as well as any other reports that you have been given permission to view by the report creator.
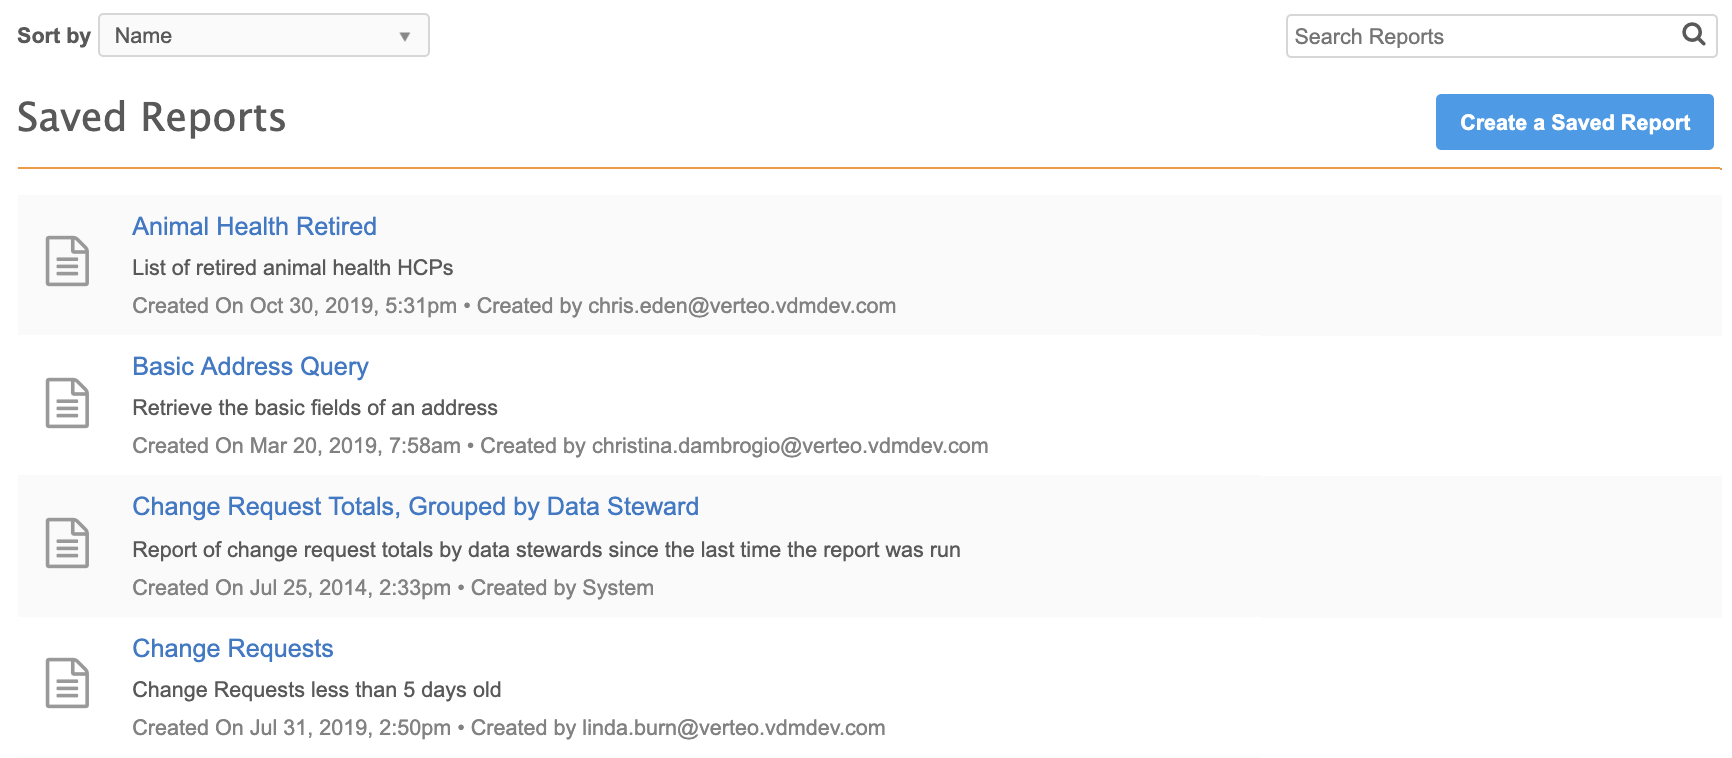
Report access
System administrators can view all of the reports that have been saved in their Network instance. All other users will see their own saved reports and any other reports that they've been given permission to view or edit by the report creator.
Note: Data managers that have access to view a report can also edit and delete that report.
Report actions
When you hover over a report in the Saved Reports list, an Edit icon ![]() and Options icon
and Options icon ![]() appear to the right of the report.
appear to the right of the report.
When you click the Edit icon, the report's configuration page opens. For more information on configuring a report, see Configuring report options.
The Options icon includes the following actions, depending on your level of access for a specific report.

Download Report - Available if the report has been run previously. When you select this option, a time and date stamped .zip file is downloaded to your local file system. The most recent results for the selected report are in a .csv file within the archive.
Run Report - Runs the report in the background. If the report includes time parameters, a dialog enables you to specify the time period for which to run the report. An indicator next to the report title appears while the job is processing.
Note: Saved reports are limited to 5,000 results. Report results exceeding this limit display the Row Limit Reached status in the report's result history.
Make a Copy - Opens a new report with "- Copy" added to the report title in the configuration page. You can now update the configuration, change the title of the report, and save it as a new report in the list.
Delete - Available for Administrators and the specified report's creator, for non-System reports. It is also available for any user who has been given Editor access to the report. This option deletes the report.
Merged HCO and HCP reports
The following Saved Reports are legacy reports that do not use the current Network reporting warehouse. They will be discontinued in a future release.
-
Merged HCO Report
-
Merged HCP Report
New reports are created using SQL Queries. These reports are now available as Sample Queries in the SQL Query Editor.
You can also save these queries as saved reports.
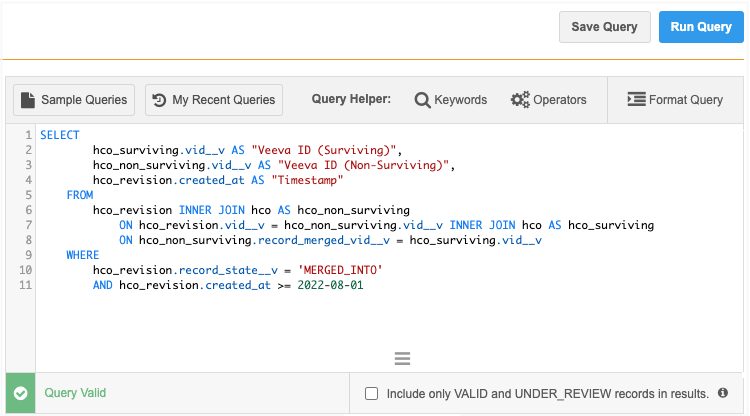
Merged HCOs query
SELECT
		hco_surviving.vid__v AS "Veeva ID (Surviving)",
		hco_non_surviving.vid__v AS "Veeva ID (Non-Surviving)",
		hco_revision.created_at AS "Timestamp"

    FROM
        hco_revision
		INNER JOIN hco AS hco_non_surviving ON hco_revision.vid__v = hco_non_surviving.vid__v
		INNER JOIN hco AS hco_surviving ON hco_non_surviving.record_merged_vid__v = hco_surviving.vid__v
    WHERE
	    hco_revision.record_state__v = 'MERGED_INTO'
        and hco_revision.created_at >= 'insert_date_here' -- example '2022-01-30'
Merged HCPs query
SELECT
		hcp_surviving.vid__v AS "Veeva ID (Surviving)",
		hcp_non_surviving.vid__v AS "Veeva ID (Non-Surviving)",
        hcp_revision.created_at AS "Timestamp"

    FROM
        hcp_revision
		INNER JOIN hcp AS hcp_non_surviving ON hcp_revision.vid__v = hcp_non_surviving.vid__v
		INNER JOIN hcp AS hcp_surviving ON hcp_non_surviving.record_merged_vid__v = hcp_surviving.vid__v
    WHERE
	    hcp_revision.record_state__v = 'MERGED_INTO'
        and hcp_revision.created_at >= 'insert_date_here' -- example '2022-01-30'
Save the reports
Save these queries as saved reports. You can schedule saved reports to run or you can run them manually.
To save a report:
-
On the Network menu bar, click Reports > SQL Query Editor.
-
Paste the query in the query box.
Customize the query by defining the date parameter and include any additional columns.
-
Clear the Include only VALID and UNDER_REVIEW records in results option.
This ensures that records with the
record_state__vfield set to MERGED_INTO display in the results. -
Click Save Query. The button is available only if the query is valid.
-
In the Save Report As dialog, type a name and description.
-
On the report configuration page, you can choose to schedule the report, share it with other users, define download options, and make changes to the SQL query.
For more details , see Saved report options.