Selecting and applying a match
DS
Your data steward inbox only displays suspect matches that are assigned to either you or a group to which you belong. You can only work with a suspect match that is assigned to you. To work with a suspect match that is assigned to your group, you must first re-assign it to yourself.
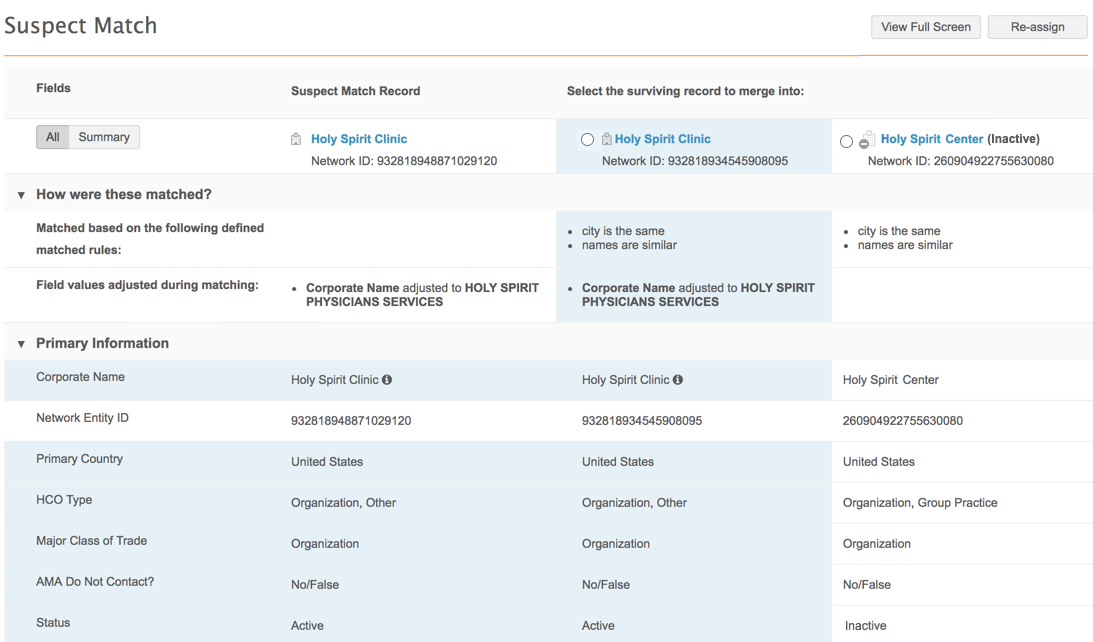
On the Suspect Match page, potential matches are listed to the right of the matched record. Potential matches that contain identical information to parts of the matched record are highlighted.
Understanding why records matched
To understand why the records are considered a match, review the How were these matched section. It displays the match rules and the field values that were adjusted by using filters and/or aliases during the matching process. Aliases and filters are used to improve the matching outcomes by making the data more consistent during the matching process. For each field value that was changed, Data Stewards can view the altered value of the field that was used during matching.
This section can be viewed on suspect match tasks and source deduplication suspect match tasks.
Note: Aliases and filters are not applied when suspect match tasks are created by data stewards using the Find Suspect Match feature in the Network MDM UI; match rules are not applied to these tasks.
Processing a suspect match task
-
In your inbox, open a suspect match.
Tip: Click the row to open the task. Clicking the HCP or HCO name opens that record profile
-
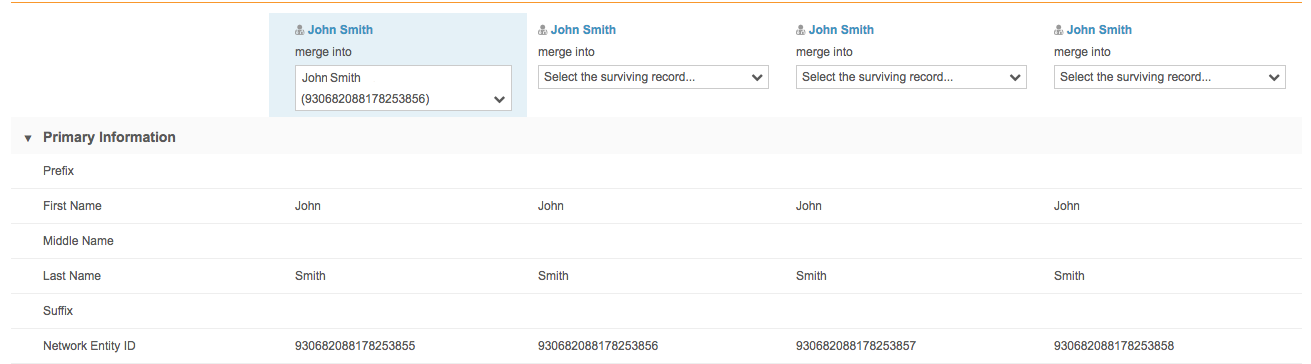
On the suspect match task, review the potential matches. The suspect match record and any matching records are clearly defined and separated. After you've determined that a match belongs to the customer record, select the surviving record.
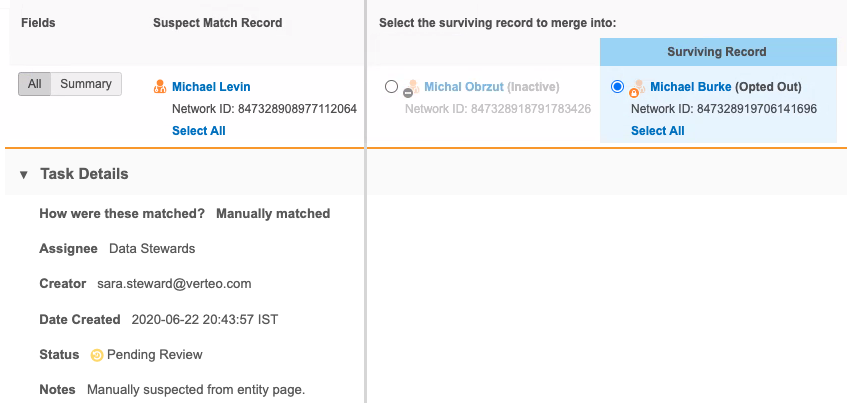
When the surviving record is selected, the following behavior applies:
- The record is highlighted and Surviving Recording displays above the column.
- Records that were not selected as a match are dimmed and cannot be selected. Only values from the suspect match (source record) and the surviving record (target record) can be selected.
- A Select All link might display below the surviving record name. If you click the link, it becomes dimmed so you know that no other action is required for the individual field values.
- The fields on the surviving record are selected by default. If the suspect match record has a field with a value and the surviving record does not, the field is selected on the suspect match record.
- If the field values are identical between the suspect match record and surviving record, the values on the surviving record are selected and no selection is required; the value for the surviving record is retained.
-
Select individual fields to retain on the surviving record. Selecting fields overrides survivorship rules. Some fields cannot be selected.
- When you are finished, click Apply to save your changes.
The Apply Suspect Match dialog displays.
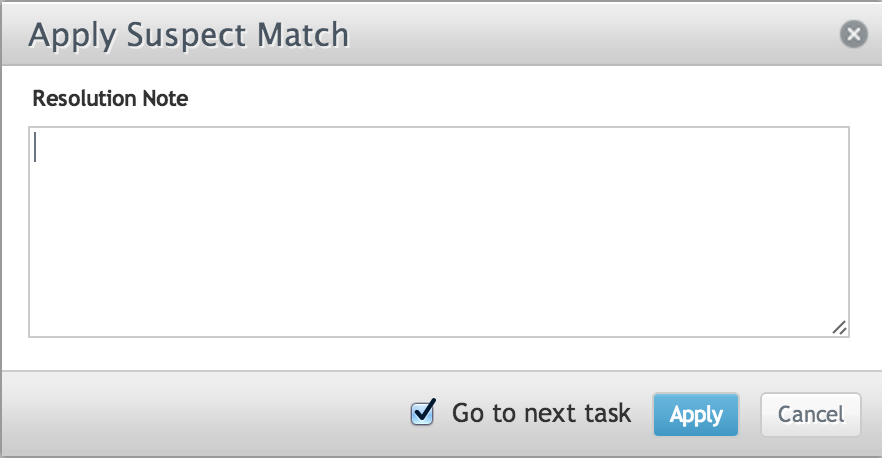
- Type a resolution note
 Comments that can be used by data stewards to explain the rejection or approval of a data change request..
 - Select the Go to next task checkbox if you want the option to navigate to your next inbox task after you apply the change.
- Click Apply.
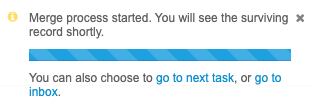
When the merge process begins, a message advises that the surviving record will open so you can review the updates. You can click the go to inbox link to return to your Inbox instead. If you selected Go to next task in the Apply Suspect Match dialog, the option to go to next task also displays.
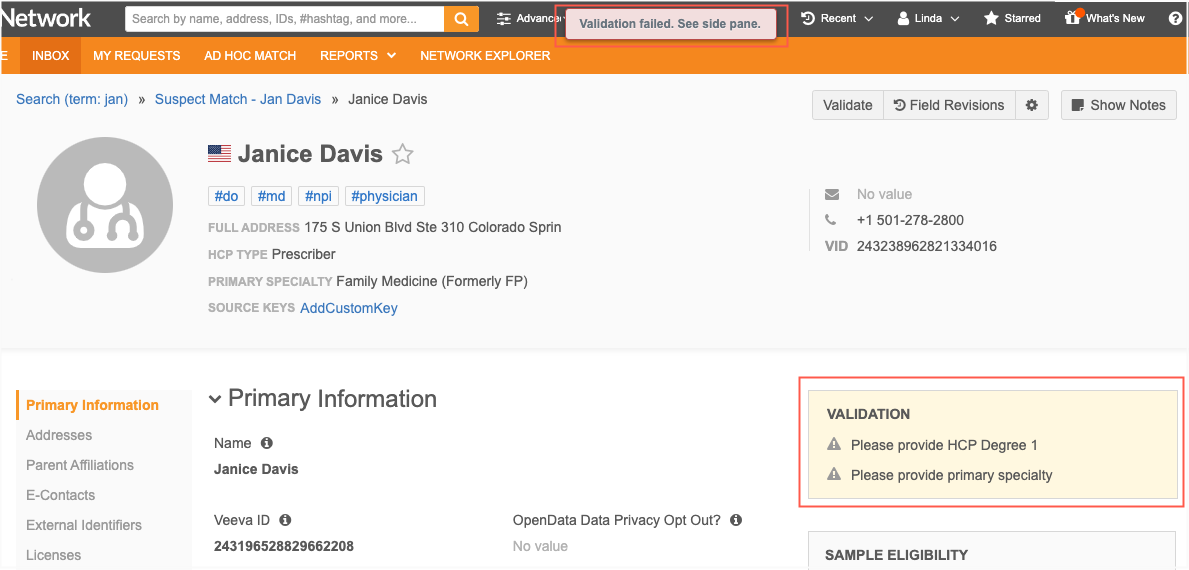
When the profile page opens for the surviving record, profile validation rules can run automatically if administrators have enabled it for the Network MDM instance (Settings > General Settings). If validation issues occur, they will display in the Validate box.
Note: If you navigate from the profile page without resolving the validation issues, it does not prevent the merge. The records are merged at this point, but the data issues will remain until they are resolved.
Data Stewards and Data Managers can also use the Validate button to run profile validation rules at any time.
When individual fields cannot be selected
Data stewards and data managers cannot select individual fields in the following situations:
- The incoming suspect match record does not have a Network ID.
This occurs when the Create Unverified option is not enabled in the General Settings; a DCR is created, but it is not considered a record because it does not contain a VID. In the suspect match task, a surviving record can be selected, which creates a change request. Data stewards and data managers can accept or reject fields from the incoming record on the change request, as usual.
- The suspect match task originated from source deduplication.
Individual fields cannot be selected, but the records can be merged using the Network ID.
Note: Merge prevention rules do not apply to these suspect match tasks.
- Fields selections are hidden for Under_Review records. Suspect matches that originate from add requests have the options to match or not match only. If a match is selected, data stewards can review and process the field values on the change request that will be created.
- Opted-out HCP records are read-only so field values are dimmed and cannot be actioned. The only field value that can be actioned is the Customer Data Privacy Opt Out? field.
- Some fields on records must always be retained, for example,
created_date__v,record_state__v,is_properprietary__vand so on. These fields cannot be selected. Locked fields are typically the fields on the Profile page that contain the Locked icon.
icon. - Sub-object fields (addresses, licenses, and Parent HCOs) cannot be selected. If the sub-objects are exactly the same between the suspect match record and the surviving record, the objects are merged. If the sub-objects are different, they are both included on the surviving record.
- If the suspect match record matches with a mastered surviving record (either Veeva OpenData or third party master) the values of the mastered record are always retained. Only the surviving values for local (gray) fields can be selected.
Profile validation rules
Profile validation rules ensure that data is complete and accurate before record changes are processed for add or change requests. For suspect match merges, profile validation rules run when two records are merged and field values have been selected from the suspect match record. In this situation, merging the records includes a change request for the updated values, so the profile validation rules will run. If a profile validation rule fails, the change request task will be listed in the inbox for a data steward to review and address.
If two records are merged and no field values have been selected from the suspect match record, profile validation rules do not run. The merge request does not contain changes, so data validation is not required.