Creating Network reporting data components
Data components can be created for reporting data so you can see all related Network data (for example, change request and sub-object data) on profile pages. For example, you can see all the change request data for the record to help troubleshoot discrepancies.
When you open the data component, the report results are dynamically retrieved and displayed for the record that you are viewing.
Download data
A maximum of 1000 rows can display in the data component. If the results contain more than 1000 rows, click Download to view all of the results.
About reporting data components
Administrators define the users that can view data component tabs. The reporting data available in each data component depends on individual user permissions (for example, inbox task groups, data visibility profiles, and reporting permissions). If you do not have access to the data through your user permissions, the report results do not display. Permissions for reporting data components work the same as permissions for Network Reports.
For example, you cannot view change request data in a data component if you do not have access to the change_request reporting table through your user permissions (inbox task group).
Network Portal users
Reporting permissions are provided to Portal users so they can view the reporting data in data components in the Network widgets. Portal users do not have access to the Network UI.
Records in OpenData instances
Data components display on OpenData records that have not yet been downloaded to your Network instance. To view data for these records, you can create separate data components that use OpenData reporting tables in the query.
Add a data component
Use SQL queries to create a reporting data component.
To create a data component:
-
In the Admin console, click Widgets & Portal > Data Components.
-
Click Add Data Component.
-
In the New Data Component dialog, select Network Reporting. Click Add Data Component.
On the New Data Component page, define the following settings.
-
Details section - Define the following:
-
Name and Description - The name must be unique across all Network Reporting and Salesforce type data components.
-
System - Choose the system that this component applies to.
-
Status - By default the data component is enabled.
-
-
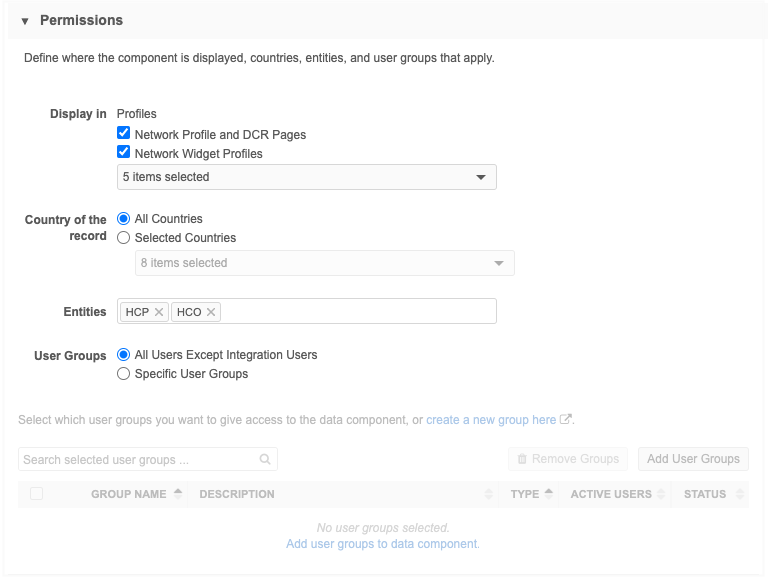
Permissions section - Define where the data component will display and the countries, entities, and user groups that apply.
-
Display in - Identify where you want the data component to display:
-
Network Profile and DCR pages - In the Network UI on record profiles and data change requests.
-
Network Widget Profiles - Select the widgets. Data components are supported for Affiliation widgets, Profile widgets, and Search widgets.
-
Country of the record - Choose which countries will apply to the data component
-
All countries - All countries that are available in your Network instance (Default).
All countries display in the list; the list is not filtered by user permissions.
-
Selected Countries - Select the countries that the data component applies to.
-
-
Entities - Select the entities this data component supports. All enabled main objects in your Network instance display in the list.
-
User Groups - Choose the user groups that can view the data component tab.
Note: Viewing the data in the data component depends on individual user permissions (for example, inbox task groups, data visibility profiles, and reporting permissions).
-
-
-
In the Component Builder section, create a SQL query for the data component.
As you type your query, an icon displays in the lower left indicating whether or not the query is valid.

Define the following settings and options for each data component:
-
Section Name - The name that will display for the data component.
-
View Type - Choose how the data displays in the data component.
-
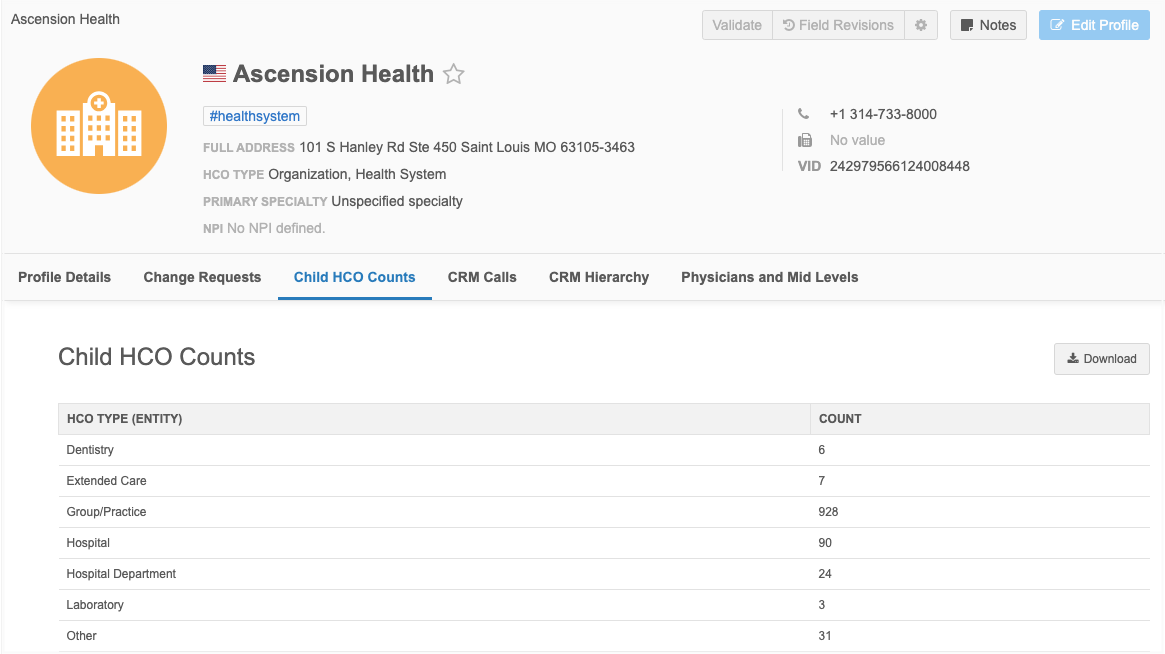
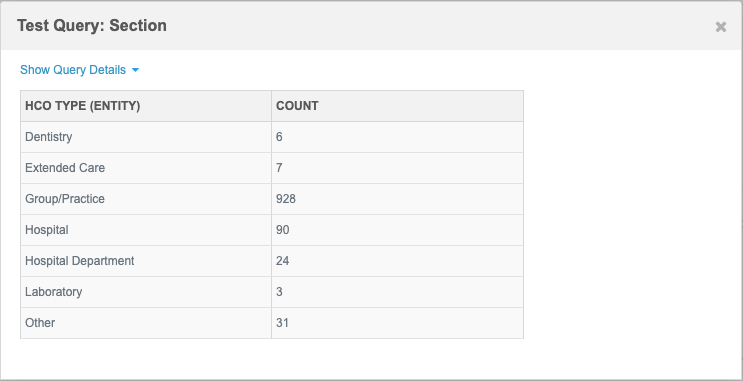
Table View (Default) - Use when the data component will display multiple values in a table.
Example - Child HCO Counts query results
-
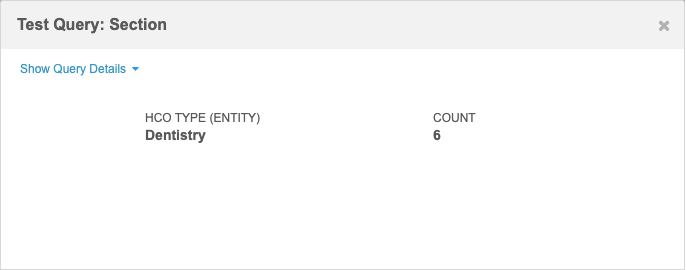
Details View - Use to display only one result in a two-column display.
Example - Child HCO Counts query results
Using the same query, only the first result displays.
-
-
Show Reference Value Fields As - Choose to show reference values as Labels or Codes in the data component.
-
Include only Valid and UNDER_REVIEW records in results - Enabled by default for new data components. Clear the setting if you want to view all records in the results.
-
Sample queries - Use a sample query for the data component.
The following queries are available:
-
Physicians & Mid-Levels - HCP details for physicians and mid-levels at an HCO. Applicable for US records only.
-
Doctors & Nurses - HCP details for doctors and nurses at an HCO. Applicable for countries outside of the US.
-
Child HCO Counts - Number of child HCOs based on HCO type.

Preview the query or select it and click Insert Selected Query into the query box in the data component.
-
-
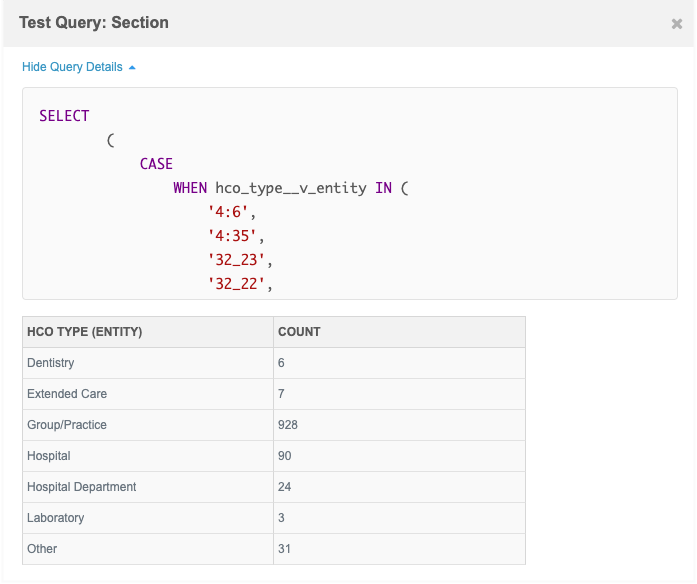
Test query - Type a Network ID to review results for the query. The query and results for that record display.
Note: User permissions are applied to the Admin or Data Manager user that is testing the query. For example, if you do not have access to France through your data visibility profile and you use the VID of an HCO in France, a message displays that there is no record with this Network ID.
-
- Save the data component.
Preview data component
After a data component configuration is saved, you can preview the data that can display.
-
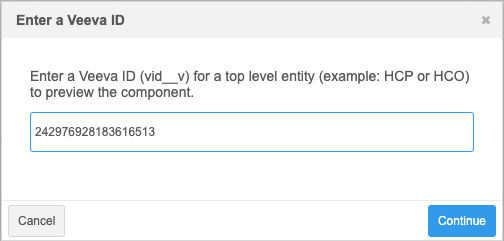
Click Preview Component
-
In the dialog, add the Network ID of an HCP, HCO, or custom object record.
-
Click Continue.
The data component displays with the data returned from the report.

Note: User permissions are applied to the Admin or Data Manager user that is testing the query. For example, if you do not have access to records in France through your data visibility profile and you try to test the data component with a VID of an HCO in France, you will see a message that there is no record with this Network ID.
Clone a data component
To create a reporting data component that is similar to another data component, you can clone an existing data component.
-
In a data component configuration, click Clone.
-
A New Data Component page displays with all of the settings and the same report query of the existing data component.
-
Type a Name for this data component and make any required changes to the settings.
-
Click Save.
Use SQL query variables
When you create a SQL query for a data component, use variable syntax to make the results of the query relevant to each profile.
The variables are fields on the entity.
Example
vid__v =:vid__v
or
ancestor_vid__v =:vid__v
When the data component is opened on a profile, the variable is swapped with the Network ID of that record.
vid__v =243243646072128514
Use the following syntax to use LIKE in a WHERE clause with a variable:
WHERE vid__key like concat('%', :vid__v)
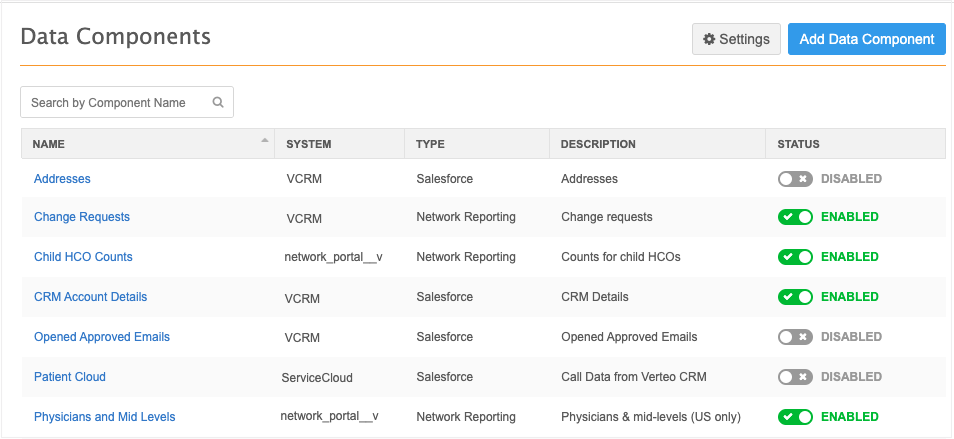
Data components view
On the Data Components page, the Networking Reporting type identifies the data components that display report data.
Logs
Administrators can use the System Audit Log to see when new data components are created.
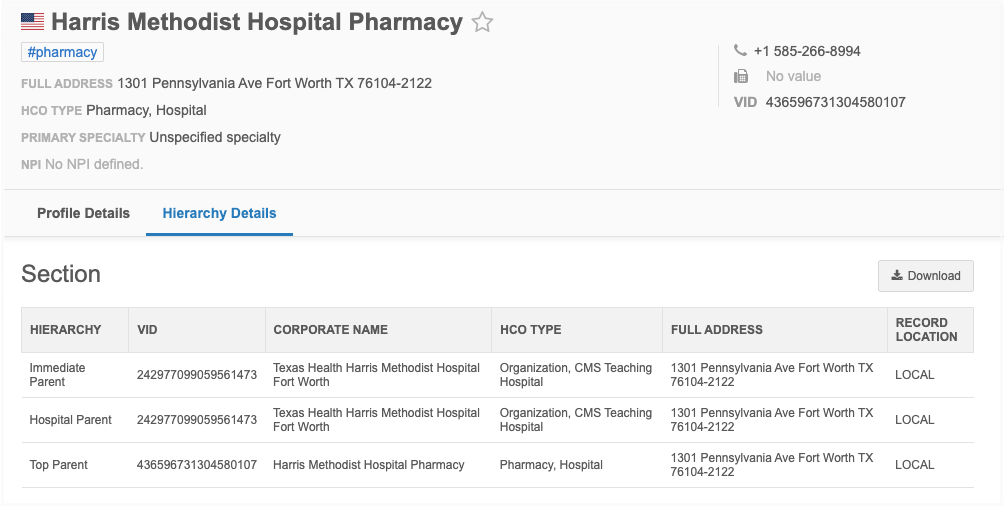
Example - OpenData hierarchy data
Veeva OpenData HCO records (US only) include a Hierarchy section that contains the Network IDs of specific related HCOs. To give users immediate access to additional details about these VIDs from the Profile page, create a data component that will query the Network reporting tables and display this information.
For detailed instructions, see OpenData hierarchy data.