SAP Concur security requirements
To improve security standards, SAP Concur has updated the credential requirements for their application connector. All usernames and passwords must now be a minimum of 10 characters and a maximum of 50 characters. This means that a new Network Integration user must be created and assigned to the Concur Connector so your Concur users can continue to search against Network for HCPs to add to their expense reports.
These new security standards must be met by August 31, 2021 to ensure that the Concur Connector continues to work.
SAP Concur requirements
For more information the new security requirements, see SAP Concur's Online Help:
Required actions
Complete the following actions by August 31, 2021.
Sandbox and Production Network instances
-
Create a security policy for SAP Concur.
-
Create an Integration user so the credentials comply with the new security policy.
-
Assign the new Integration user to your Concur Connector.
SAP Concur
-
Update the Network username and password that is used to access the Network API.
Detailed instructions for these actions are included below. For additional assistance, please contact Veeva Support.
Note: If the Integration user assigned to your Concur Connector already meets these security requirements, no action is required. If you update an Integration user instead of creating a new user, you must update the Network credentials in Concur immediately to avoid invalid login attempts that would cause the Network user to be locked out of Network.
Required Actions in your Network instance
Complete the following tasks in your Sandbox and Production Network instances.
Create a security policy
Add a security policy for Concur to ensure that all passwords meet SAP Concur's requirements.
To create a policy:
-
In the Network Admin console, click Settings > Security Settings.
-
Click Add New Policy.
-
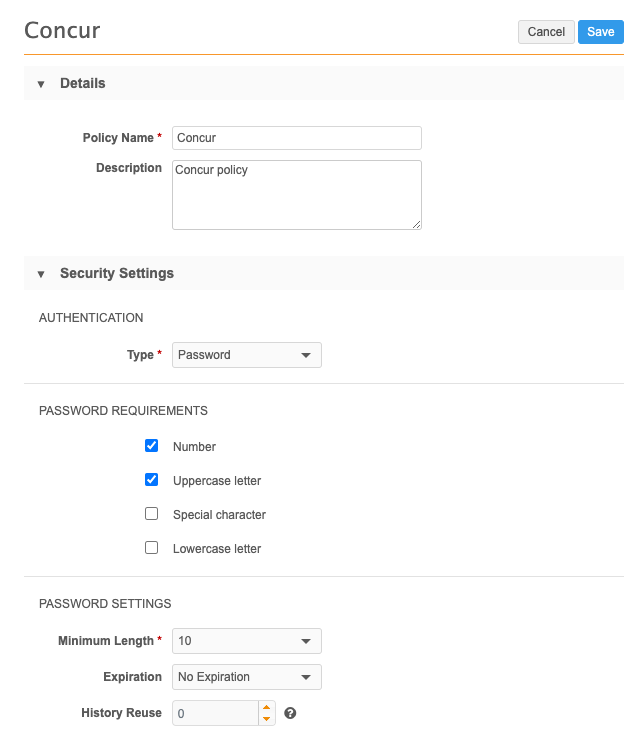
Type a Name (for example, Concur) and a Description.
-
In the Authentication section, expand the Type list and choose Password.
-
In the Password Requirements sections, you can select any requirements that are applicable to your corporate policy. There are no specific requirements for Concur.
-
In the Password Settings section, expand the Minimum Length list and select 10. The Expiration value is typically No Expiration for Integration users.
-
Save the policy.
Create an Integration user
Add a new Integration user and assign the security policy to ensure that SAP Concur's username and password requirements are met.
Create a user
A Network administrator can create an Integration user.
-
In the Network Admin console, click Users & Permissions > Users.
-
Click Add New User.
-
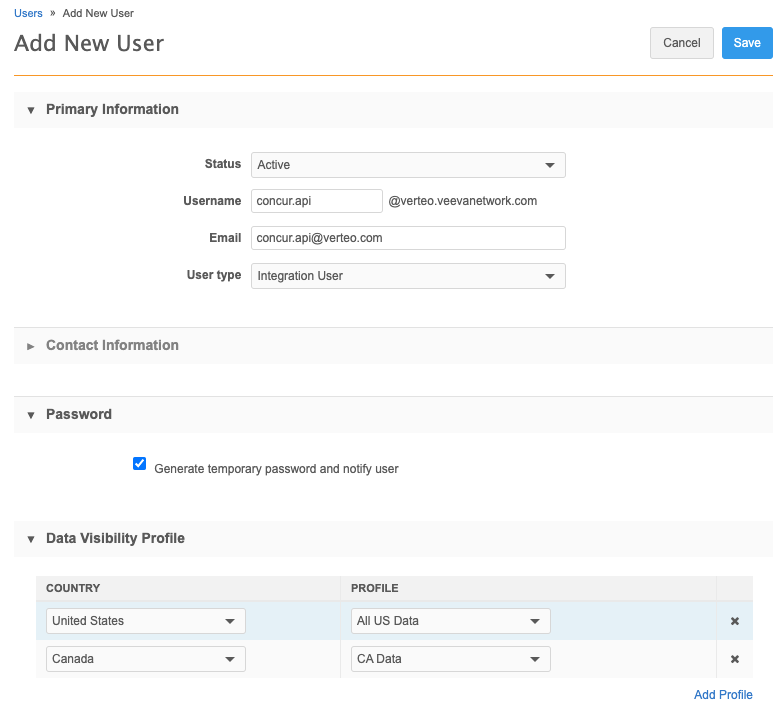
On the Add New User page, in the Primary Information section, type a Username. Ensure that the user name (including @veevanetwork.com) is no longer than 50 characters.
Considerations for user names:
- Supported: Letters (Latin alphabet), numbers, and the following special characters: !#$%&'*+-/=?^_` {|}.
- Restrictions: Names cannot start or end with a period (.) . Also, a period cannot be followed by another period within the user name.
- In the Email field, type the user's email address. Network notifications will be sent to this address.
- Expand the User Type list and choose Integration User.
- In the Contact Information section, the user's First Name and Last Name are required. Add other optional contact details.
- In the Password section, click Generate temporary password and notify user. A Welcome email with a temporary password will be sent to the Integration User.
-
In the Data Visibility Profile section, assign the data visibility profiles for all regions where SAP Concur users will search.
-
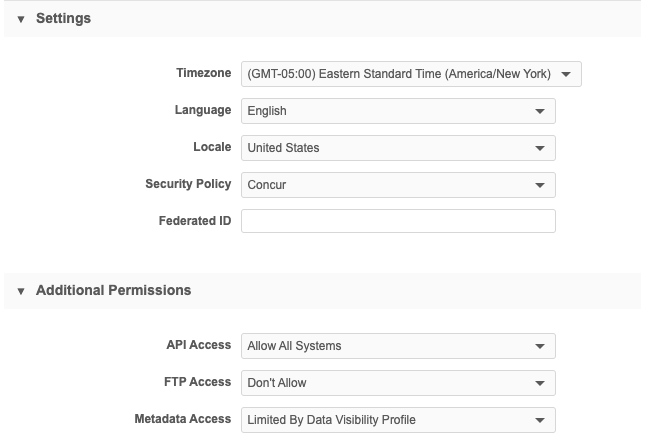
Iin the Settings section, expand the Security Policy list and choose the policy that you just created; for example, Concur.
-
In the Additional Permissions section, ensure that the API Access value is Allow All Systems.
-
Save your changes.
Note: If you update an Integration user instead of creating a new user, you must update the Network credentials in Concur immediately to avoid invalid login attempts that would cause the Network user to be locked out of Network.
Update the password
The Integration user must update their password.
-
Access the login page for the Network instance. The link to the Network instance is included in the Welcome email the user received from Veeva Network.
-
On the Network login page, click the Forgot your password? link.
-
In the Forgot your Password dialog, type the Integration user’s username.
A new password will be generated and sent to the Integration user’s email address.
-
In the Password Reset email, click Change Password.
-
In the Change Password dialog, type a new password.
The password will be validated to ensure that it meets the requirements of your new Concur security policy.
Update the Concur Connector
Assign the new Integration user to your Concur Connector.
-
In the Admin console, click System Interfaces > Concur Connector.
-
Open the Concur Connector configuration.
-
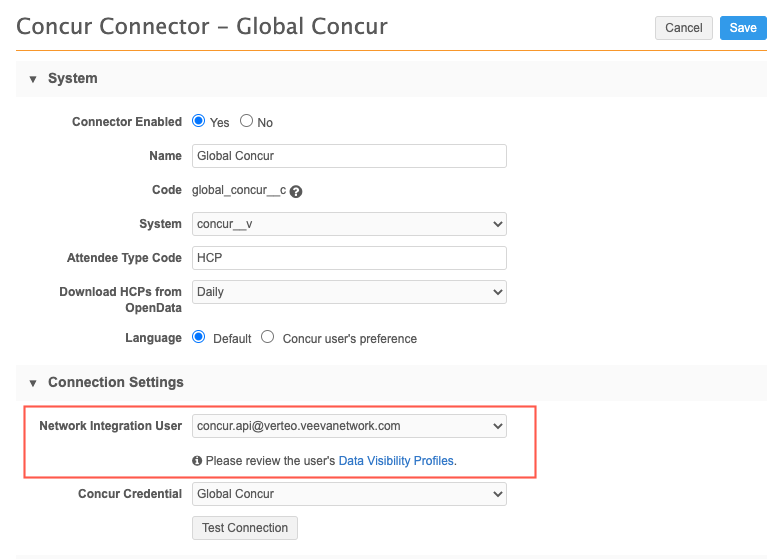
In the Connection Settings section, expand the Network Integration User list and select the new user.
-
Save your changes.
Required actions in SAP Concur
The Web Services admin user must complete the following task in the SAP Concur application.
Update the Network credentials in Concur
The Integration user’s credentials must be updated so the Concur Connector can access the Network API.
-
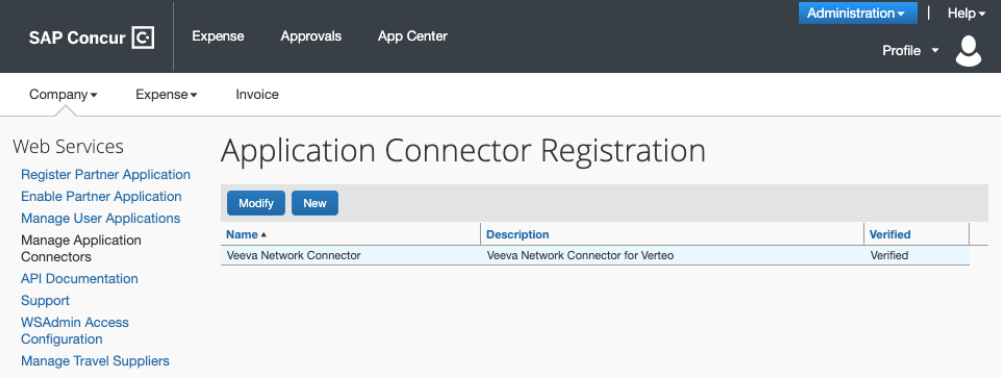
Log into SAP Concur In the Administration menu, select Company > Web Services > Manage Application Connectors.
-
On the Application Connector Registration page, select the name of your Network Concur Connector and click Modify.
-
In the System section, update the User Name and Password with the new Network Integration user.
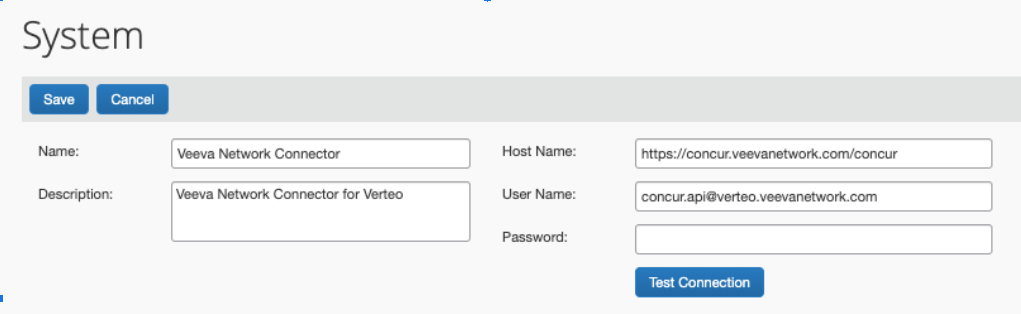
-
Click Test Connection. Concur will connect to Network using the credentials. When the connection is successful, click OK.
-
Save your changes.