Influence Map screenshots
DM
DS
ST
Widget users can take a screenshot of the Influence Map canvas using the Take Screenshot tool. Using this tool, it's easy to snap an image to display in a presentation or to share with others.

Take a screenshot
The Take Screenshot tool is available for all views and for all users that have edit and read-only access to the Affiliation widget.
To take a screenshot of the Influence Map canvas:
-
In the Tools menu, click Take Screenshot.
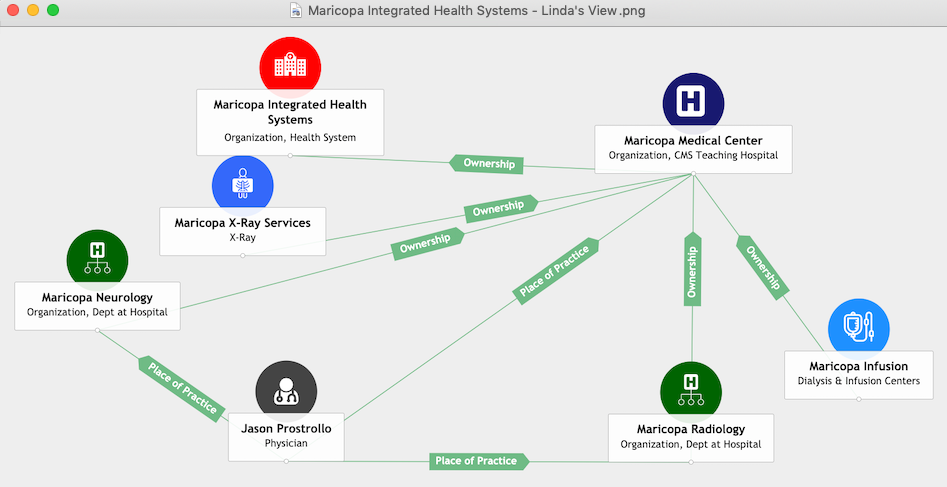
The image will be downloaded to your local computer as a .png file with the following naming convention: <health_system> - <view_name>.png.
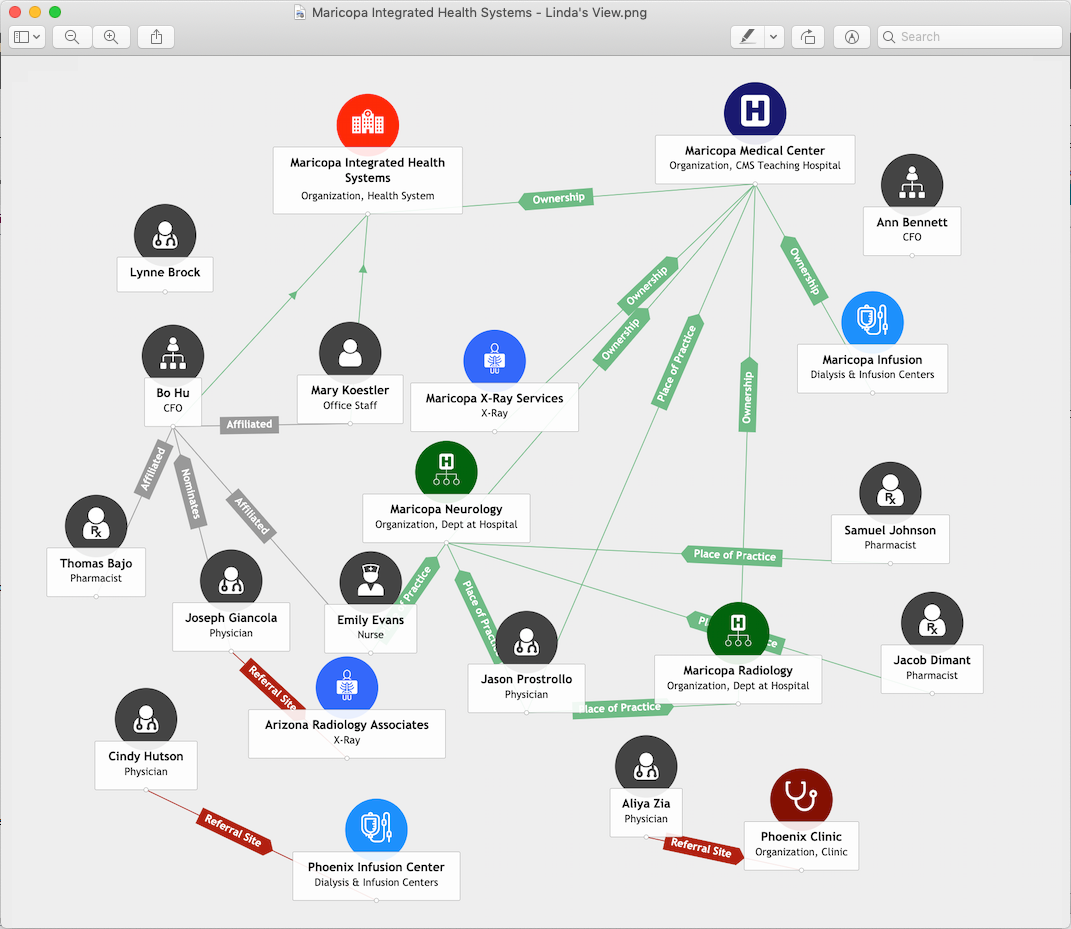
The entire Influence Map will be included in the screenshot even if you are zoomed in and some of the entities appear to be offscreen.
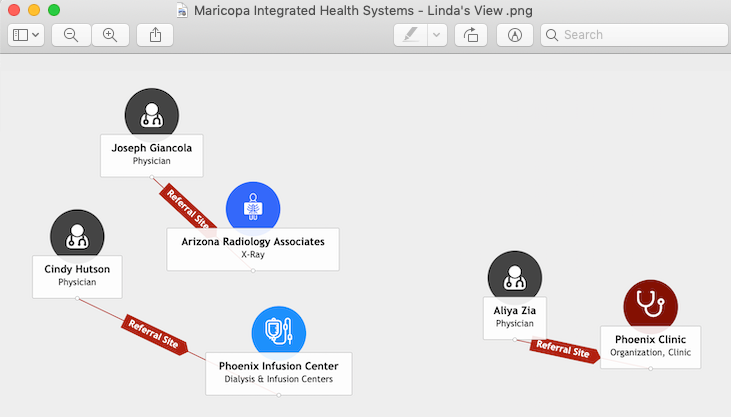
Filtered views
If you filter the view for specific HCPs, HCOs, or relationships, only the highlighted entities and relationships will be included in the screenshot.
Example
To highlight referrals that are going outside of the health system, filter the canvas to view physicians and all HCOs in a different system. All the other entities and relationships are dimmed.

When you take a screenshot of the view, only those highlighted physicians and HCOs in the same system are included in the .png file.
Focused entity
If you want to screenshot a particular entity and its connection, click the entity. The entity and its connections are highlighted on the Influence Map and the profile preview opens.
Click Take Screenshot.
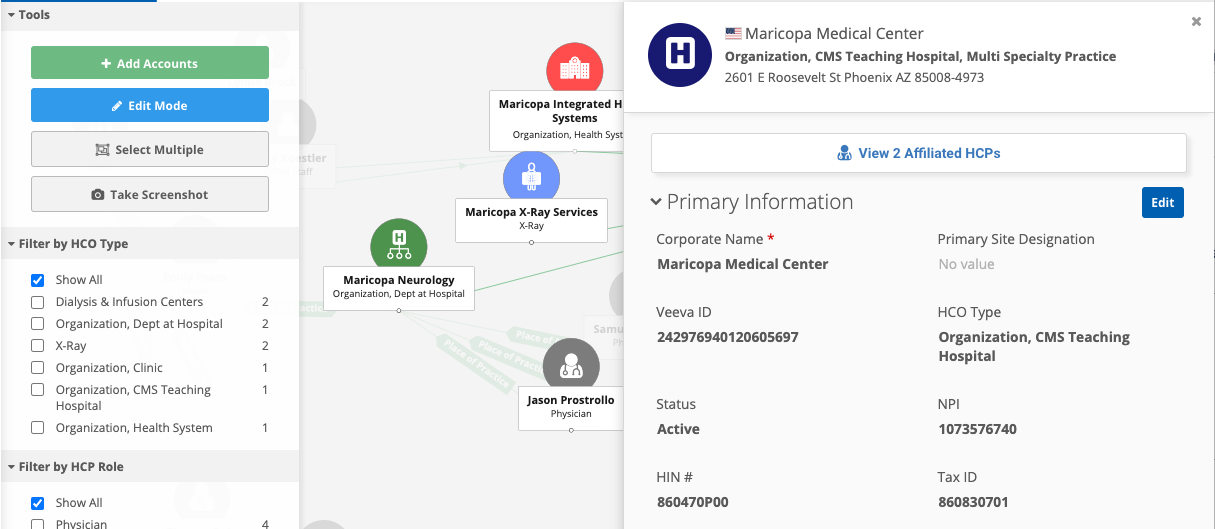
The screenshot displays only the entity and the HCOs and HCPs that are directly connected to that entity.