Editing the Influence Map
DM
DS
ST
Customize the Influence Map by adding accounts, creating affiliations, and copying or removing accounts in bulk.
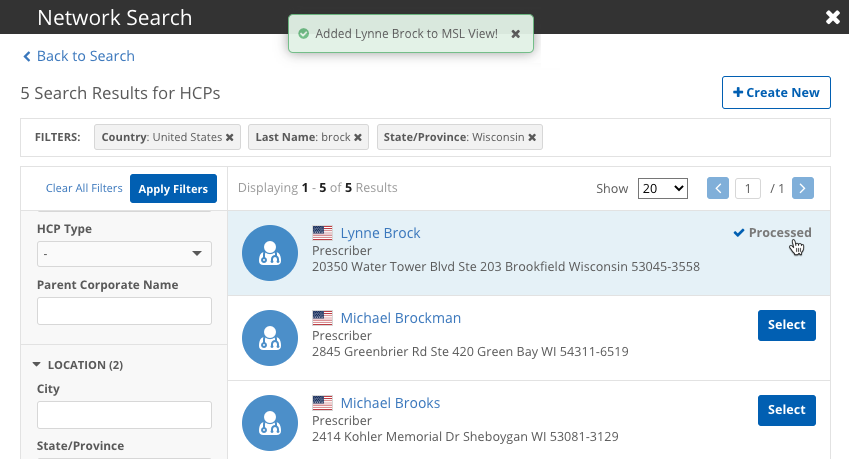
Add accounts
Affiliation widget users can add HCPs and HCOs to a health system view.
To add an account:
-
Select the view that you want to add the account to. The account will be added to this view only.
-
In the Tools section on the Influence Map tab, click Add Account. You can also add an account from the Account List tab.
The Network Search widget opens.
- Select the appropriate tab (for example, the tabs might be called HCPs and HCOs) and enter the search terms.
-
Click Search.
Depending on your Veeva OpenData subscriptions and data visibility profile, you can search your Network instance and the Veeva OpenData database. If you add an account that is currently in the OpenData database, it will be downloaded to your Network instance.
-
In the search results, select the button to add the account. A message displays when the account is added to the view. Click the x icon to close the message. To close the Network Search window, click the x icon.
If an existing account wasn't found, click Create New.
- Select the Country and click Create Record.
- Provide the record information and click Review Changes.
- Add any relevant details to the Notes section and click Add Account.
A data change request is routed to the appropriate data steward and the account is immediately added to the view.
When an account is added to the view it is not part of a relationship and it does not contain metric ratings. To add metrics, click the account and edit the metrics on the profile.
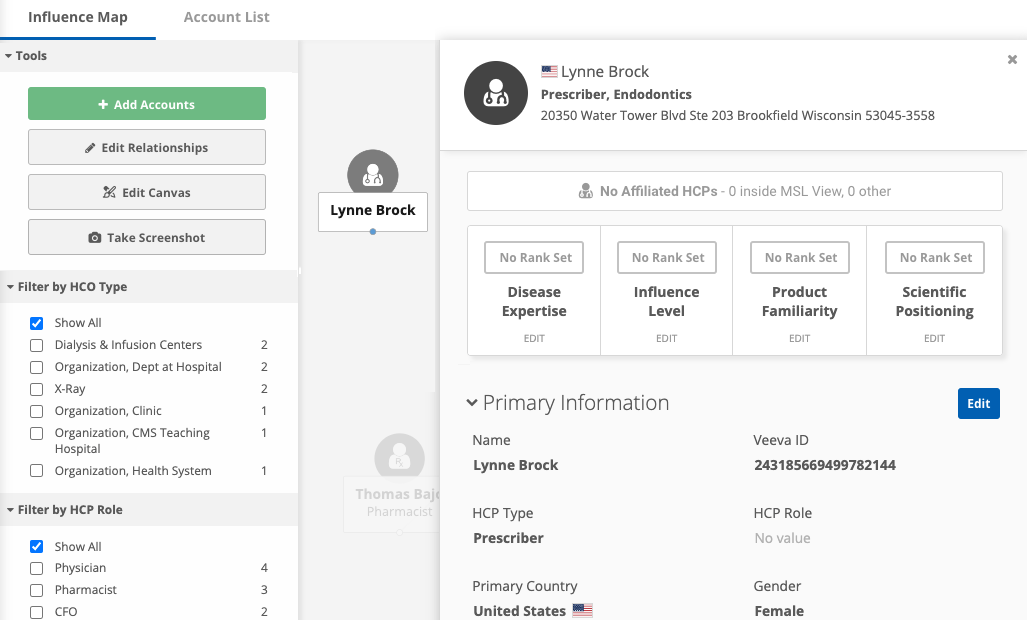
If the account was downloaded from Veeva OpenData, the field that you use for that entity to filter the Influence Map might not have a value. For example, if you use a custom field called HCP Role, the value will be empty. Click Edit to populate the field so this account can be included in filtering.
If the Edit button does not display, the Affiliation widget is read-only.
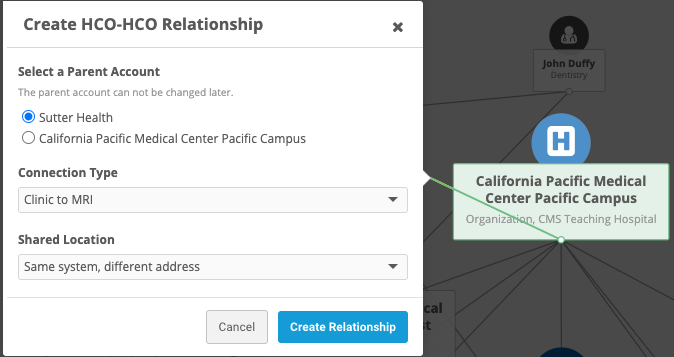
Create relationships and affiliations
You can draw lines between HCPs and HCOs to create relationships and affiliations.
Supported relationships
- HCP-HCO
- HCO-HCO
Supported affiliations
- HCP-HCP
To create a relationship or affiliation:
- In the Tools menu, click Edit Mode.
-
On the account, click the Add icon and draw the line to the related account.
-
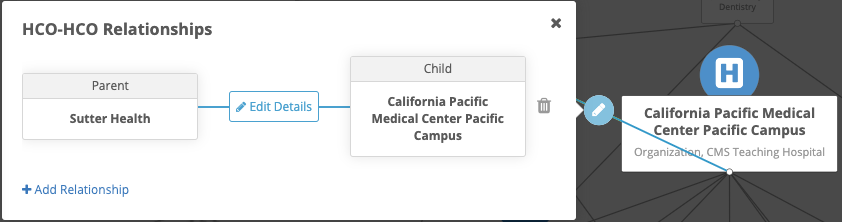
Relationship - When the line is connected to each account, a dialog displays so you can include details about the relationship. The relationship is automatically approved. The line color changes from green to gray to indicate that the relationship is locally managed.
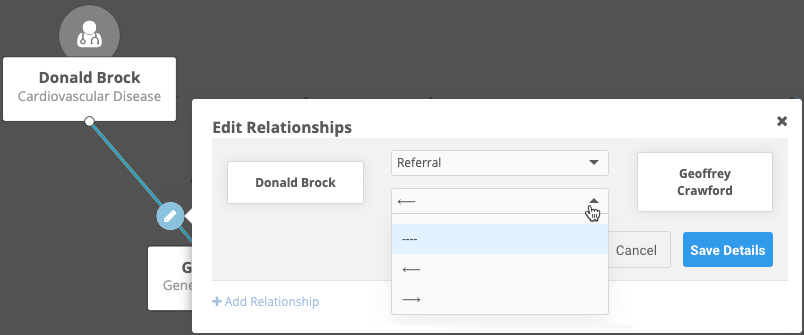
To edit the details after a relationship is created, click the Edit icon on the connecting line. In the pop-up that displays, click Edit Details.
- Affiliation - The affiliation is automatically approved. All affiliations are locally managed. The default affiliation is created with the following values:
- Affiliation Type - Affiliated (AFF)
- Direction - Neutral
These values can be changed.
To edit these values:
- Hover over the affiliation line and click the Edit
 icon that displays.
 - In the pop-up, click the Affiliated field to open the Edit Relationships dialog.
- Click the Affiliation Type list to choose a different value.
- Expand the Direction list to choose the influence direction.
-