Affiliation widget annotations
DM
DS
ST
Widget users can use the editing tools to annotate the views in the Affiliation widget.
Highlights
-
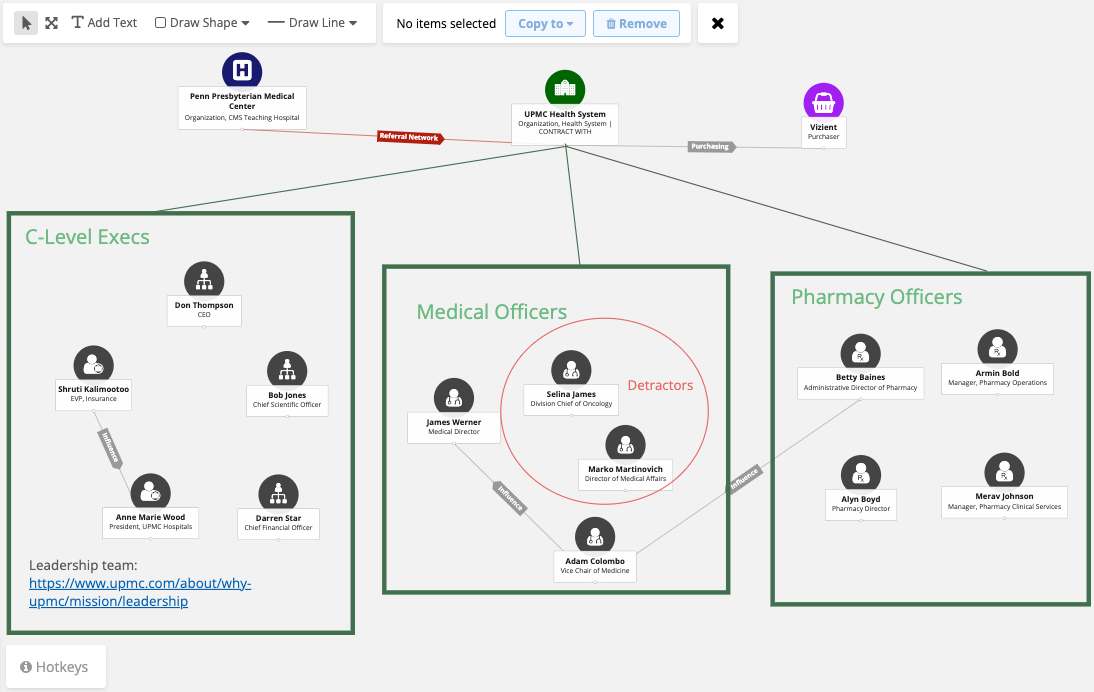
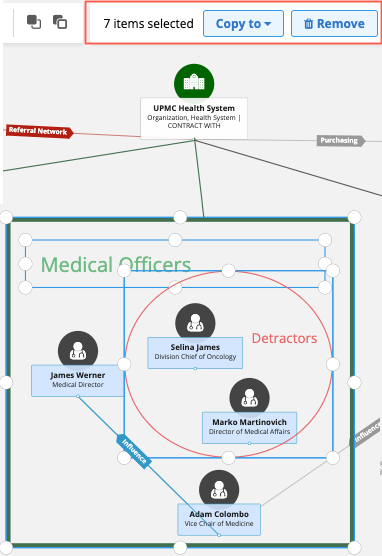
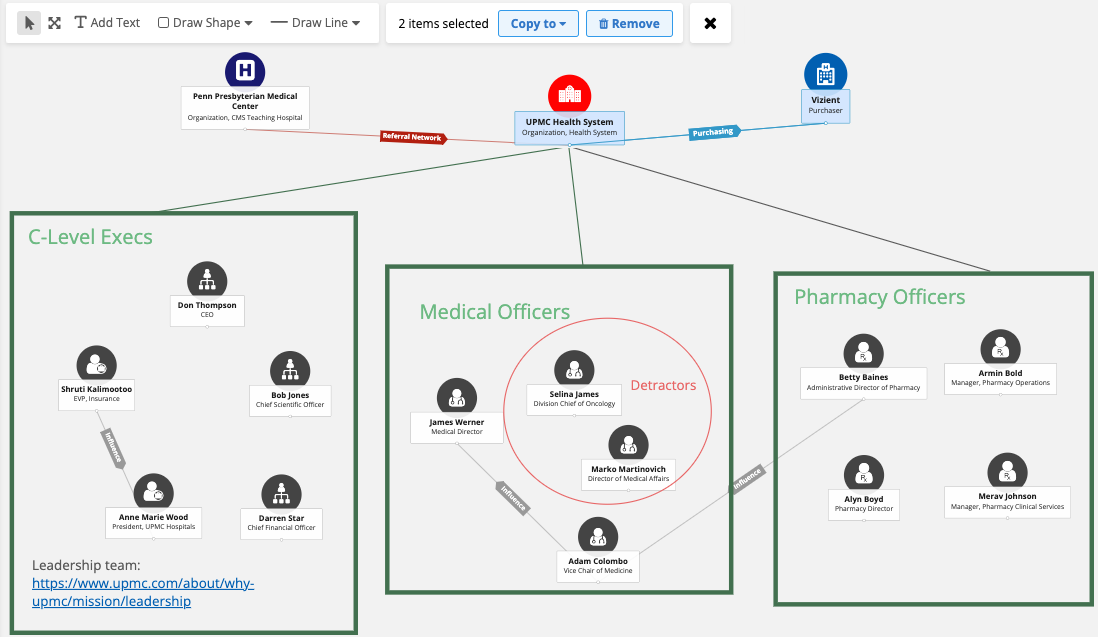
Influence Maps can fully substitute traditional presentations, providing detailed visuals of key influencers, detractors, and their interconnections within the health system.
-
Add comments, links, arrows, and other graphical elements to emphasize specific aspects of the health system, drawing attention to notable records and areas of interest.
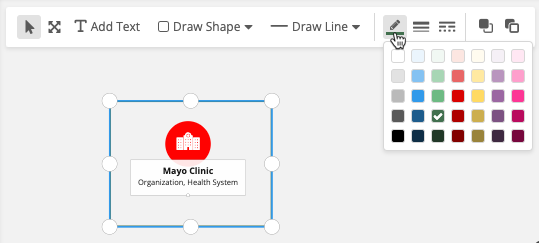
Edit tool
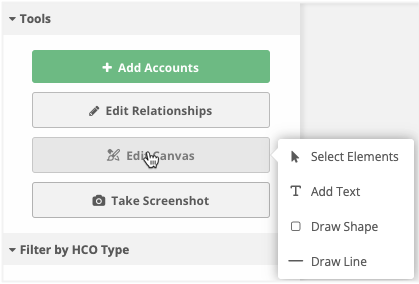
On the Tools pane, hover over the Edit Canvas button to see the available editing tools.
-
Select Elements - Opens selection mode so you can select elements on the Influence map canvas.
-
Add Text - Create a text box so you can add comments
This tool does not display if it is not enabled in the widget configuration.
-
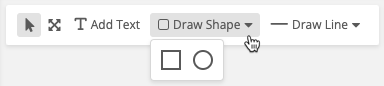
Draw Shape - Create a round or square shape on the canvas.
-
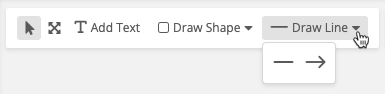
Draw Line - Draw a line or arrow on the canvas.
Select a tool or click Edit Canvas. The tools display in a bar at the top of the Influence Map.

Select Elements
Use this tool to select any element on the Influence Map canvas.

In selection mode the following actions are available:
-
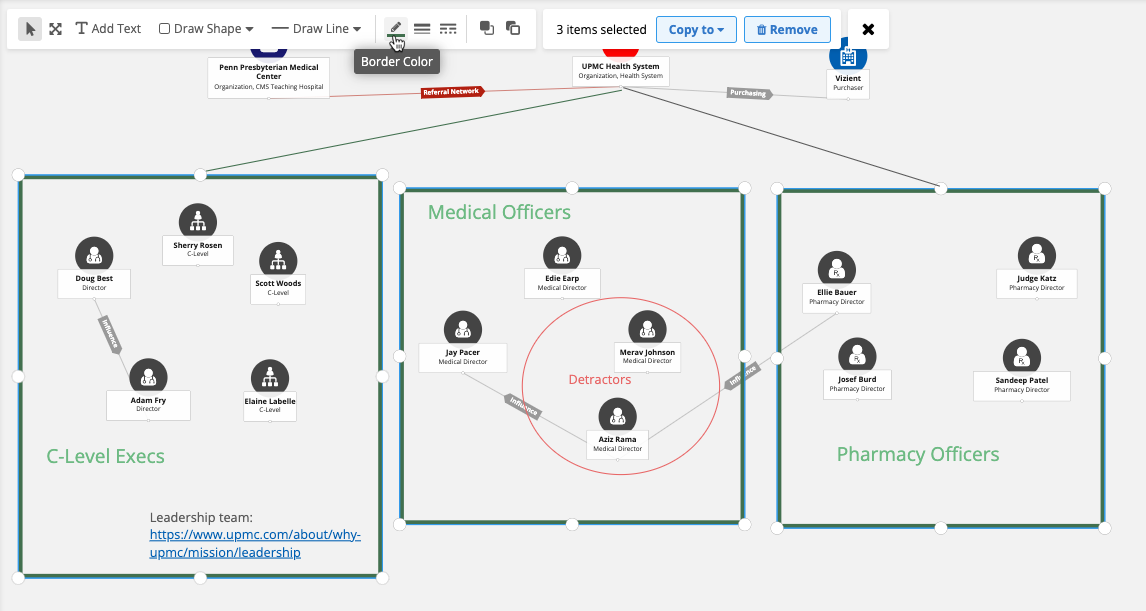
Additional editing tools are available to customize elements (for example, text or line color, styles, size)
-
Resize elements
-
Delete elements
Select multiple elements
More than one element can be selected to move or edit them together.
Multiple elements can be selected in the following ways:
-
Click one element and press CTRL (Windows) or Command (MAC) and select the additional elements.
-
Hold the SHIFT key and click multiple elements.
-
Click and drag your cursor over all the elements to highlight them.
The toolbar updates to display the number of elements that are selected.

Multiple elements can be edited together. Common editing tools (for example, line color and thickness) will make the change on all selected elements.
Pan
Use this tool to move all of the elements on the canvas together.

Draw a shape
Create a box on the Influence Map canvas. For example, you can draw a box around people or institutions to group them.
When you click Draw Shape, choose the box or circle.
Your cursor becomes a cross hair (+). Click on the canvas where you want to start the shape and drag the cursor to create the shape.
Tip: To create a square or perfect circle, hold the SHIFT key while you draw.
When you have finished drawing the shape, it is in selection mode. You can continue editing the shape.
-
Resize
-
Change the line color, weight, and type.
-
Layering (bring to front/back)
By default, shapes are a black solid line (1px). If you change the style, your changes will be remembered for your next shape.
Draw a line
Your cursor becomes a cross hair (+). Click on the canvas where you want to start the line and drag the cursor to create the line.
Tip: Hold the SHIFT key as you move the line up or down to shift the line by 15 degrees.
When you have finished drawing the line, it is in selection mode. You can continue editing the line.
-
Resize
-
Change the line color, weight, type, and front and end style
-
Layering (bring to front/back)

Any styles that you have defined are remembered the next time you draw a line.
Add text
Click Add Text to create a text box so you can add details to the Influence Map.

Your cursor becomes a cross hair (+). Click on the canvas where you want to start the text box and drag the cursor to create the box.

Tip: To add a new line to the text box, hold the SHIFT key.
When you have finished drawing the text box, it is in selection mode. Immediately start typing to add text to the box.
You can continue editing the text.
-
Resize
-
Change the text color, size, style (bold, underline, italics, strikethrough), and alignment (left, center, right)
-
Highlight color
-
Layering (bring to front/back)
Note: If Add Text does not display, it is not enabled in the widget configuration.
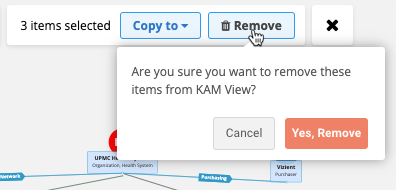
Delete elements
All shapes, lines, and text can be removed from the canvas.
Click Select and then click the element so it's in selection mode. At the top of the map, the action bar updates to display a count of the selected elements.
Click Remove.
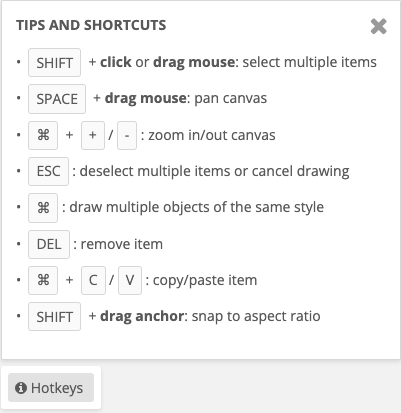
Tips and shortcuts
Click Hotkeys at the bottom of the Influence Map to display the Tips and Shortcuts dialog.
Use these hotkeys to quickly perform actions on the Influence Map.
Clone views
When Influence Map views are cloned using the Copy to tool, the elements (text, shapes, lines) on the original view are copied to the cloned view.
Logs
All changes on the Influence Map are tracked in the System Audit Log in Network.
Bulk editing
You can select multiple HCP and HCO accounts to manage at the same time; for example, you can copy multiple accounts from one view to another custom view or change the style of multiple elements.
Select multiple elements
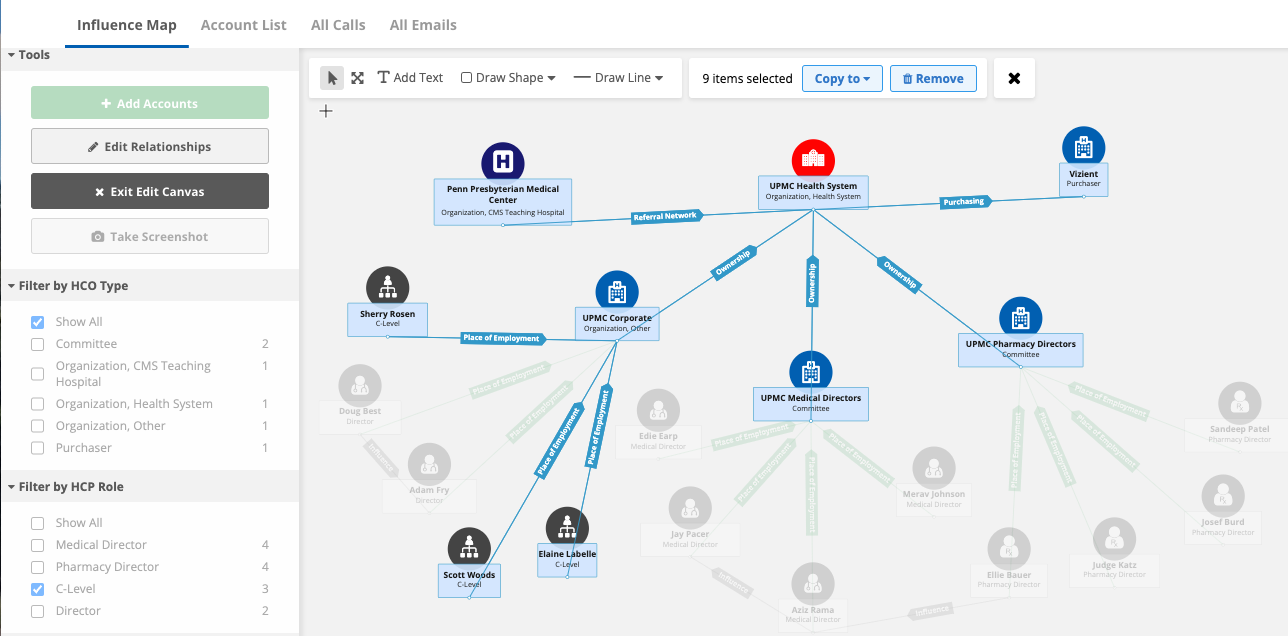
Influence maps can contain hundreds of accounts, so using the Select Multiple button on the Tools menu helps you to manage the accounts at the same time.
To select elements in bulk:
-
On the Tools menu, click Edit Canvas. Your mouse cursor will become a crosshair + symbol and an toolbar will display at the top of the map.
-
Click the map and drag a rectangle to select multiple accounts or elements. The selections are highlighted. You can click other accounts and elements to add them to the selection.
To deselect one element when multiple elements are highlighted, click the element. To deselect all elements, click an empty area on the view.
-
At the top of the influence map, the action bar updates to display a count of the selected elements . For example, 6 Items Selected. The count updates if you select more accounts or remove a selected account.

The following actions are available for the selected elements:
-
Copy to - Expand the list to copy the elements to another view. Copy to an existing view or create a new view. The existing views that are available for this product and therapeutic area are listed.
Note: Relationships are also copied to new or existing views if both accounts are copied; the connecting line between the accounts is maintained.
Copy the elements to an existing view
Choose one of the views in the list. The elements will be copied and the view will open with the selected elements highlighted. The elements are added to the bottom of the view but will maintain their relative position; you can reposition them while they are still highlighted.
If an account already exists in the view, it will not be copied; the existing account position is maintained.
Create a new view
Click Create New View. A new view will be added and it will open with the selected elements copied and highlighted. The health system is not automatically added to the new view. The view will be given a default name; for example, View #1.
-
Remove - Delete the elements from the view. In the confirmation pop-up, click Yes, Remove. The elements are deleted from the view.
-
Style - Make changes to all of the selected elements at the same time. For example, change the color, highlighting, text, or position of the elements.
-
- You can also select multiple elements to reposition them on the existing view. To reposition the elements, hover over a highlighted account and your mouse cursor will become a hand. Click and drag the elements to another place on the view.
Filtered view
If the view is filtered to highlight specific HCPs or HCOs, only those accounts are available for selection. When you draw the area to select accounts, the dimmed accounts are not included. This is helpful for copying or removing specific accounts.