Identity provider configuration (Okta, Azure)
Before you can configure single sign-on details, you must add and configure Network MDM as an application on your identity provider's site. This page provides examples of how to do this with specific providers for guidance.
Specifically, you will require the following information from idP configuration for your Network MDM security setup:
- Issuer
- idP certificate
- idP login URL
- SP-initiated request URL
Note: Network supports one identity provider for each Network MDM instance; multiple providers pointing to the same Network MDM instance is not supported.
Configuring the identity provider
Click one of the tabs below to see details on configuring SSO for your identity provider.
- Okta
- Microsoft Azure (Entra ID)
Okta configuration
In Okta, an administrator sets up and configures a Network MDM application as follows:
- Sign into Okta.
- Switch to the Classic UI from the Admin console.
- From the top navigation, click Applications.
- On the Add Applications page, click the Create New App button.
- In the dialog, select SAML 2.0.

- On the Create SAML Integration page, type an application name and optionally provide a logo.

- Click Next.
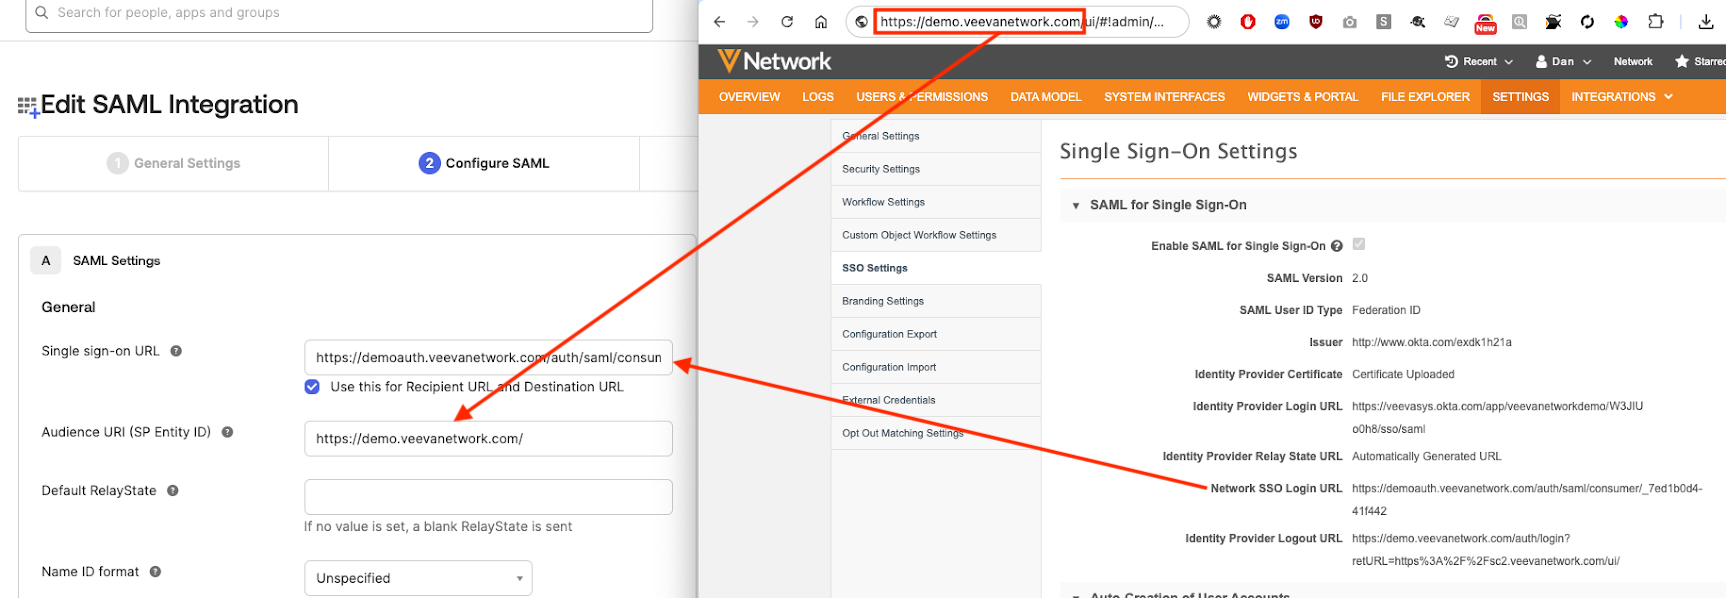
- On the SAML Settings page, provide the following:
- Single sign on URL: the Network MDM SSO Login URL from the SSO settings in Network MDM.
- Audience URI: the URL for your Network MDM login page
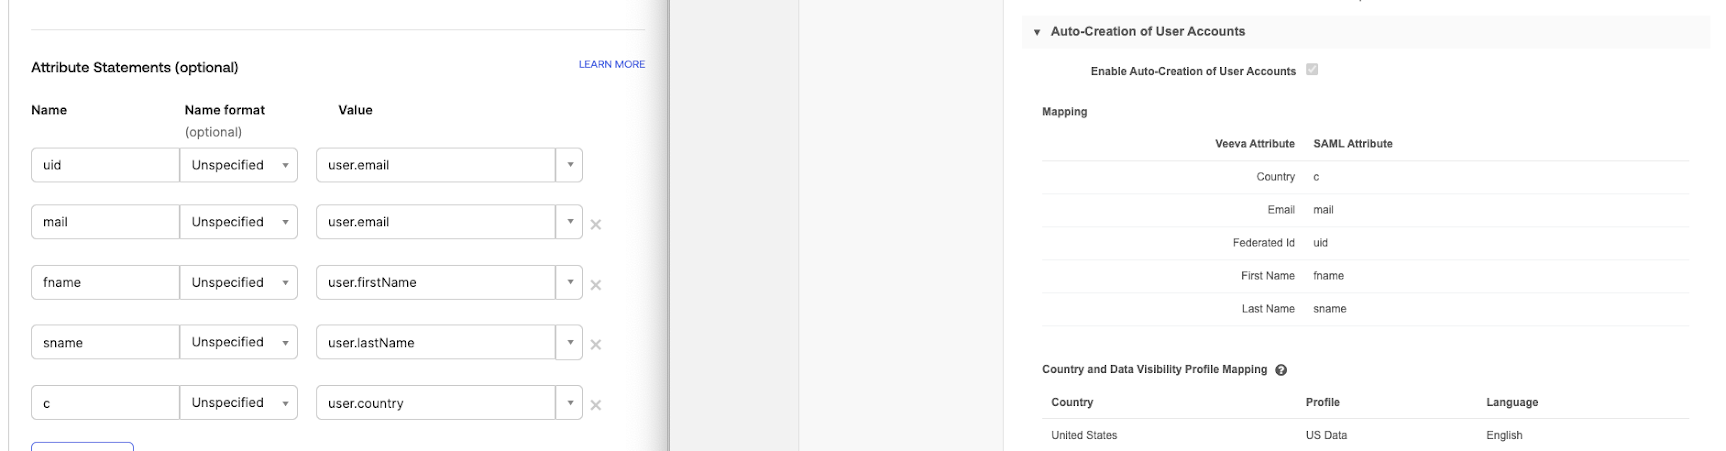
- In the Attribute Statements section, create attribution statements to map required values to Network MDM.
Notes:
- The uid attribute must be mapped for the integration to work.
- If you're working with one country you can its name as the country value; for example, "US" instead of "user.country."
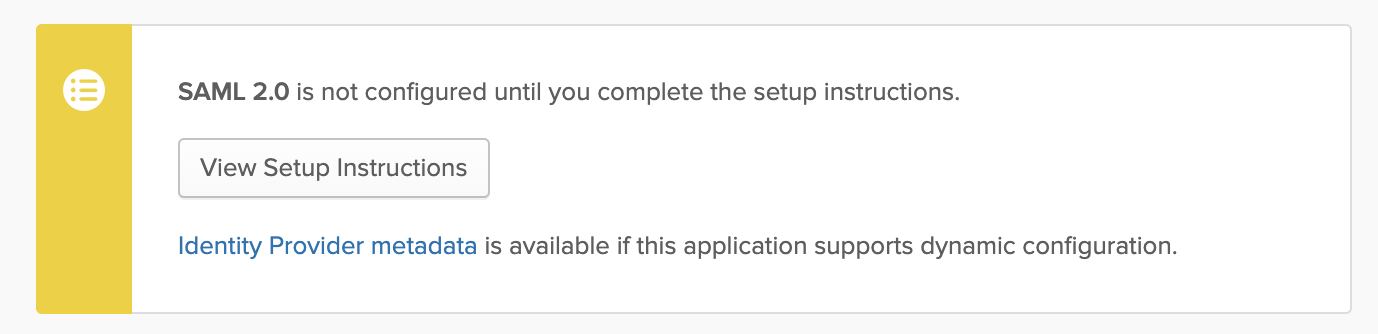
After you finish initial configuration, your integration appears. Additional configuration is required to complete the setup.
Click the View Setup Instructions button to see additional information you'll need to configure in Network MDM.
The subsequent page shows details for the following:
- Identity provider single sign-on URL
- Identity provider issuer
- X.509 certificate
- IDP metadata
Note all of these details for further configuration in Network MDM.
Under X.509 Certificate, click the Download Certificate button. You will need to upload this certificate in Network MDM.
Configure Network MDM SAML and other single sign-on settings by following the steps in Configuring single sign-on in Network MDM.
Microsoft Azure configuration
When you configure single sign-on in Microsoft Azure AD (now Microsoft Entra ID) and Network MDM, you will need to use information from each to complete the configuration.
In Network MDM, take note of the following:
-
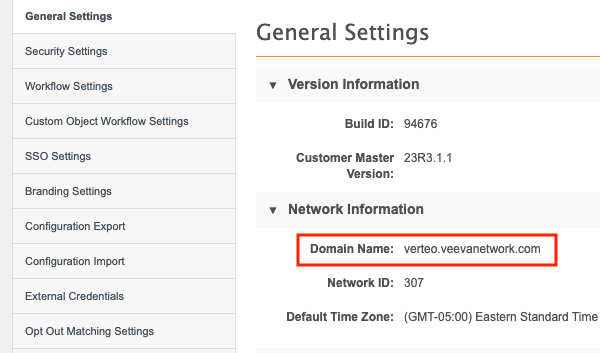
the Network MDM DNS; for example,
https://verteo.veevanetwork.com
In Microsoft Azure AD (now Microsoft Entra ID), take note of the following:
-
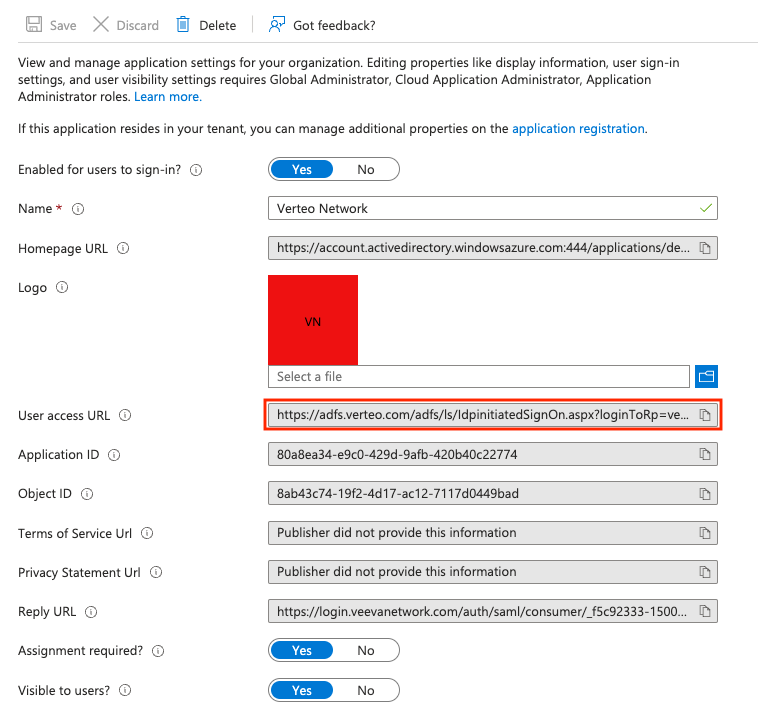
the User access URL in the application properties
-
the Logout URL in the application properties
-
the Microsoft Entra Identifier (previously, Azure AD Identifier) in the application properties
-
the Reply URL from Manage > Single sign-on
Additionally, you will need to download the 64-byte certification for use in Network MDM.
Configure single sign-on
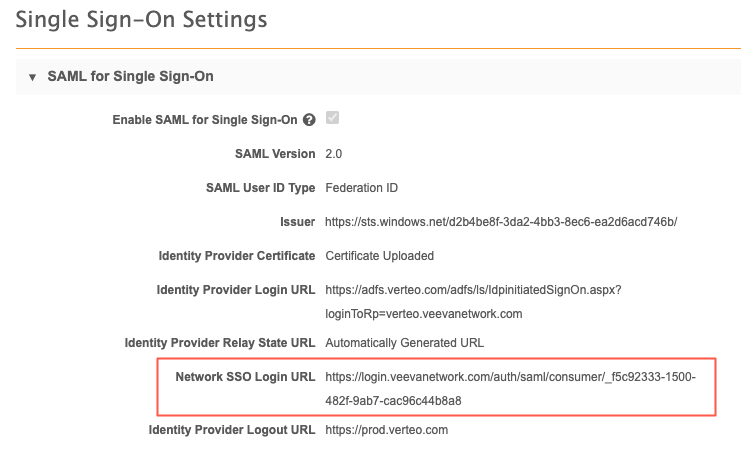
In Network MDM, note the following values:
- the domain name (from the General Settings page).
- the Network MDM SSO login URL (from the Single Sign-On Settings page).
In Microsoft® Azure® AD, an administrator sets up and configures a Network MDM application as follows:
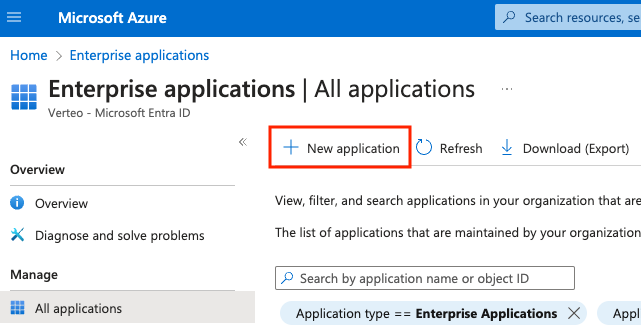
- Select Enterprise Applications and click + New application.
-
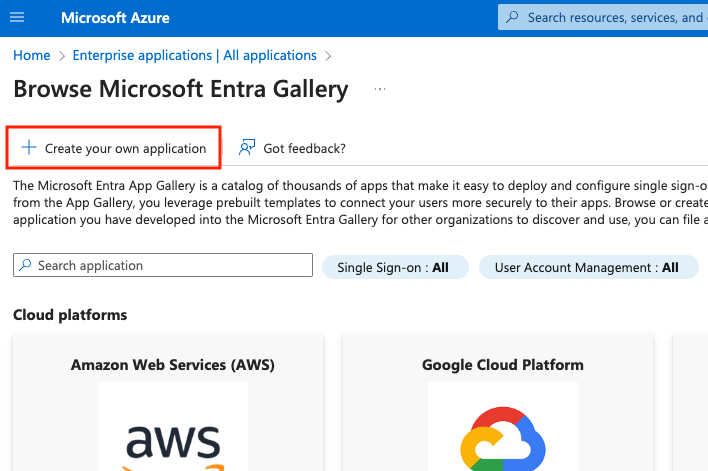
Select + Create your own application.
-
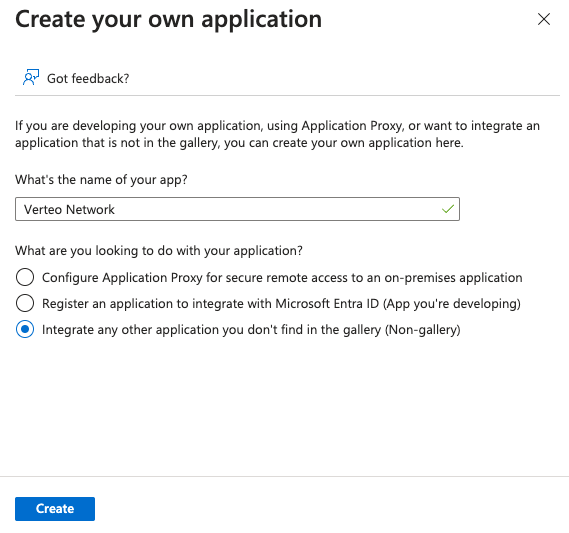
Provide a name for the application and click the Create button.
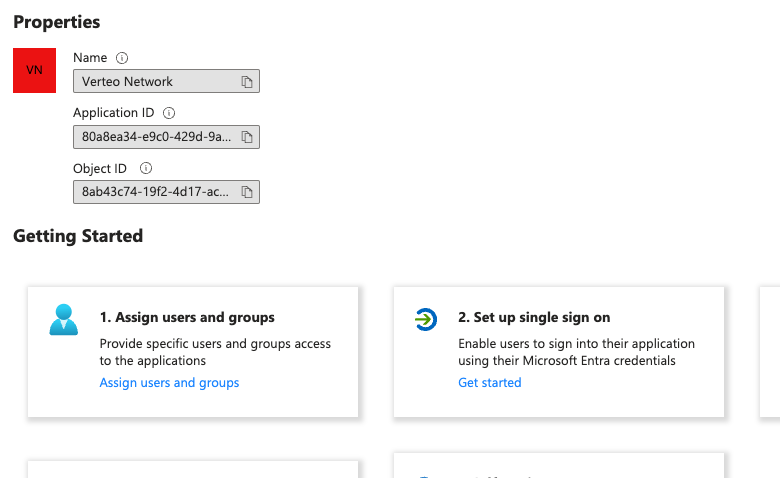
-
On the application overview page, in the Getting Started section, select Set up single sign on.
-
Under Select a single sign-on method, select SAML.
-
In section 1:
-
copy the domain name (from the Network MDM General Settings in step 1) into the Entity ID field.
-
copy the Network MDM SSO login URL (from the Network MDM SSO settings in step 1) into the Reply URL field.
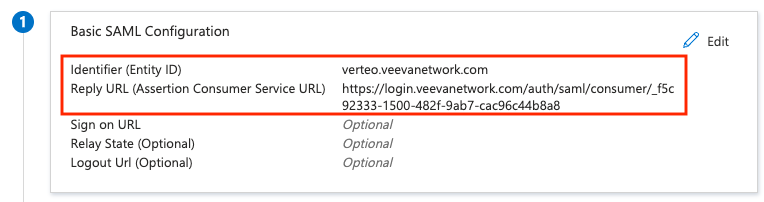
Note: The reply URL will not be available until you configure SSO in Network and retrieve the Network MDM SSO login URL. You can provide a temporary reply URL value here and replace it after Network MDM SSO configuration is complete.
-
-
In section 2, add a new attribute named
uidand map it to the Entrauser.userprincipalnameattribute.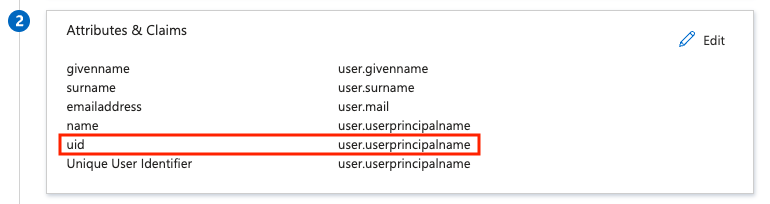
-
Edit section 3 and change Signing Option to Sign SAML response and assertion.
-
In section 3, download the Base-64 certificate.
-
Select Properties (under Manage) in the left navigation and take note of the User access URL.
-
Add Entra users or groups to the application.
Enter IdP details in Network MDM
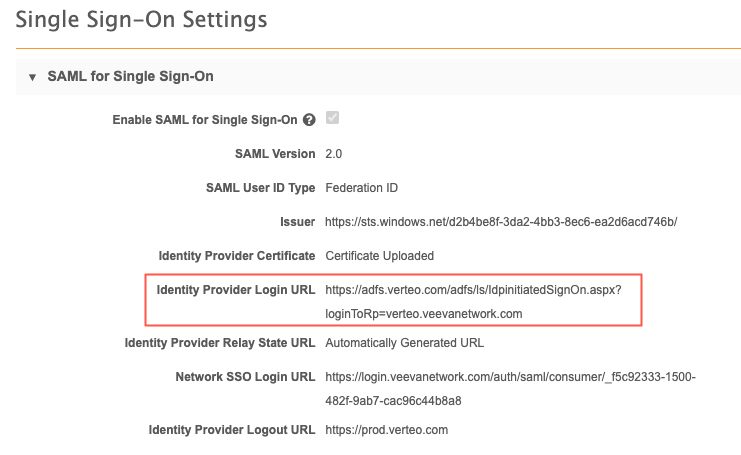
Using the values from the previous sections, perform the following steps on the Single Sign-On Settings page (Admin > Settings > SSO Settings):
-
SAML User ID Type - Change to Federation ID.
-
Issuer - Copy the Microsoft Entra Identifier (previously, Azure AD Identifier) value from the Azure application settings. For example, https://sts.windows.net/....
-
Identity Provider Certificate - Load the AzureAD Base-64 certificate downloaded from the application settings.
-
Identity Provider Login URL - Copy the User Access URL from the application settings.
-
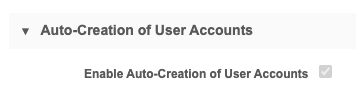
Enable Auto-Creation of User Accounts - Select if you want to provision users automatically from AzureAD. Provide the AzureAD attributes that correspond to the required Network MDM user attributes.
-
Save the settings.
-
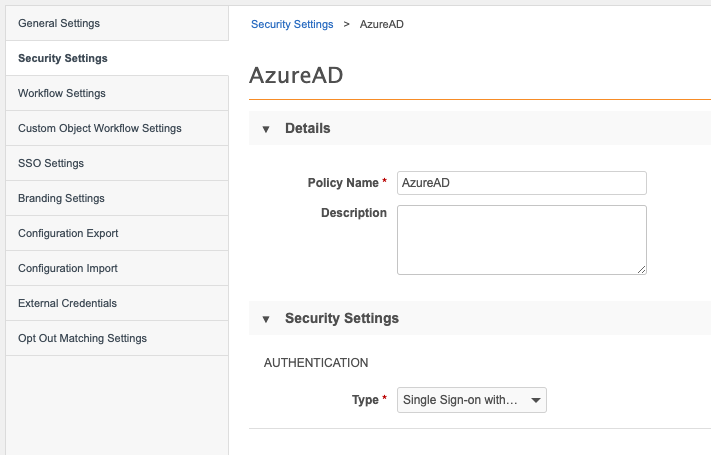
Create a new security policy (Admin > Settings > Security Settings > Add New Policy). Name the policy AzureAD and change the Type to Single Sign-on with SAML.
-
Save the policy.
-
For each SSO-enabled user, set the Federation Identifier to the value of the user attribute (uid/user.userprincipalname) being sent by Entra. This is typically the user's email address.
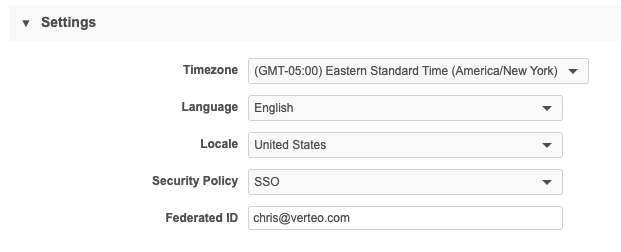
Note: Federation identifiers are case-sensitive, so ensure that the Federation Identifier specified in Network matches the uid/user.userprincipalname value exactly.