Filter affiliations in Network Explorer
DM
DS
ST
You can create and save filters to use to refine the affiliations on the Network Explorer canvas. For example, if you are interested in HCOs that specialize in pediatric internal medicine, create a filter that highlights only those HCOs on the Network Explorer canvas. After you apply a filter, Network Explorer applies it for any entity until the filter is removed. This helps users to easily find the entities that match their criteria.
A blue Filter icon ![]() indicates that a filter is currently applied to Network Explorer.
indicates that a filter is currently applied to Network Explorer.
Note: When filters are applied, editing is not available in the Network Explorer canvas.
Create a filter
- On the Network Explorer canvas, click the Filter icon
 .
. - In the Saved Filters dialog box, click + Add Filter.
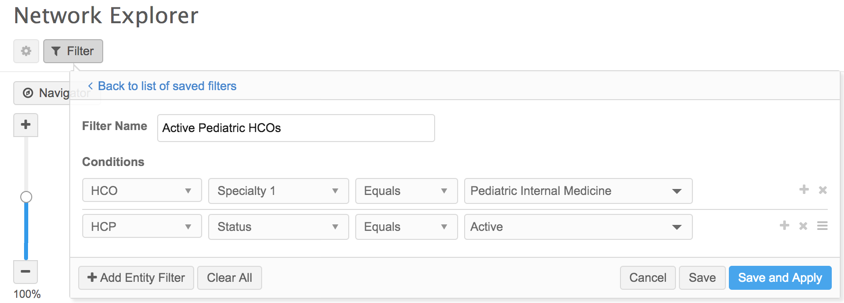
- Define the Conditions for the filter. You can filter on entities, addresses, licenses, and external keys.
- Expand the Status drop-down list to select a field. The available fields are defined by your filter selection. Scroll through the list or use the search box to quickly find a field.
- Select an operator (Equals, Find, Greater Than, Less Than, Between, In, Is Null, Is Not Null) from the second drop-down list. Note that this list changes depending on the field you select.
- Select a value from the third drop-down list. Note that if you selected a date field in the first -down list, a date picker appears next to the list.
-
To refine the filter further, click + to add more filter rows, click x to remove a filter row, and use the handle
 to reorder the filter rows.
 -
Use the AND operator or the OR operator to include additional conditions on a filter.
If you create multiple conditions for an entity, only one type of operator can be used; AND or OR.

- In the Untitled Filter section, type a name for the filter.
- Click the Apply button to view the effects of your filter, the Save button to save it, or Clear All to remove all filter rows and start over.
Working with saved filters
You can view the list of filters that you saved by clicking the filter icon and then clicking the Back to list of saved filters link at the top right of the Filters pane.
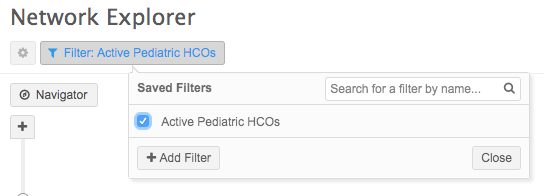
You can refine the list of saved filters further by typing text in the search field, or add new filters by clicking the Add Filter button. Click the Close button to close the list.

For a specific filter, click the filter name or the pencil icon to edit it, or click the x to the right of the filter to delete it. You can toggle the effects of the filter in the Network Explorer view by selecting or clearing the checkbox to the left of the filter name.