Editing in Network Explorer
DM
DS
Data Steward, Data Manager, and System and Data Admin users can create a brand new hierarchy or update an existing hierarchy using existing entities and edit root entity fields on the canvas. By editing directly on the canvas, users can visualize their changes instantly - especially if they are making changes on multiple records.
Enable edit mode
On the canvas, a ribbon with various editing tools is available to use.
To access the ribbon, click the Edit button.

The editing ribbon displays on the canvas. Use these buttons to make changes to entities and relationships on the canvas.

Note: Edit mode is not supported for custom objects.
Edit a profile
The main entity fields (for example, fields in the Primary Information and Education sections) on a profile can be updated directly from Network Explorer. This enables data stewards and data managers to make changes while they are referencing hierarchical relationships.
To edit a profile:
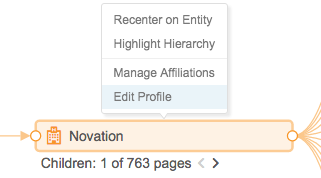
- Right-click on an entity.
- In the action menu, select Edit Profile.
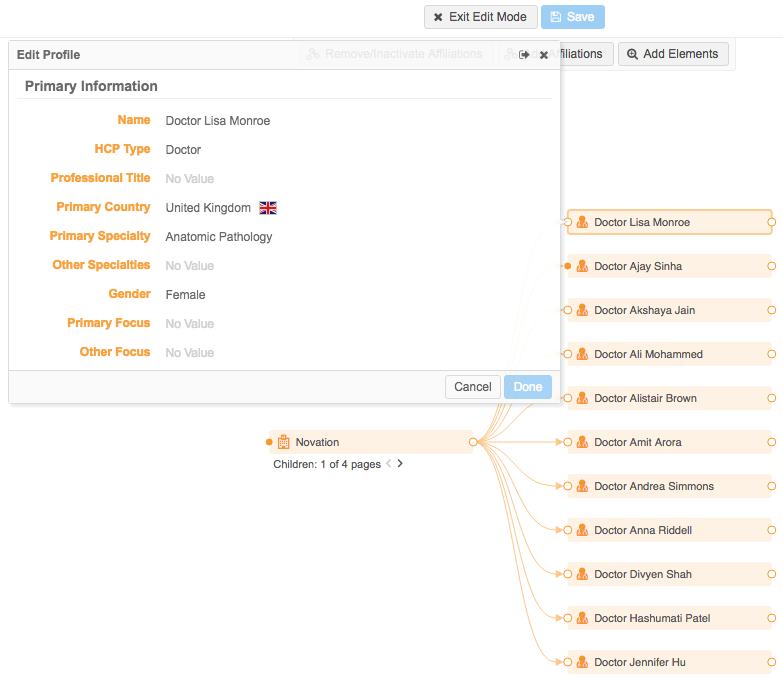
The profile opens in the right pane of the canvas. All of the main entity fields can be edited, except the affiliations. Affiliations can be edited directly on the canvas. Sub-object fields cannot be edited.
- Hover your cursor on any field to highlight the field and display the Edit icon.
- Make your changes and click the Save button.
When you click Save, a change request is submitted. The change request is auto-approved and the changes are reflected on the profile.
Undock
When you are editing a profile, you can remove it from the right pane of the canvas by clicking the Undock button.
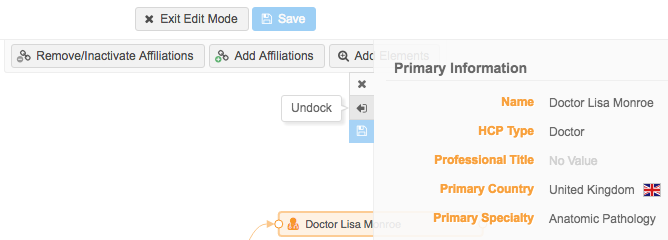
The Edit Profile window displays beside the entity. This option is useful if you want to have multiple profiles open for editing.
Add parent affiliations
Data stewards and data managers can create parent affiliations between two entities that are on the canvas.
When a new parent affiliation is created, existing relationships to parents and children are preserved.
To create a parent affiliation:
- Add an affiliation using one of the following ways:
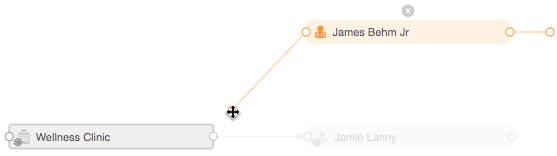
On the editing ribbon, click the Add Affiliations button. Click the circle on the right or left side of an entity and draw a line to another entity on the canvas. A dotted line displays between the two entities.

You can create multiple relationships in sequence when this button is active. Right-click on the canvas to inactivate the button.
Or
- On an entity, right-click the unfilled circle on the left or right of the entity. Select Add Parent (left) or Add Child (right). Draw a line from the entity to another entity on the canvas.
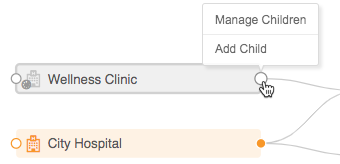
If the circle is filled, click it to expand the existing affiliations.
-
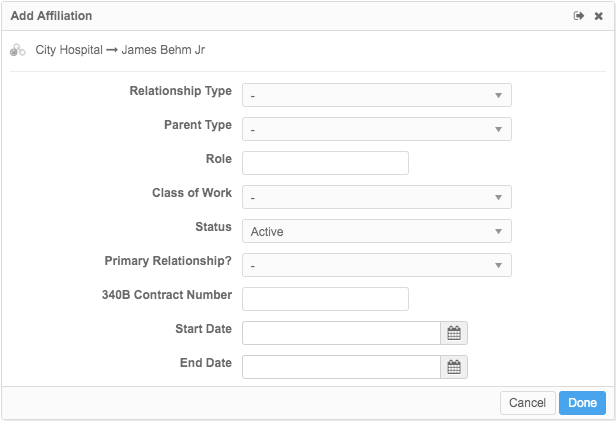
In the Add Affiliation dialog box, specify the details of the relationship.
Tip: Drag the dialog box to a different spot to view the canvas below.
- To save your changes, click Done.
- Save your changes.
A change request for the child entity is submitted.
Edit parent affiliations
Parent affiliations can be managed from Network Explorer. Updating existing relationships on the canvas enables data stewards and data managers to visualize the changes while they're looking at the hierarchy.
To edit a parent affiliation:
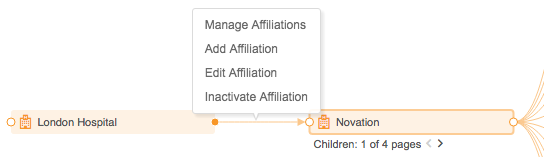
- Click the connecting line between two entities.
- Select Edit Affiliation.
- In the Edit Affiliation dialog, make any required changes.
- To save your changes, click Done.
-
Click the Save button on the canvas. A change request for the child entity is submitted.
Inactivate parent affiliations
Parent affiliations can be managed from Network Explorer by data stewards and data managers. You can inactivate a single parent affiliation, or you can inactivate multiple relationships on the canvas.
Inactivate one parent affiliation
- On the canvas, right-click the solid connecting line between two entities.
-
Select Inactivate Affiliations.
If you have just added the affiliation and haven't yet saved it, the option Remove Affiliation displays. Affiliations that have been saved cannot be removed (deleted); they can be inactivated only.

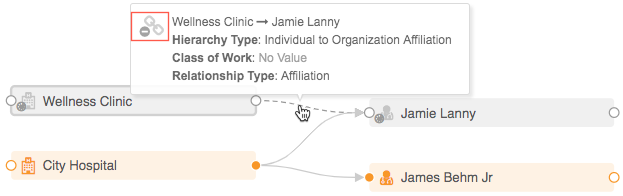
The solid connecting line between the two entities becomes dashed. When you hover the cursor over the link, the relationship icon is updated to show that it is inactive.
- To save your changes, click Done.
-
Click Save. A change request for the child entity is submitted.
Inactivate multiple parent relationships in a sequence
- On the Edit ribbon, click the Remove/Inactivate Affiliations button.
This button remains active until you right-click on the canvas.
- Click the solid connecting line between two entities on the canvas. The line becomes dashed when the relationship between the two entities is inactivated.
To inactivate the relationship between other entities, click the connecting lines.
- When you have finished, right-click on the canvas to stop editing relationships and exit the edit operation.
- Save your changes. Change requests for the affected child entities are submitted.
Add entities to a hierarchy
A new hierarchy can be created or an existing hierarchy can be updated to include existing entities. Editing the hierarchies on the canvas, instead of within individual profiles, enables data stewards and data managers to visualize the relationships.
- On the editing ribbon, click Add Elements.
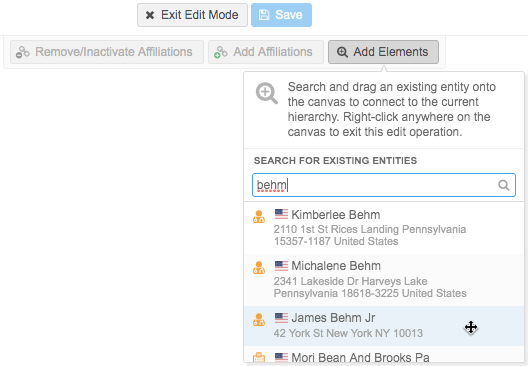
- In the Search For Existing Entities dialog, search for an entity that you want to add to the hierarchy.
- Select an entity to add it to the canvas.
- On the left or right side of the entity, select the outer circle that is connected to the entity with a dotted line and drag it to another entity on the canvas to create a relationship (either child or parent).
-
The Add Affiliations dialog displays so that you can add the details required for the affiliation between the two entities.
Tip: You can move the dialog to another place if you need to view the canvas below.
- Click Done to save your changes.
- Save your changes. Change requests for the affected child entities are submitted.
Saving changes
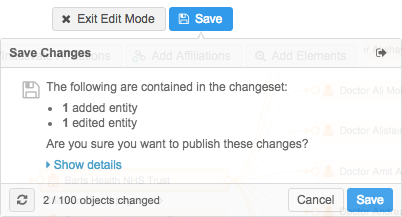
When you save the changes that you make on the canvas, click the Save button on the ribbon. A summary and details of the changes can be viewed before you submit the changes. A separate DCR is created for each profile change that you make.
After you click Save, the Save Progress window displays. Use this window to track the progress of your changes.
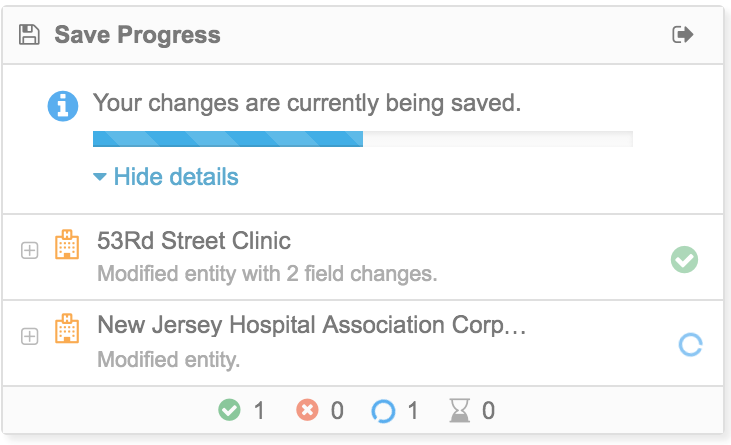
- Approved change - A Pass icon (check mark in a green circle) indicates that the DCR is approved.
- Issues found - A Fail icon ('x' in a red circle) indicates that data validation failed. The issues must be fixed before the change can be processed.
When changes have been processed, they can be viewed immediately on the canvas by refreshing the hierarchy in view. The canvas re-centers on the root entity, displaying three levels of the hierarchy.
Data validation
Depending on the profile validation rules enabled in your Network instance, changes might not be processed because of validation issues. If a rule fails when the change is being processed, you can fix the issue immediately and process the change again. Click the Fail icon ('x' in a red circle) to see the validation error.
In the example below, a profile validation rule failed on the change request because a Relationship Type was not specified for the new parent affiliation.
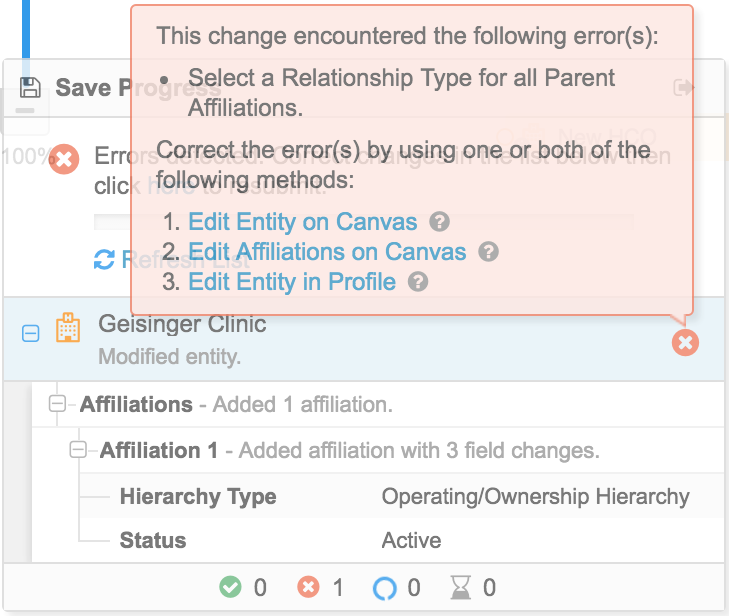
Depending on the failure, Data Stewards and Data Managers can fix the issue on the canvas or from a profile. If the issue requires changes to sub-objects, it must be fixed from the profile because sub-objects cannot be edited in Network Explorer.
Click the link for the method for editing to be immediately directed there to make changes. When the issue is fixed, Resubmit the change request from the Save Progress dialog.